
Order of the Sinking Star Hidden Achievement Puzzle Solutions
Find a puzzle solution
Filter by achievement set, puzzle area, solution availability, or puzzle name. Every result includes a locally hosted in-game screenshot, a puzzle layout, and—when available—step-by-step playback.
The achievement checklist explains each requirement. In a route, ×N means repeat a direction N times; Activate means use the game’s interact action. Follow each character’s moves in order. Expand a puzzle to view its local board and route controls.
Choose an achievement set above to browse its puzzle boards and available solutions.
Antipode High puzzle sets
High Heroes
Solve any 12 of these 14 puzzles after reaching the Heroes region of Antipode High.
Heroes and Depth
Choose a puzzle board
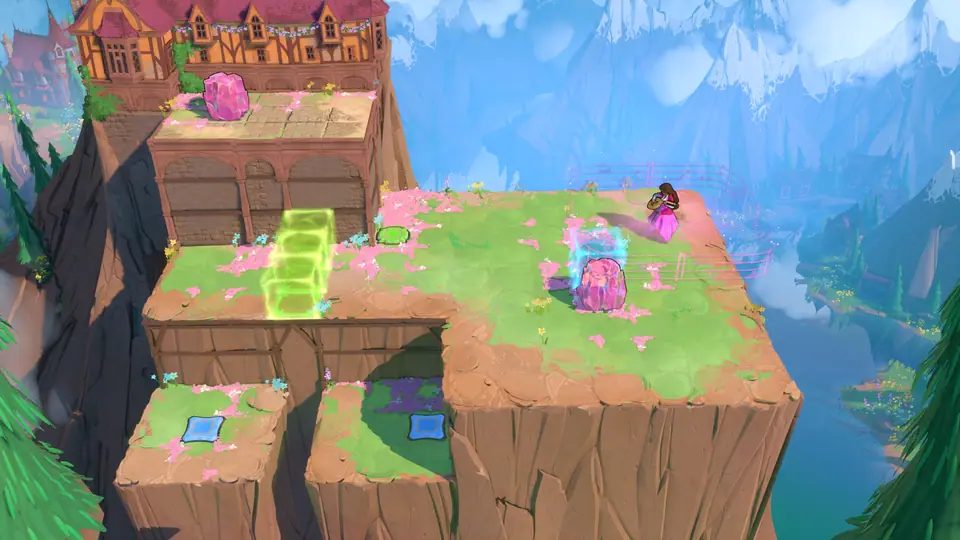 4RouteHeroes and Depth puzzle 4
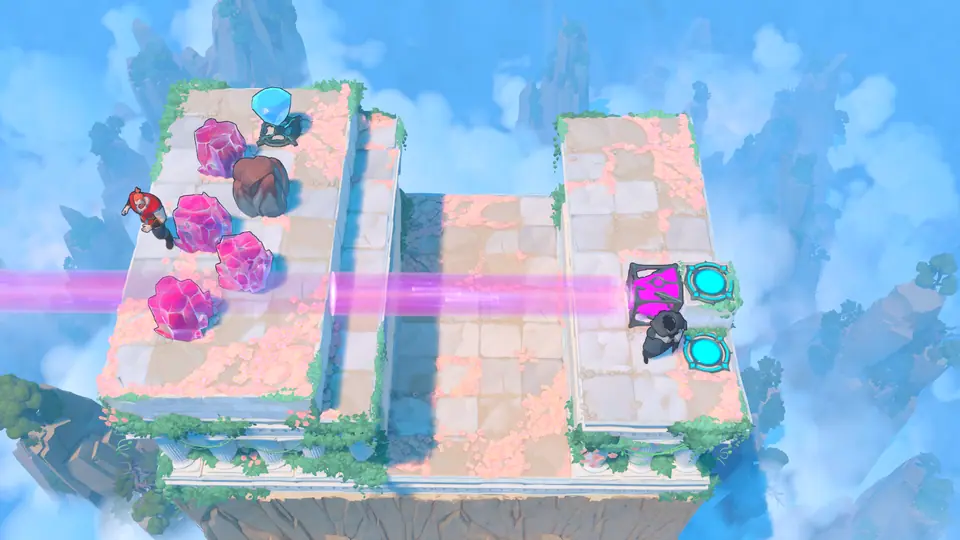 7RouteHeroes and Depth puzzle 7
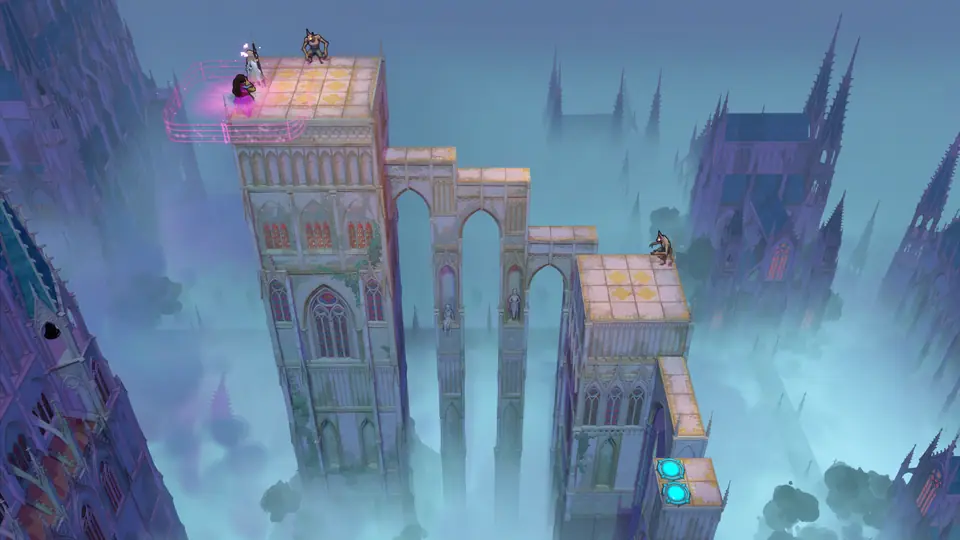 14RouteHeroes and Depth puzzle 14
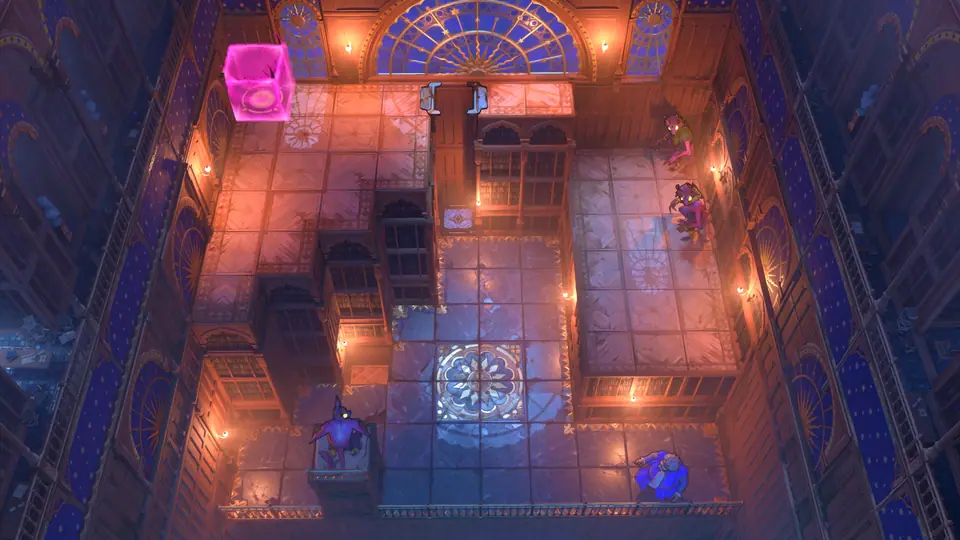 20RouteHeroes and Depth puzzle 20
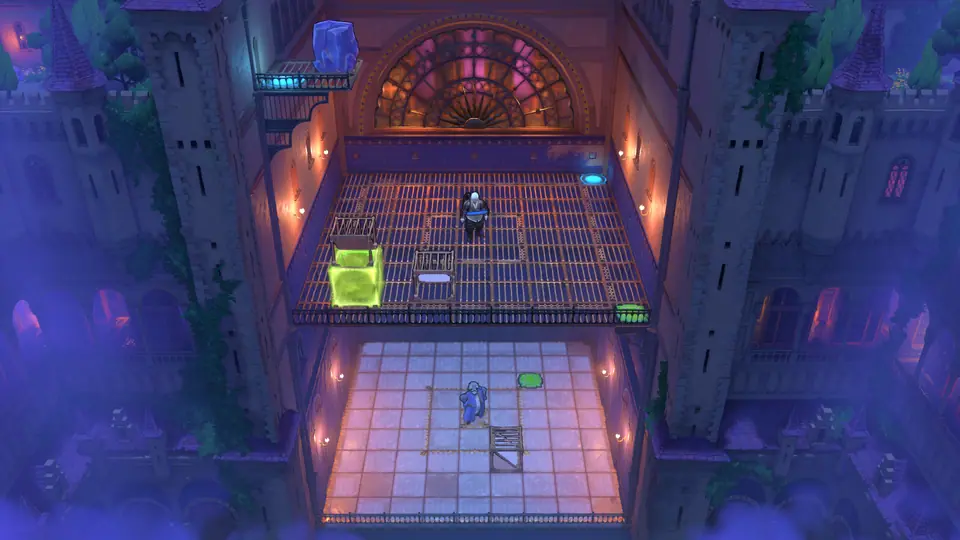 21RouteHeroes and Depth puzzle 21
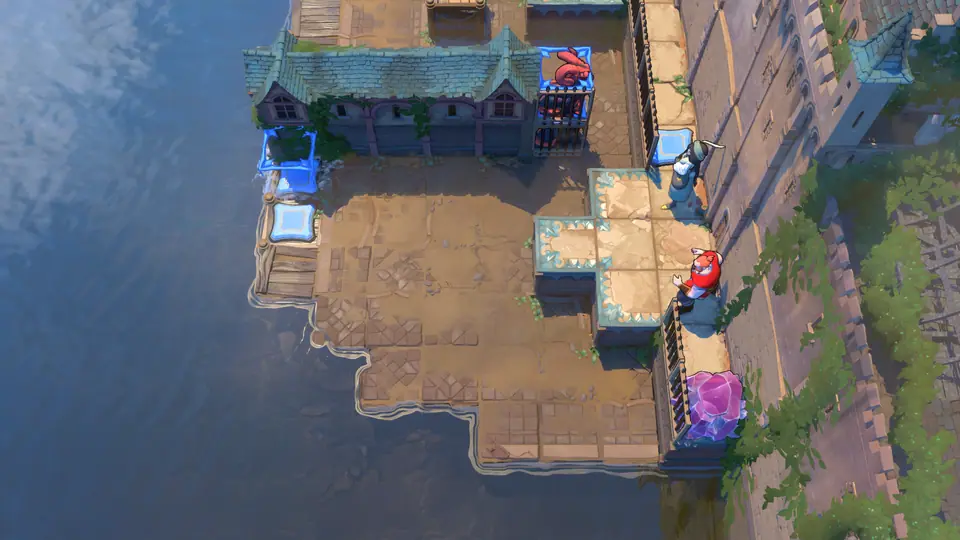 25RouteHeroes and Depth puzzle 25
Local solutions
Heroes and Depth puzzle 4Full route
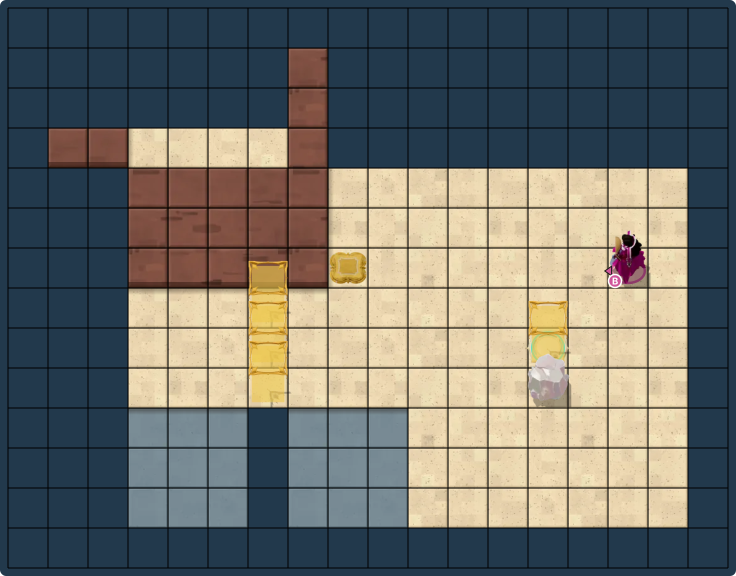
Clues
Use the move list below in order. The layout board shows the route as you step through it.
Full solution · 60 steps
Move sequence · 60 steps
Move order
- Bard
→ · ↓×5 · ←×2 · ↑×2 · ←×2 · ↑ · ←×6 · ↑ · ↓ · ↑ · ↓ · ↑ · ↓ · ← · ↓ · →×2 · ↑ · ↓ · → · ↑×2 · ← · ↓ · ← · ↓ · →×4 · ↓ · →×4 · ←×3 · ↓×2 · ↑×4 · ↓ · →×2 · ↑
Heroes and Depth puzzle 7Full route
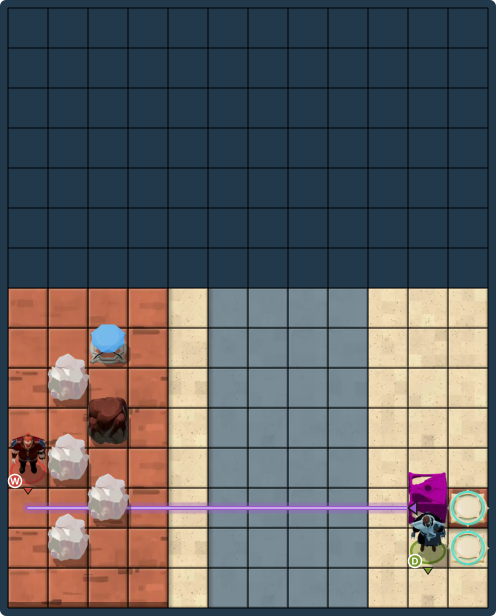
Clues
Use the move list below in order. The layout board shows the route as you step through it.
Full solution · 115 steps
Move sequence · 115 steps
Move order
- Warrior
→×2 · ↓ · ↑ · ← · ↑×2 · → · ↓×2 · ← · ↓ · →×2 - Druid
← · ↑ - Warrior
← · ↑×2 · → · ↓ · ← · ↓ · →×2 - Druid
← - Warrior
← · ↓×2 · ← · ↑ · ↓ · ←×2 · ↑×2 · →×5 - Druid
← - Warrior
←×2 · ↓×2 · ←×2 · ↑ · ← · ↑ · →×6 - Druid
← - Warrior
←×5 · ↑×3 · ← · ↑×2 · → · ↓×4 · ← · ↓ · →×7 - Druid
← · ↓ - Warrior
←×5 · ↑×3 · → · ↑×2 · ← · ↓×4 · ← · ↓ · →×10 - Druid
→×2
Heroes and Depth puzzle 14Full route
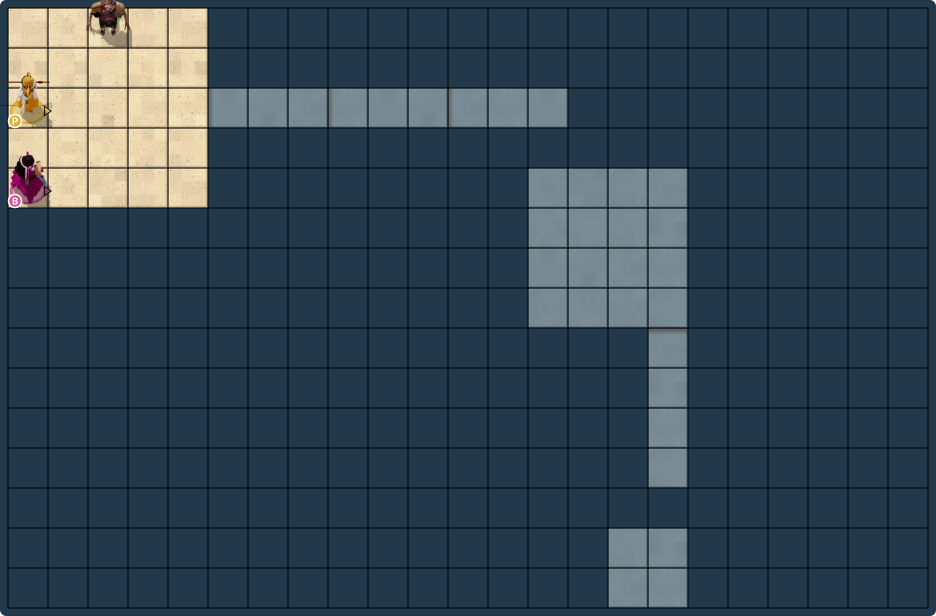
Clues
Use the move list below in order. The layout board shows the route as you step through it.
Full solution · 51 steps
Move sequence · 51 steps
Move order
- Bard
→ · ↑×2 · →×2 · ↓×2 · → · ↑ - Priest
← · ↓×3 · → - Bard
→×9 · ↓×3 - Priest
→ · ↑ - Bard
↓ · →×2 - Priest
↑ · ← - Bard
→ · ↑ · ↓ - Priest
← · ↓ - Bard
↑ - Priest
↓ · → - Bard
↓×4 · ↑ · ↓×4 · ←
Community alternative 1
Move order
- Bard
→ · ↑×2 - Priest
← · ↓×3 · → - Bard
↓ · →×2 - Priest
← · ↑ - Bard
↓ · → · ↑ - Priest
↓ · → - Bard
→×9 · ↓×3 - Priest
→ · ↑×2 · ← - Bard
↓ · →×3 · ↑ - Priest
← · ↓×2 · → - Bard
↓×4 · ↑ · ↓×4 · ←
Heroes and Depth puzzle 20Full route
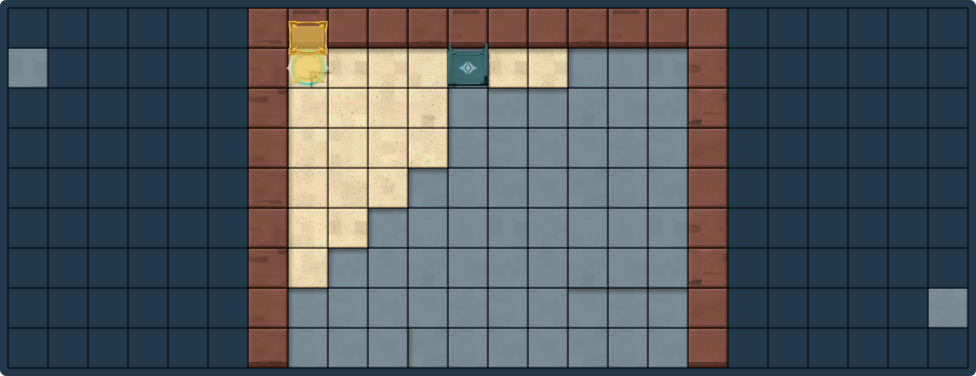
Clues
Use the move list below in order. The layout board shows the route as you step through it.
Full solution · 71 steps
Move sequence · 71 steps
Move order
- Wizard
↑ · ←×2 · ↑×5 · ←×2 · ↑ · take/drop gem · ← · ↓×2 · →×2 · ↓×2 · ↑ · ←×2 · ↓ · ← · ↓×2 · ← · ↓ · ← · ↓ · ↑×3 · take/drop gem · ←×2 · ↓×5 · ↑×2 · → · ↑×5 · take/drop gem · ←×2 · ↓×4 · → · ←×3 · ↑×3 · ←×2 · ↑ · take/drop gem · ←×4
Heroes and Depth puzzle 21Full route
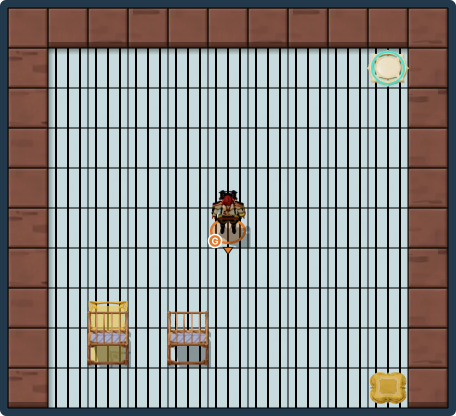
Clues
Use the move list below in order. The layout board shows the route as you step through it.
Full solution · 88 steps
Move sequence · 88 steps
Move order
- Wizard
↑×2 · →×2 - Gemsman
→ · ↓×2 - Wizard
↓×4 · ← · ↑×4 · ←×2 · ↓ · ↑ · ←×2 · ↑×4 · → · ↓ · ←×2 - Gemsman
↑×4 · ←×5 - Wizard
↑ · ↓×4 · → · ↑×4 · ←×4 · ↓×2 · →×5 · ↑×5 - Gemsman
→×7 · ↓×5 - Wizard
←×2 · ↓ - Gemsman
↑×8
Heroes and Depth puzzle 25Full route
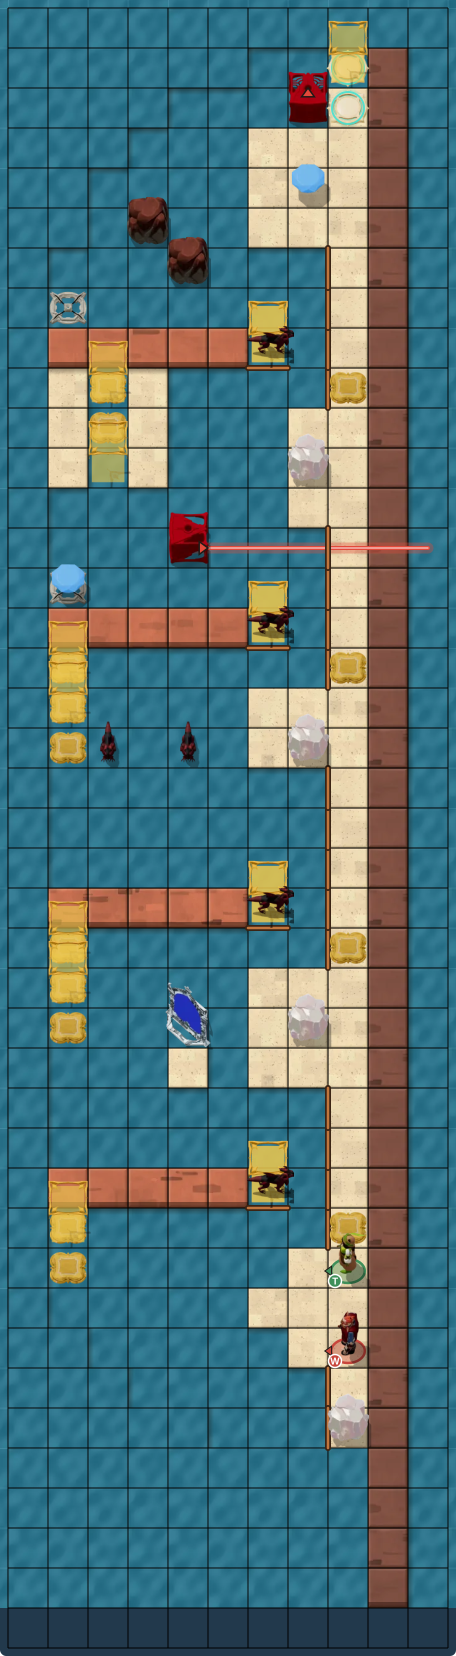
Clues
Use the move list below in order. The layout board shows the route as you step through it.
Full solution · 438 steps
Move sequence · 438 steps
Move order
- Warrior
← - Thief
↓×3 · ↑×3 · ← · ↓ · ← - Warrior
↑ · → - Thief
→ · ↓ - Warrior
←×2 · ↓ · ← · ↑×2 · → · ↑ · ←×4 · ↓ · ← - Thief
→ · ↑×3 - Warrior
→×5 · ↑ · → · ↑×3 · ←×2 · ↑×2 - Thief
↑×6 · ←×2 · ↓ · ← - Warrior
↓ - Thief
→ - Warrior
↓ · → - Thief
↓ - Warrior
← · ↑ - Thief
← - Warrior
↑×2 · ←×2 · ↓ · → · ← · ↓×2 · →×2 · ↑ · activate · ↑ · → · ↓×2 - Thief
→ - Warrior
↑ - Thief
→×3 · ↑×2 - Warrior
←×2 · ↓×2 · → · ↓ · → · ↑ · →×2 · ↓ · ← · ↑ · ← · ↑ · ↓ · ←×2 · ↑×3 · →×2 · ↓×2 · activate · ↑ · ←×2 · ↓×3 · →×3 · ↑ · ←×2 · ↓ · ← · ↑×3 · → · ↑ · ↓ · ← · ↑ · → · ↑ · ←×2 · → · ↓×5 · ← · ↑×3 · → · ↑ · ← · ↓ · ← · →×4 · ↑×2 · →×2 · ↑ - Thief
↑ · ← - Warrior
↑×3 · ← - Thief
↑ - Warrior
→ · ↓×4 · ←×2 · ↓ - Thief
↓×3 · ←×3 - Warrior
↑ · →×2 · ↑×4 · ← - Thief
↑ - Warrior
← · ↑×3 · ←×4 · ↓×2 · → · ↑ · →×3 · ↓ - Thief
←×3 - Warrior
↑ · ← · ↓ · ← · ↑ · ←×2 · ↓ · →×2 · ↑ · →×2 · ↓ - Thief
→×4 · ↑×2 - Warrior
↓×2 · ← · ↑×2 · → · ↑×2 · ←×3 · ↓×2 · →×3 · ↑ · ←×3 · ↓ · ← · →×4 · ↑×2 · →×2 · ↑×2 - Thief
↑×4 · ← - Warrior
↑ - Thief
↓ · → · ↑ - Warrior
↓×3 - Thief
→ - Warrior
↑×2 · ←×3 · ↑ · ← · ↑ · →×2 · ↑ · → - Thief
↓ - Warrior
↑ · ← · ↓×2 - Thief
← - Warrior
↑ · → · ↓ · ← · ↓×2 · →×2 · ↑ · ←×2 · ↓ · ← · ↑×2 · ← - Thief
↑ · ←×2 - Warrior
→×2 · ↑×2 · ← · ↓ · → · ↓ · ←×3 · ↑ - Thief
→×2 - Warrior
↑×2 · ↓×2 · →×2 · ↑ - Thief
→ - Warrior
→×2 · ↓ - Thief
→×2 · ↑×3 - Warrior
←×4 · ↑×2 · ↓×2 · →×4 · ↑×3 · → · ↑×2 · ←×3 · ↑×2 · ↓ · ←×2 · ↑ · →×2 · ↓ · → · ↑ - Thief
↑×4 · ←×2 · ↑ · ←×2 - Warrior
← - Thief
↓ - Warrior
→ · ↑ - Thief
→×3 · ↑×2 - Warrior
←×3 · → · ↑ · → · ↑ · → · ↓×3 · ← · ↓×2 · →×2 · ↑ · ←×3 · ↓ · ← · ↑ · → · ↑ · ← · ↑ · ← · ↓×2 · →×4 · ↑×4 · → · ↑ · →×3
Protection and Support
Choose a puzzle board
Local solutions
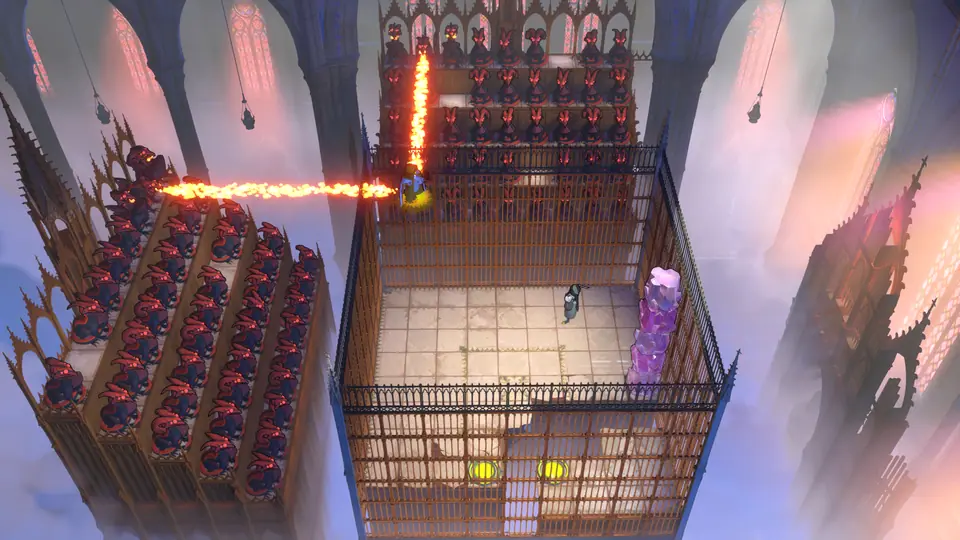 Protection and Support puzzle 3Full route
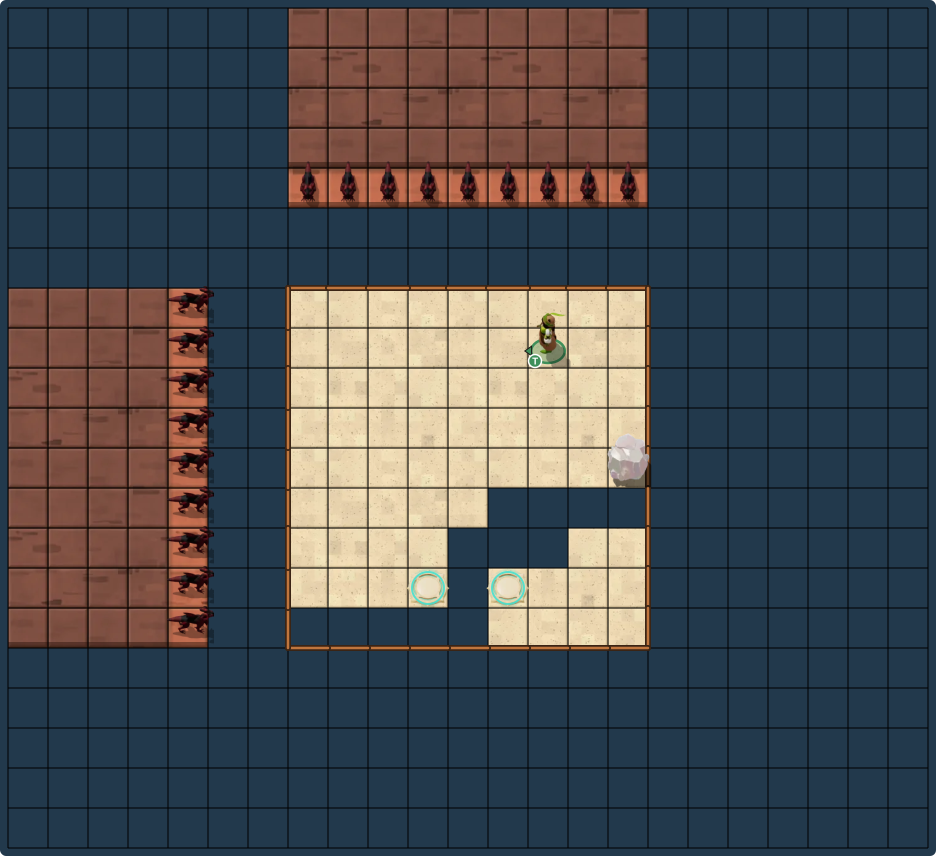
Clues
Use the move list below in order. The layout board shows the route as you step through it.
Full solution · 111 steps
Move sequence · 111 steps
Move order
- Priest
↓×4 · →×2 · ↓ · → · ↓ · →×2 - Thief
→×2 · ↓×2 · ← · ↓ · ←×7 - Priest
←×4 · ↑×5 · → - Thief
↑ · → · ↑×3 · → · ↓ · →×2 - Priest
→×3 - Thief
→ · ↓ · ← · ↓ · → · ↑ · →×2 · ↓ · ←×2 · ↓ · ← · ↑ · ←×2 · ↓ · → · ↓×3 · ← · ↑×5 · →×3 · ←×3 · ↓ · → · ↓×2 · → · ↑ · →×4 - Priest
↓×4 · ← · →×2 · ↓ · ←×2 - Thief
↑ · ←×5 · ↓×2 · ← · ↓×2 · →
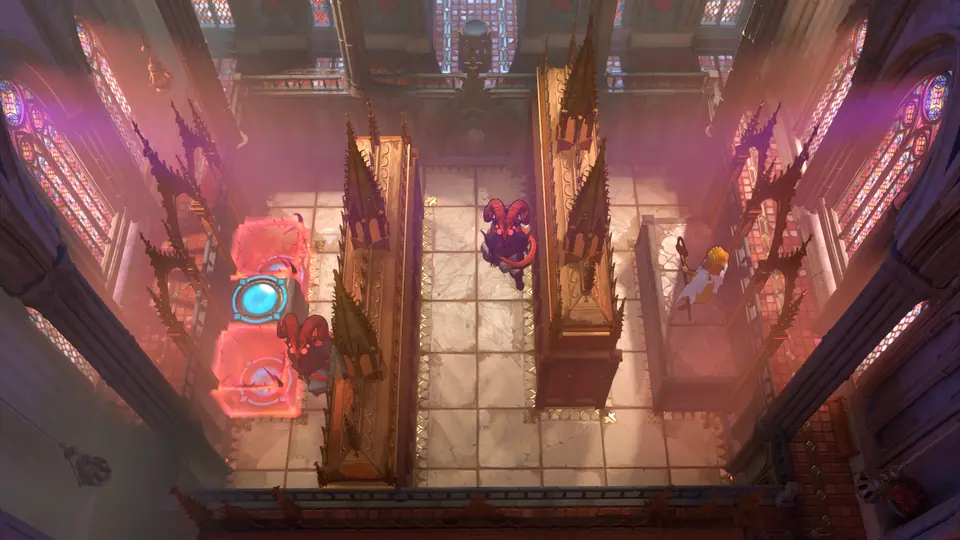 Protection and Support puzzle 5Full route
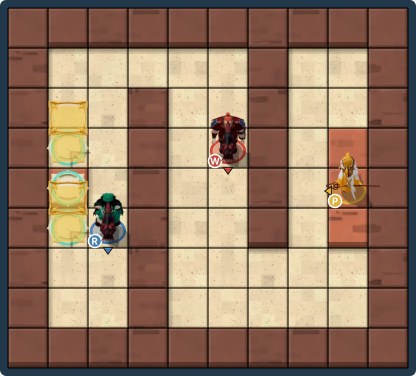
Clues
Use the move list below in order. The layout board shows the route as you step through it.
Full solution · 64 steps
Move sequence · 64 steps
Move order
- Warrior
↓×3 · →×2 · ↑×4 · ↓ - Priest
← - Hero
↑×4 · →×2 · ↓×6 · →×3 · ↑ - Priest
→ - Warrior
↓ - Priest
← - Warrior
↓×2 · ←×3 · ↑×5 · ←×2 · ↓×3 - Priest
← - Warrior
↑ · ← - Hero
←×3 · ↑×6 · ←×2 · ↓×4 · ←
Stacks and Water
Choose a puzzle board
Local solutions
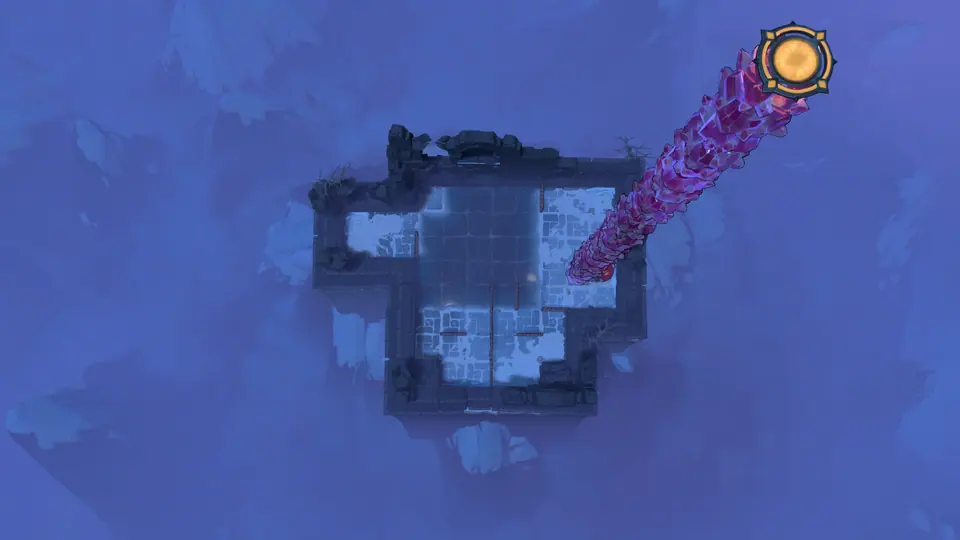 Stacks and Water puzzle 6Full route
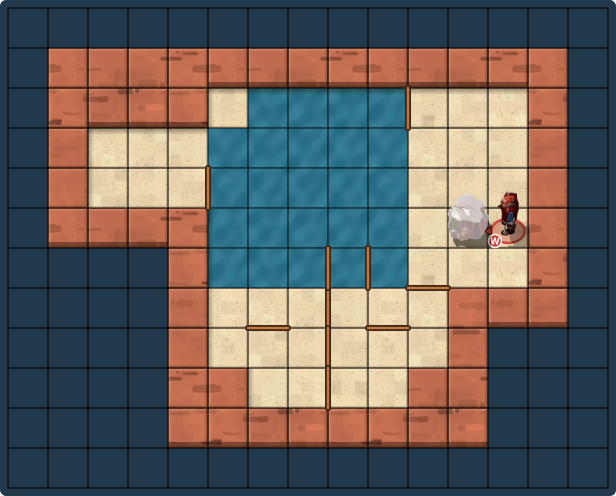
Clues
Use the move list below in order. The layout board shows the route as you step through it.
Full solution · 142 steps
Move sequence · 142 steps
Move order
- Warrior
← · ↓ · ← · ↑×2 · → · ↑ · ←×7 · ↓ · ←×2 · ↑ · →×8 · ↑ · → · ↓ · → · ↓ · ←×3 · ↑ · ← · ↓×4 · →×2 · ↓ · ← · ↓ · ← · ↑×5 · → · ↑ · ←×5 · ↓ · ←×2 · ↑ · →×8 · ↑ · → · ↓ · → · ↓ · ←×2 · ↑ · ← · ↓×2 · ← · ↓×2 · → · ↑×2 · → · ↑ · ←×2 · ↑ · ← · ↓×4 · ←×2 · ↓ · → · ↓ · → · ↑×4 · → · ↑ · ← · ↑ · ← · ↓×2 · → · ↓ · ← · ↓ · ← · ↑×3 · → · ↑ · ←×2 · ↓ · ←×2 · ↑ · →×3 · ↓ · → · ↑ · ← · ↑ · →×4
Charmed Stacks
Choose a puzzle board
Local solutions
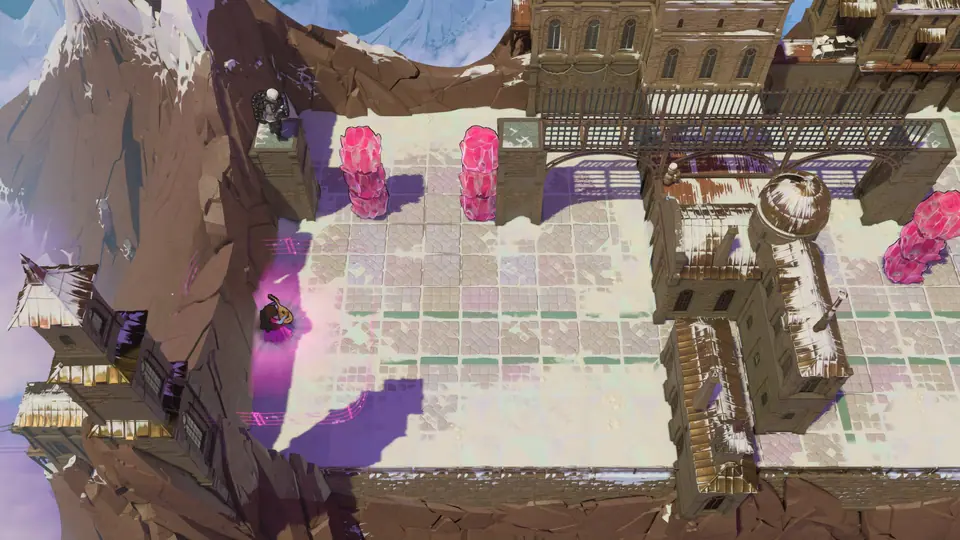 Charmed Stacks puzzle 2Full route
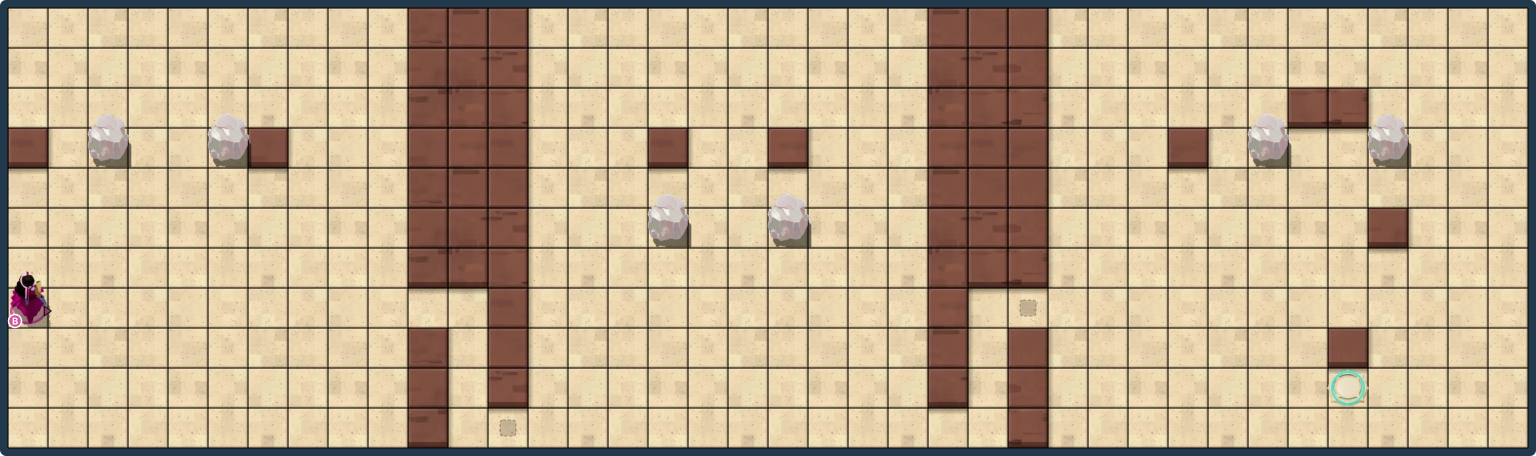
Clues
Use the move list below in order. The layout board shows the route as you step through it.
Full solution · 173 steps
Move sequence · 173 steps
Move order
- Bard
→×2 · ↑×2 · → · ←×2 - Gemsman
→ - Bard
→×2 - Gemsman
→×11 - Bard
→×5 · ↓×2 · →×3 · ↓×3 · →×3 · ↑×9 · →×8 · ↓×7 · ←×2 · ↑×2 · ←×2 - Gemsman
↓ - Bard
→ - Gemsman
↑ · →×10 - Bard
→×3 · ↓×4 · →×2 · ↑×3 · →×7 · ↑×2 · → · ←×2 - Gemsman
→ - Bard
→ - Gemsman
↑ - Bard
←×4 · ↓×2 · →×9 · ↑×6 · ←×4 · → · ↑ · →×3 · ↓×6 · ←×8 · ↑×2 · → · ↓×3 · → · ↑×3 · ↓ · → · ↑ - Gemsman
↓ - Bard
↓×2 - Gemsman
↓ - Bard
↓×3 · →×2
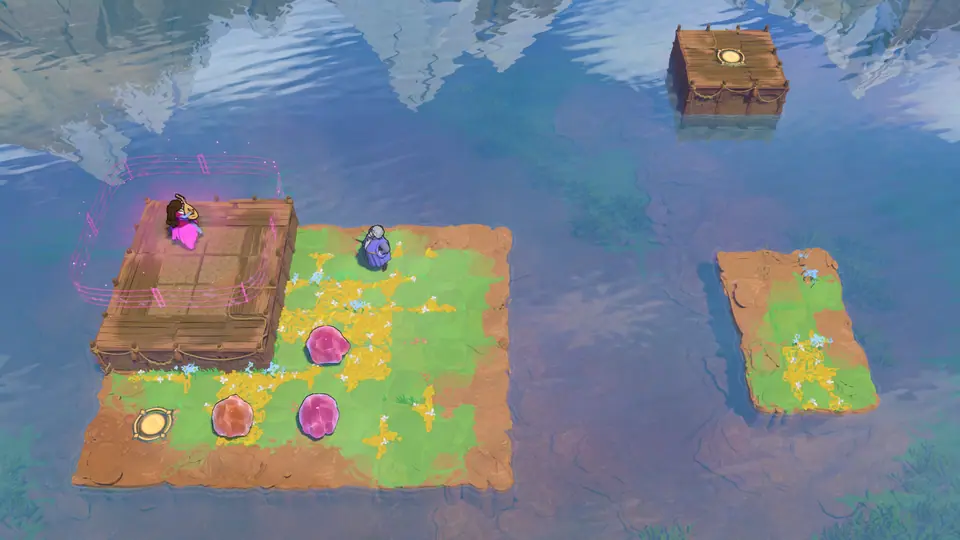 Charmed Stacks puzzle 6Under review
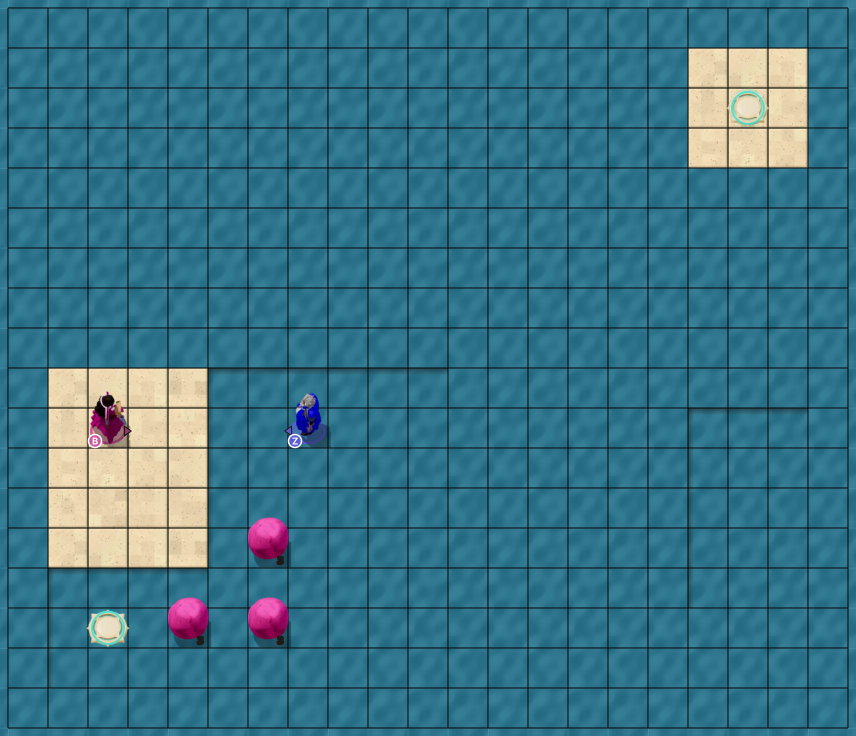
Clues
A complete move-by-move solution is not currently available for this puzzle.
No complete move sequence is listed yet. The board is available to inspect locally.
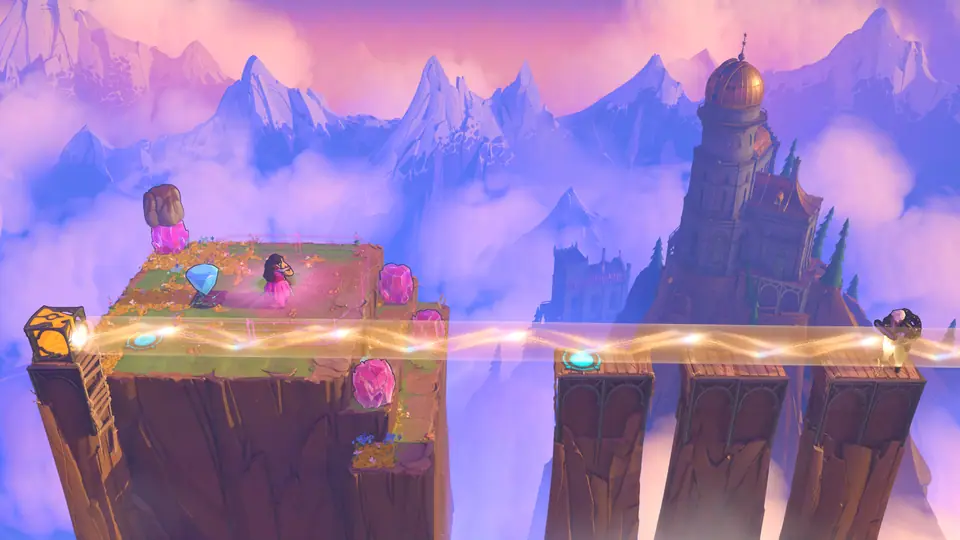 Charmed Stacks puzzle 9Full route
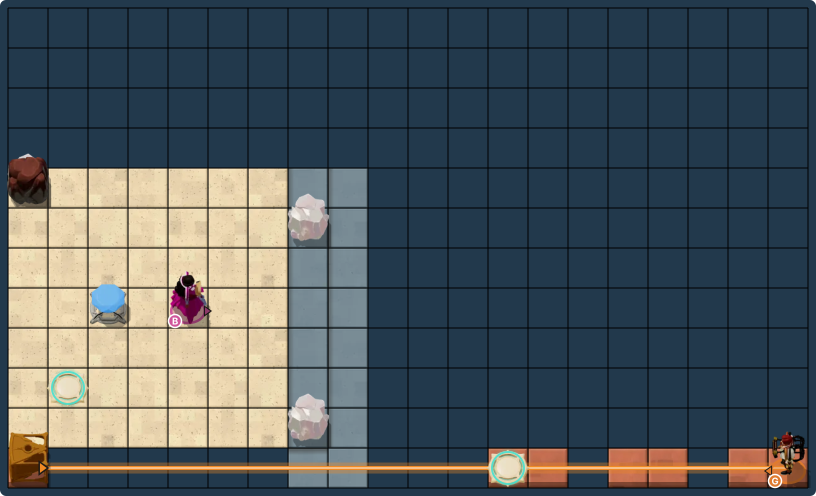
Clues
Use the move list below in order. The layout board shows the route as you step through it.
Full solution · 106 steps
Move sequence · 106 steps
Move order
- Bard
↑ · → · ↑ · ← · ↓×3 · → · ↑×2 · ← · ↓ · → · ↑ · ← · ↓ · → · ↑ · ← · ↓×2 · → · ↑ · ← · ↓×2 · →×2 · ↑ · ↓×2 · ← · ↑ · → · ↓ · ← · ↑ · → · ↓ · ← · ↑ · → · ↓ · ← · ↑×4 · ↓×2 · ← · ↑×2 · → · ↓×2 · ← · ↑×2 · → · ↓×3 · ↑ · ←×2 · ↑×3 · ← · → · ↓ · →×2 · ↓×2 · ←×5 · ↑×2 · → · ↓×2 · →×4 · ↓ - Gemsman
← - Bard
↑ - Gemsman
← - Bard
↓ - Gemsman
← - Bard
↑ - Gemsman
← - Bard
↓ - Gemsman
← - Bard
↑ · ←×3 · ↓ · ←
Archways
Choose a puzzle board
Local solutions
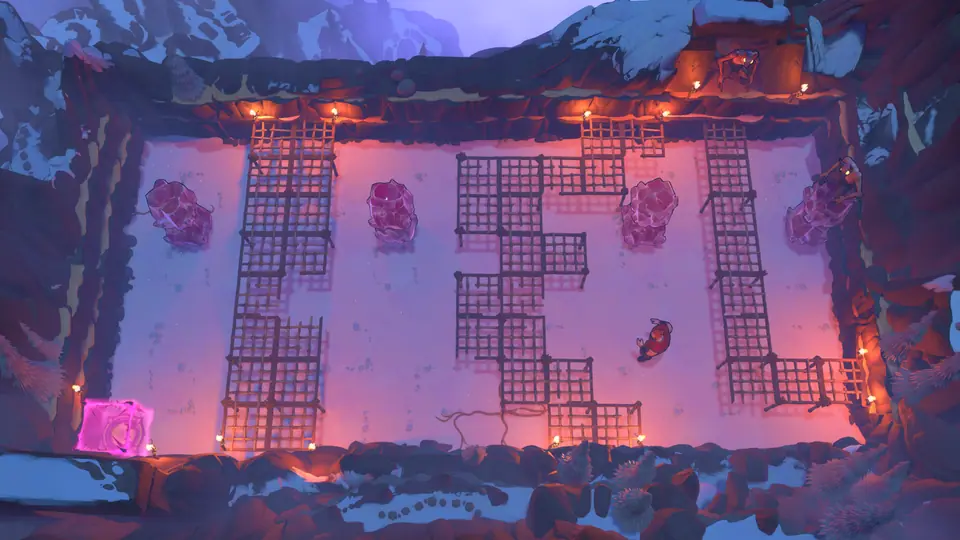 Archways puzzle 4Full route
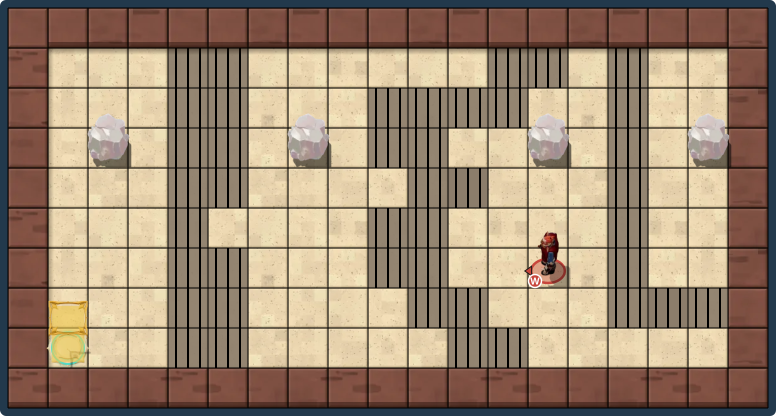
Clues
Use the move list below in order. The layout board shows the route as you step through it.
Full solution · 108 steps
Move sequence · 108 steps
Move order
- Warrior
←×12 · ↑×4 · → · ↓×2 · ← · ↓ · →×3 · ↑×3 · →×3 · ↓×2 · → · ↓ · ←×3 · →×3 · ↑×4 · →×3 · ↓ · →×3 · ↓ · ←×2 · ↓ · ← · ↑ · →×3 · ↓×5 · →×3 · ↑ · ← · ↑×5 · → · ↓×4 · ↑×5 · ←×2 · ↓×7 · ←×14
Top of the World
Choose a puzzle board
Local solutions
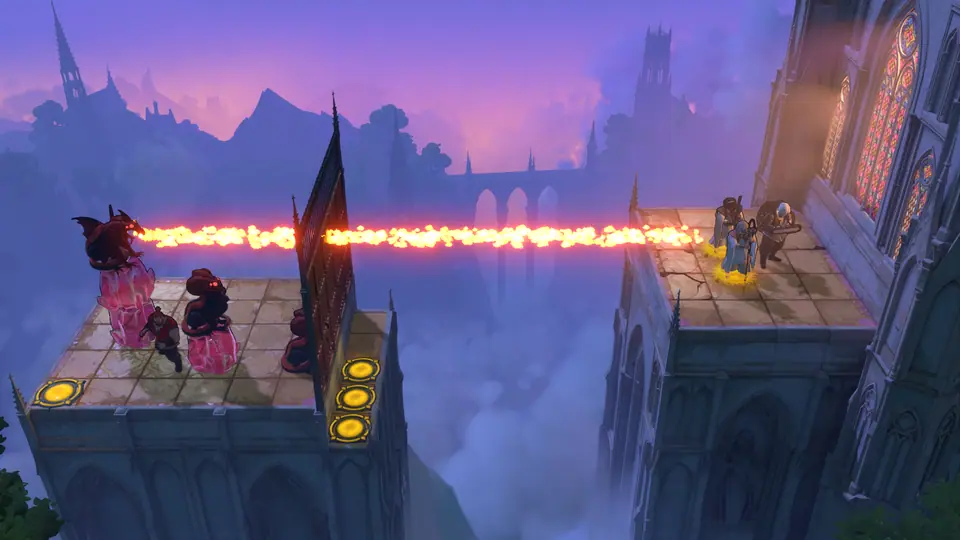 Top of the World puzzle 1Full route
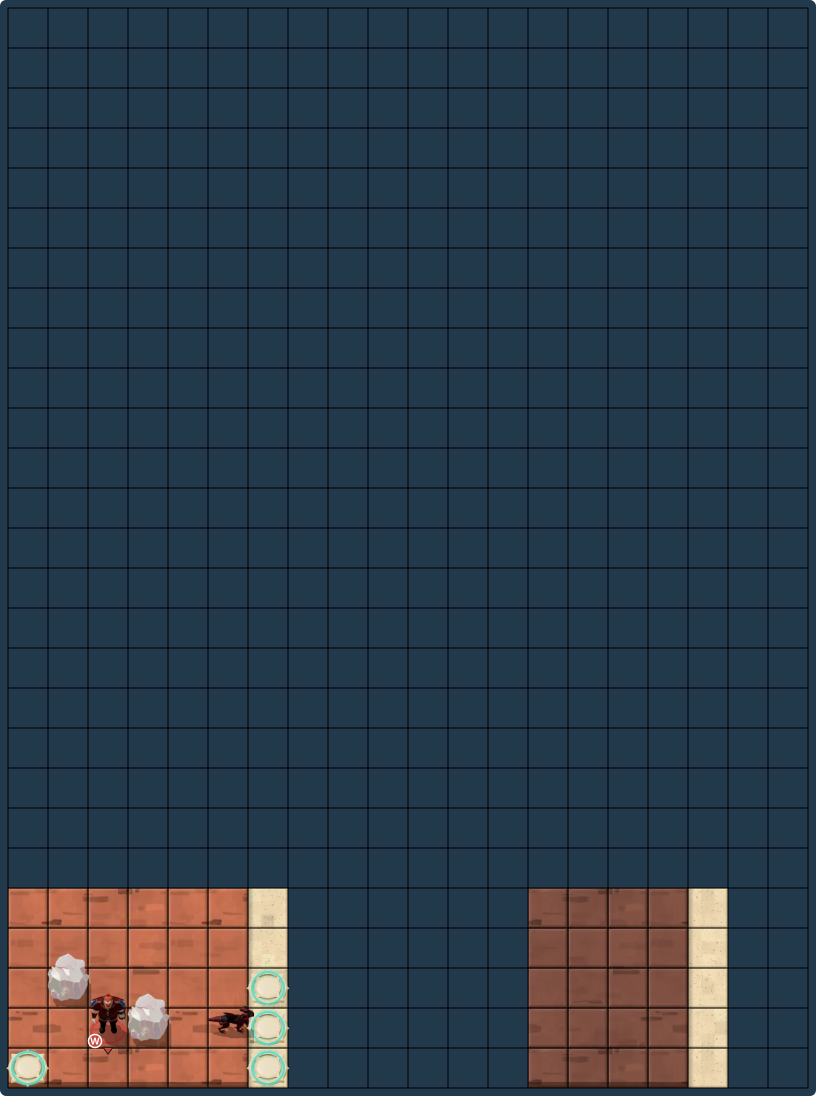
Clues
Use the move list below in order. The layout board shows the route as you step through it.
Full solution · 68 steps
Move sequence · 68 steps
Move order
- Priest 2
←×2 - Gemsman
↓ · ←×2 - Priest 1
↓ - Warrior
↑×2 · ← · ↓ - Gemsman
← - Priest 1
← - Warrior
→ · ↓×2 · → · ↑ - Priest 2
← · → - Warrior
→ · ↑×2 · ← · ↓ · ← · ↓×2 · ← · ↑ · → · ↑×2 · ← · ↓ - Priest 1
← - Priest 2
← - Gemsman
← - Priest 1
← - Priest 2
← - Gemsman
← - Priest 1
← - Priest 2
← - Gemsman
← - Priest 1
← - Priest 2
← - Gemsman
← - Priest 1
← - Priest 2
← - Gemsman
← - Priest 1
← - Priest 2
← - Gemsman
← - Priest 1
← · ↓ - Gemsman
↑ - Warrior
→×3 · ↓×2 · → · ↑ · ↓ · ←×5
High Mirrors
Solve any 6 of these 7 puzzles in the Mirrors region of Antipode High.
Vertical Mirrors
Choose a puzzle board
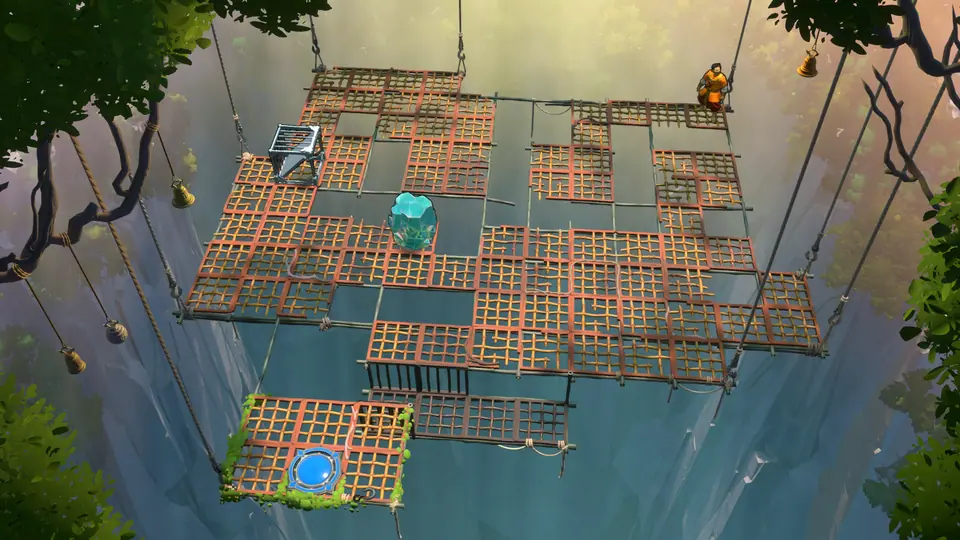 3RouteVertical Mirrors puzzle 3
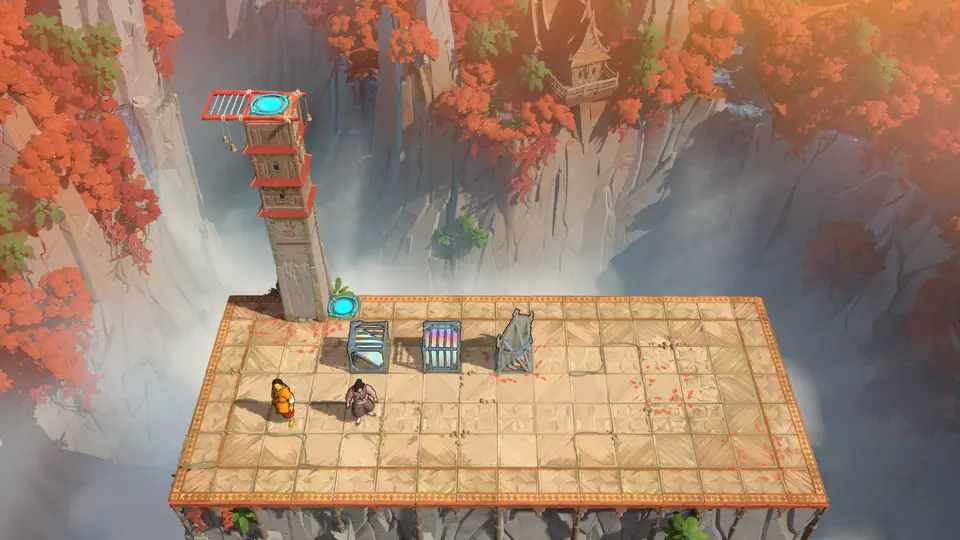 16BoardVertical Mirrors puzzle 16
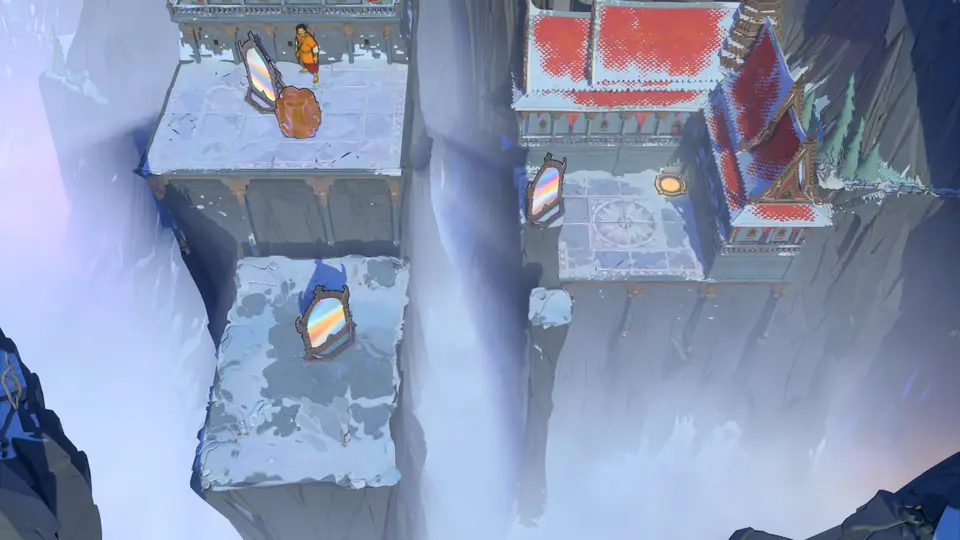 17RouteVertical Mirrors puzzle 17
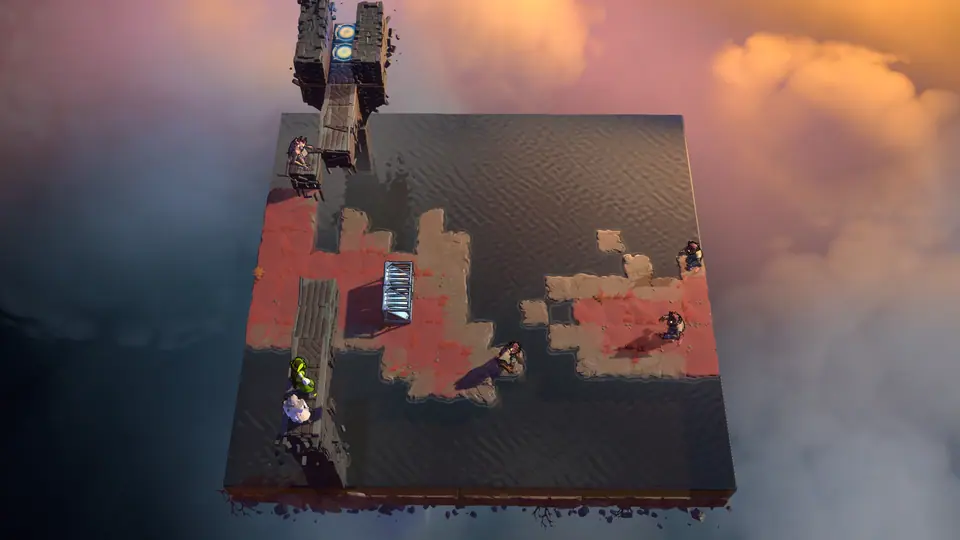 20BoardVertical Mirrors puzzle 20
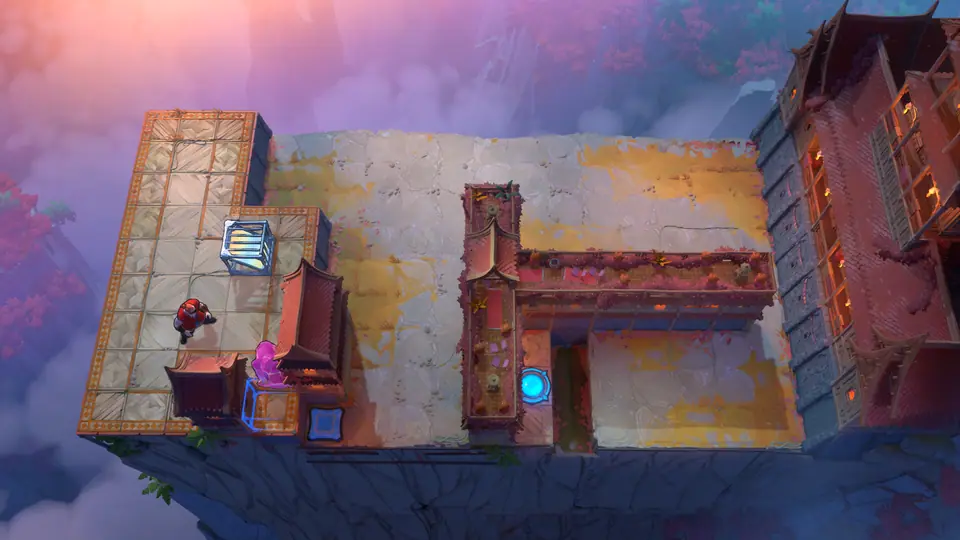 25RouteVertical Mirrors puzzle 25
Local solutions
Vertical Mirrors puzzle 3Full route
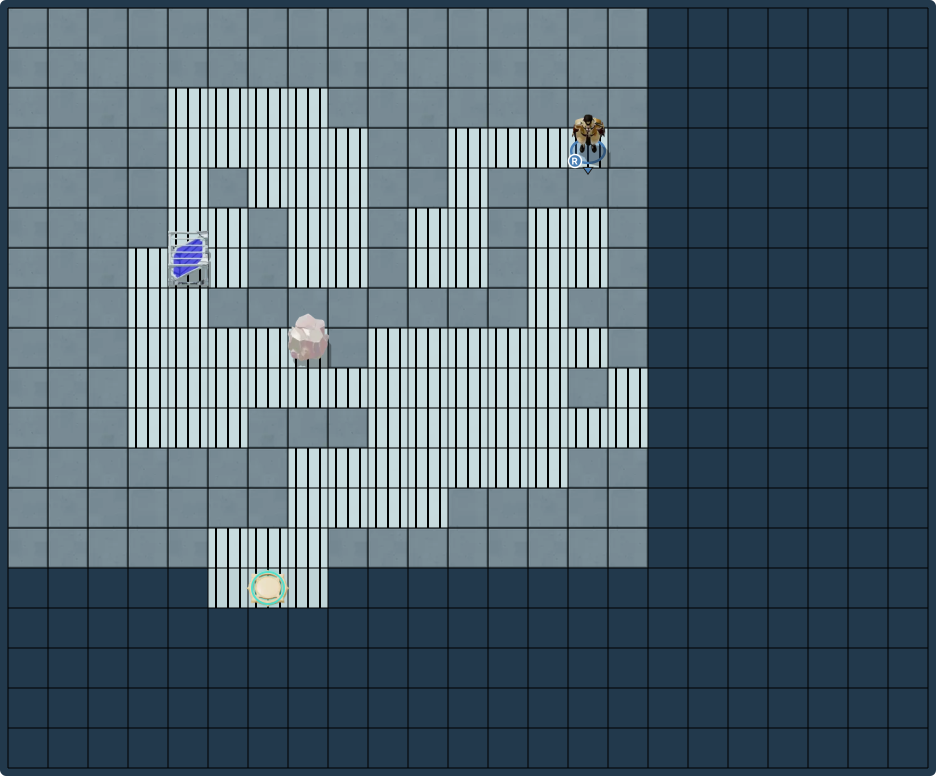
Clues
Use the move list below in order. The layout board shows the route as you step through it.
Full solution · 138 steps
Move sequence · 138 steps
Move order
- Controls
Start: release Ctrl and Shift. Keep each modifier state until the next change. Directions are taps; waits use real seconds at 60 frames per second. - Hero
←, wait 0.583 s×3 · ↓, wait 0.567 s · ↓, wait 0.583 s · ↓, wait 0.283 s · activate, wait 0.617 s · activate, wait 0.217 s · ↓, wait 0.583 s×2 · ←, wait 0.567 s · ←, wait 0.583 s×3 · ↓, wait 0.567 s · ←, wait 0.567 s · ←, wait 0.583 s×2 · ↑, wait 0.567 s · ←, wait 0.567 s · ←, wait 0.583 s · ↑, wait 0.567 s · ↑, wait 0.683 s · →, wait 0.583 s · ↑, wait 0.267 s · activate, wait 0.6 s · activate, wait 0.217 s · ↑, wait 0.583 s · ←, wait 0.567 s · ↑, wait 0.567 s · ←, wait 0.567 s · ←, wait 0.583 s · ↓, wait 0.567 s · ↓, wait 0.683 s · ↓, wait 0.517 s×2 · ←, wait 0.583 s · ↓, wait 0.567 s · ↓, wait 0.583 s · →, wait 0.267 s · activate, wait 0.967 s · activate, wait 0.217 s · ↑, wait 0.583 s · ↑, wait 0.517 s×2 · →, wait 0.583 s · ↑, wait 0.267 s · activate, wait 0.6 s · activate, wait 0.217 s · ↑, wait 0.583 s · ←, wait 0.567 s · ↑, wait 0.567 s · ←, wait 0.567 s · ←, wait 0.583 s · ↓, wait 0.567 s · ↓, wait 0.683 s · →, wait 0.583 s · ↓, wait 0.267 s · activate, wait 1.2 s · activate, wait 0.217 s · ↓, wait 0.583 s · ↓, wait 0.683 s · ↓, wait 0.517 s · ←, wait 0.583 s×6 · ↑, wait 0.567 s · ←, wait 0.567 s · ←, wait 0.583 s×3 · ↑, wait 0.567 s · →, wait 0.567 s · ↑, wait 0.583 s · →, wait 0.583 s · ↑, wait 0.267 s · activate, wait 0.6 s · activate, wait 0.217 s · ↑, wait 0.583 s · ←, wait 0.567 s · ↑, wait 0.567 s · ←, wait 0.567 s · ←, wait 0.583 s · ↓, wait 0.567 s · ↓, wait 0.683 s · ↓, wait 0.517 s×3 · ←, wait 0.583 s · ↓, wait 0.567 s · →, wait 0.583 s · →, wait 0.517 s×5 · ↑, wait 0.583 s · →, wait 0.567 s · →, wait 0.583 s · ↓, wait 0.267 s · activate, wait 0.733 s · activate, wait 0.217 s · ↓, wait 0.583 s · ←, wait 0.567 s · ←, wait 0.683 s · ←, wait 0.517 s×3 · →, wait 0.6 s · ↑, wait 0.567 s · ↑, wait 0.583 s · ←, wait 0.567 s · ↓, wait 0.583 s · ↓, wait 0.517 s · ↑, wait 0.6 s · ←, wait 0.567 s · ↓, wait 0.583 s · ↓, wait 0.717 s · ↓, wait 0.583 s · →, wait 0.867 s · ←, wait 0.583 s · ←, wait 0.517 s · →, wait 0.6 s · →, wait 0.583 s · ↑, wait 0.167 s · activate, wait 0.517 s · ←, wait 0.583 s · ←, wait 0.683 s · ←, wait 0.517 s×2 · ←, wait 4.117 s · ↓, wait 0.583 s×2 · ←, wait 0.567 s · ↓
Vertical Mirrors puzzle 16Under review
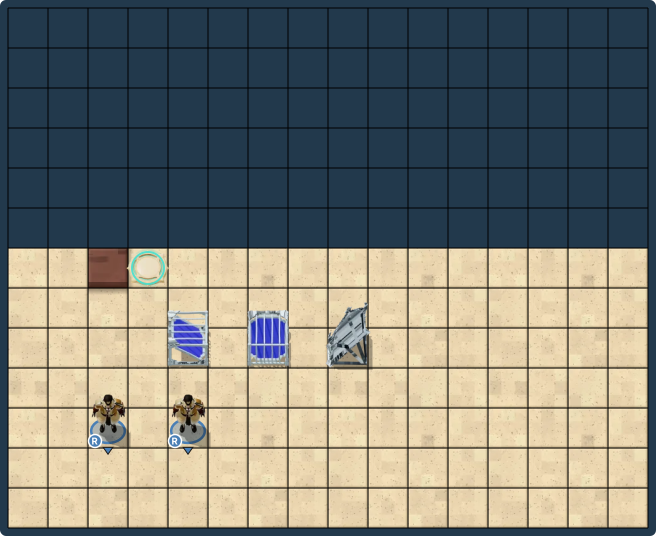
Clues
A complete move-by-move solution is not currently available for this puzzle.
No complete move sequence is listed yet. The board is available to inspect locally.
Vertical Mirrors puzzle 17Full route
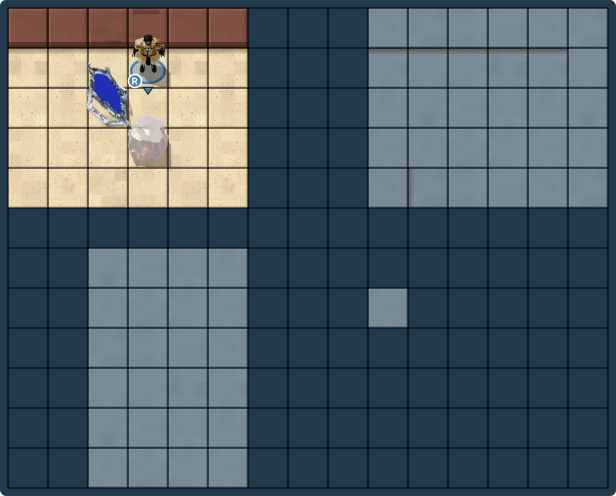
Clues
Use the move list below in order. The layout board shows the route as you step through it.
Full solution · 31 steps
Move sequence · 31 steps
Move order
- Hero
←×2 · ↓ · →×3 · ↑ · → · ↓ · ← · ↓ · ←×3 · activate · ←×2 · ↓ · → · ↓ · → · ↑ · ↓×3 · activate×2 · → · ↑×3
Vertical Mirrors puzzle 20No route
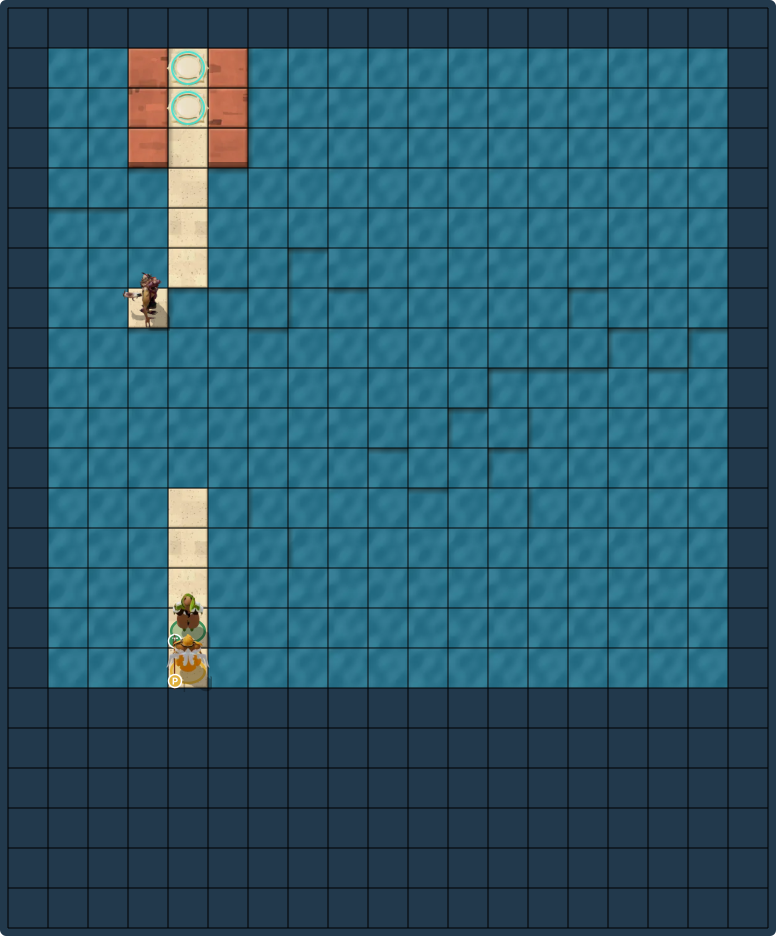
Clues
A complete move-by-move solution is not currently available for this puzzle.
No complete move sequence is listed yet. The board is available to inspect locally.
Vertical Mirrors puzzle 25Full route
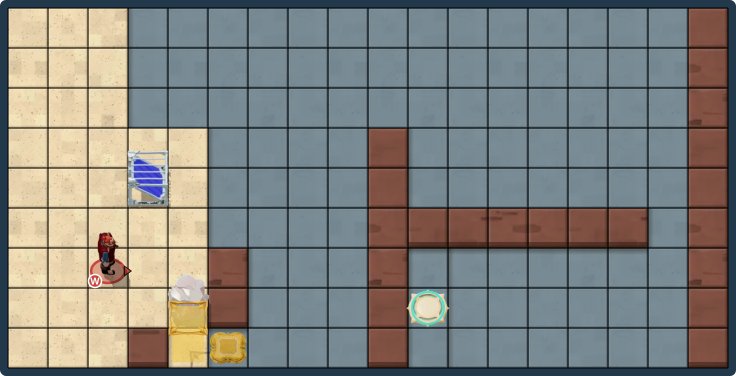
Clues
Use the move list below in order. The layout board shows the route as you step through it.
Full solution · 53 steps
Move sequence · 53 steps
Move order
- Warrior
↑×3 · → · ↓×3 · ← · ↓ · activate · → · ↑ · → · ↓ · ↑×2 · →×2 · ↓×3 · ← · → · ↑ · →×2 · ↑×5 · →×2 · ↓×2 · →×6 · ↓×3 · ←×4 · → · activate · ←×3
Mirror on Head
Choose a puzzle board
Local solutions
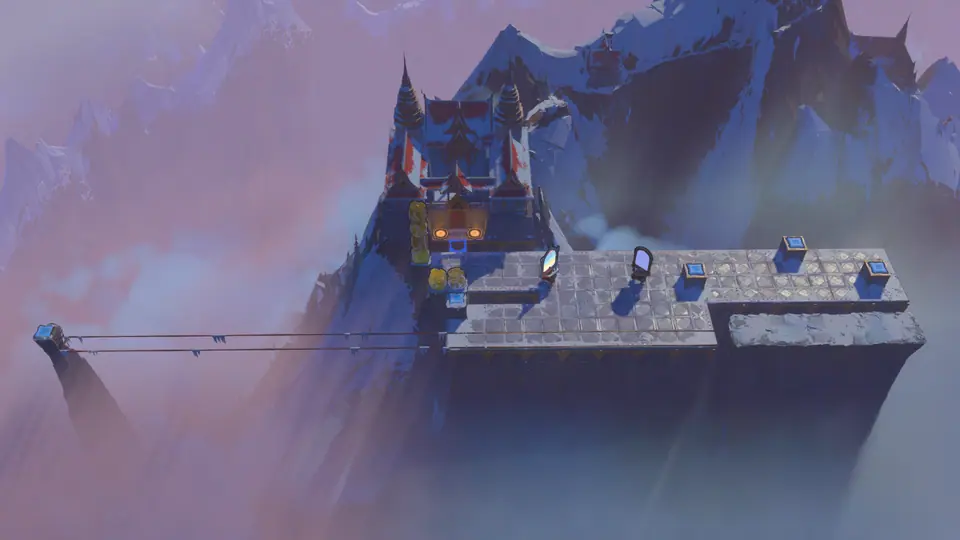 Mirror on Head puzzle 3Full route
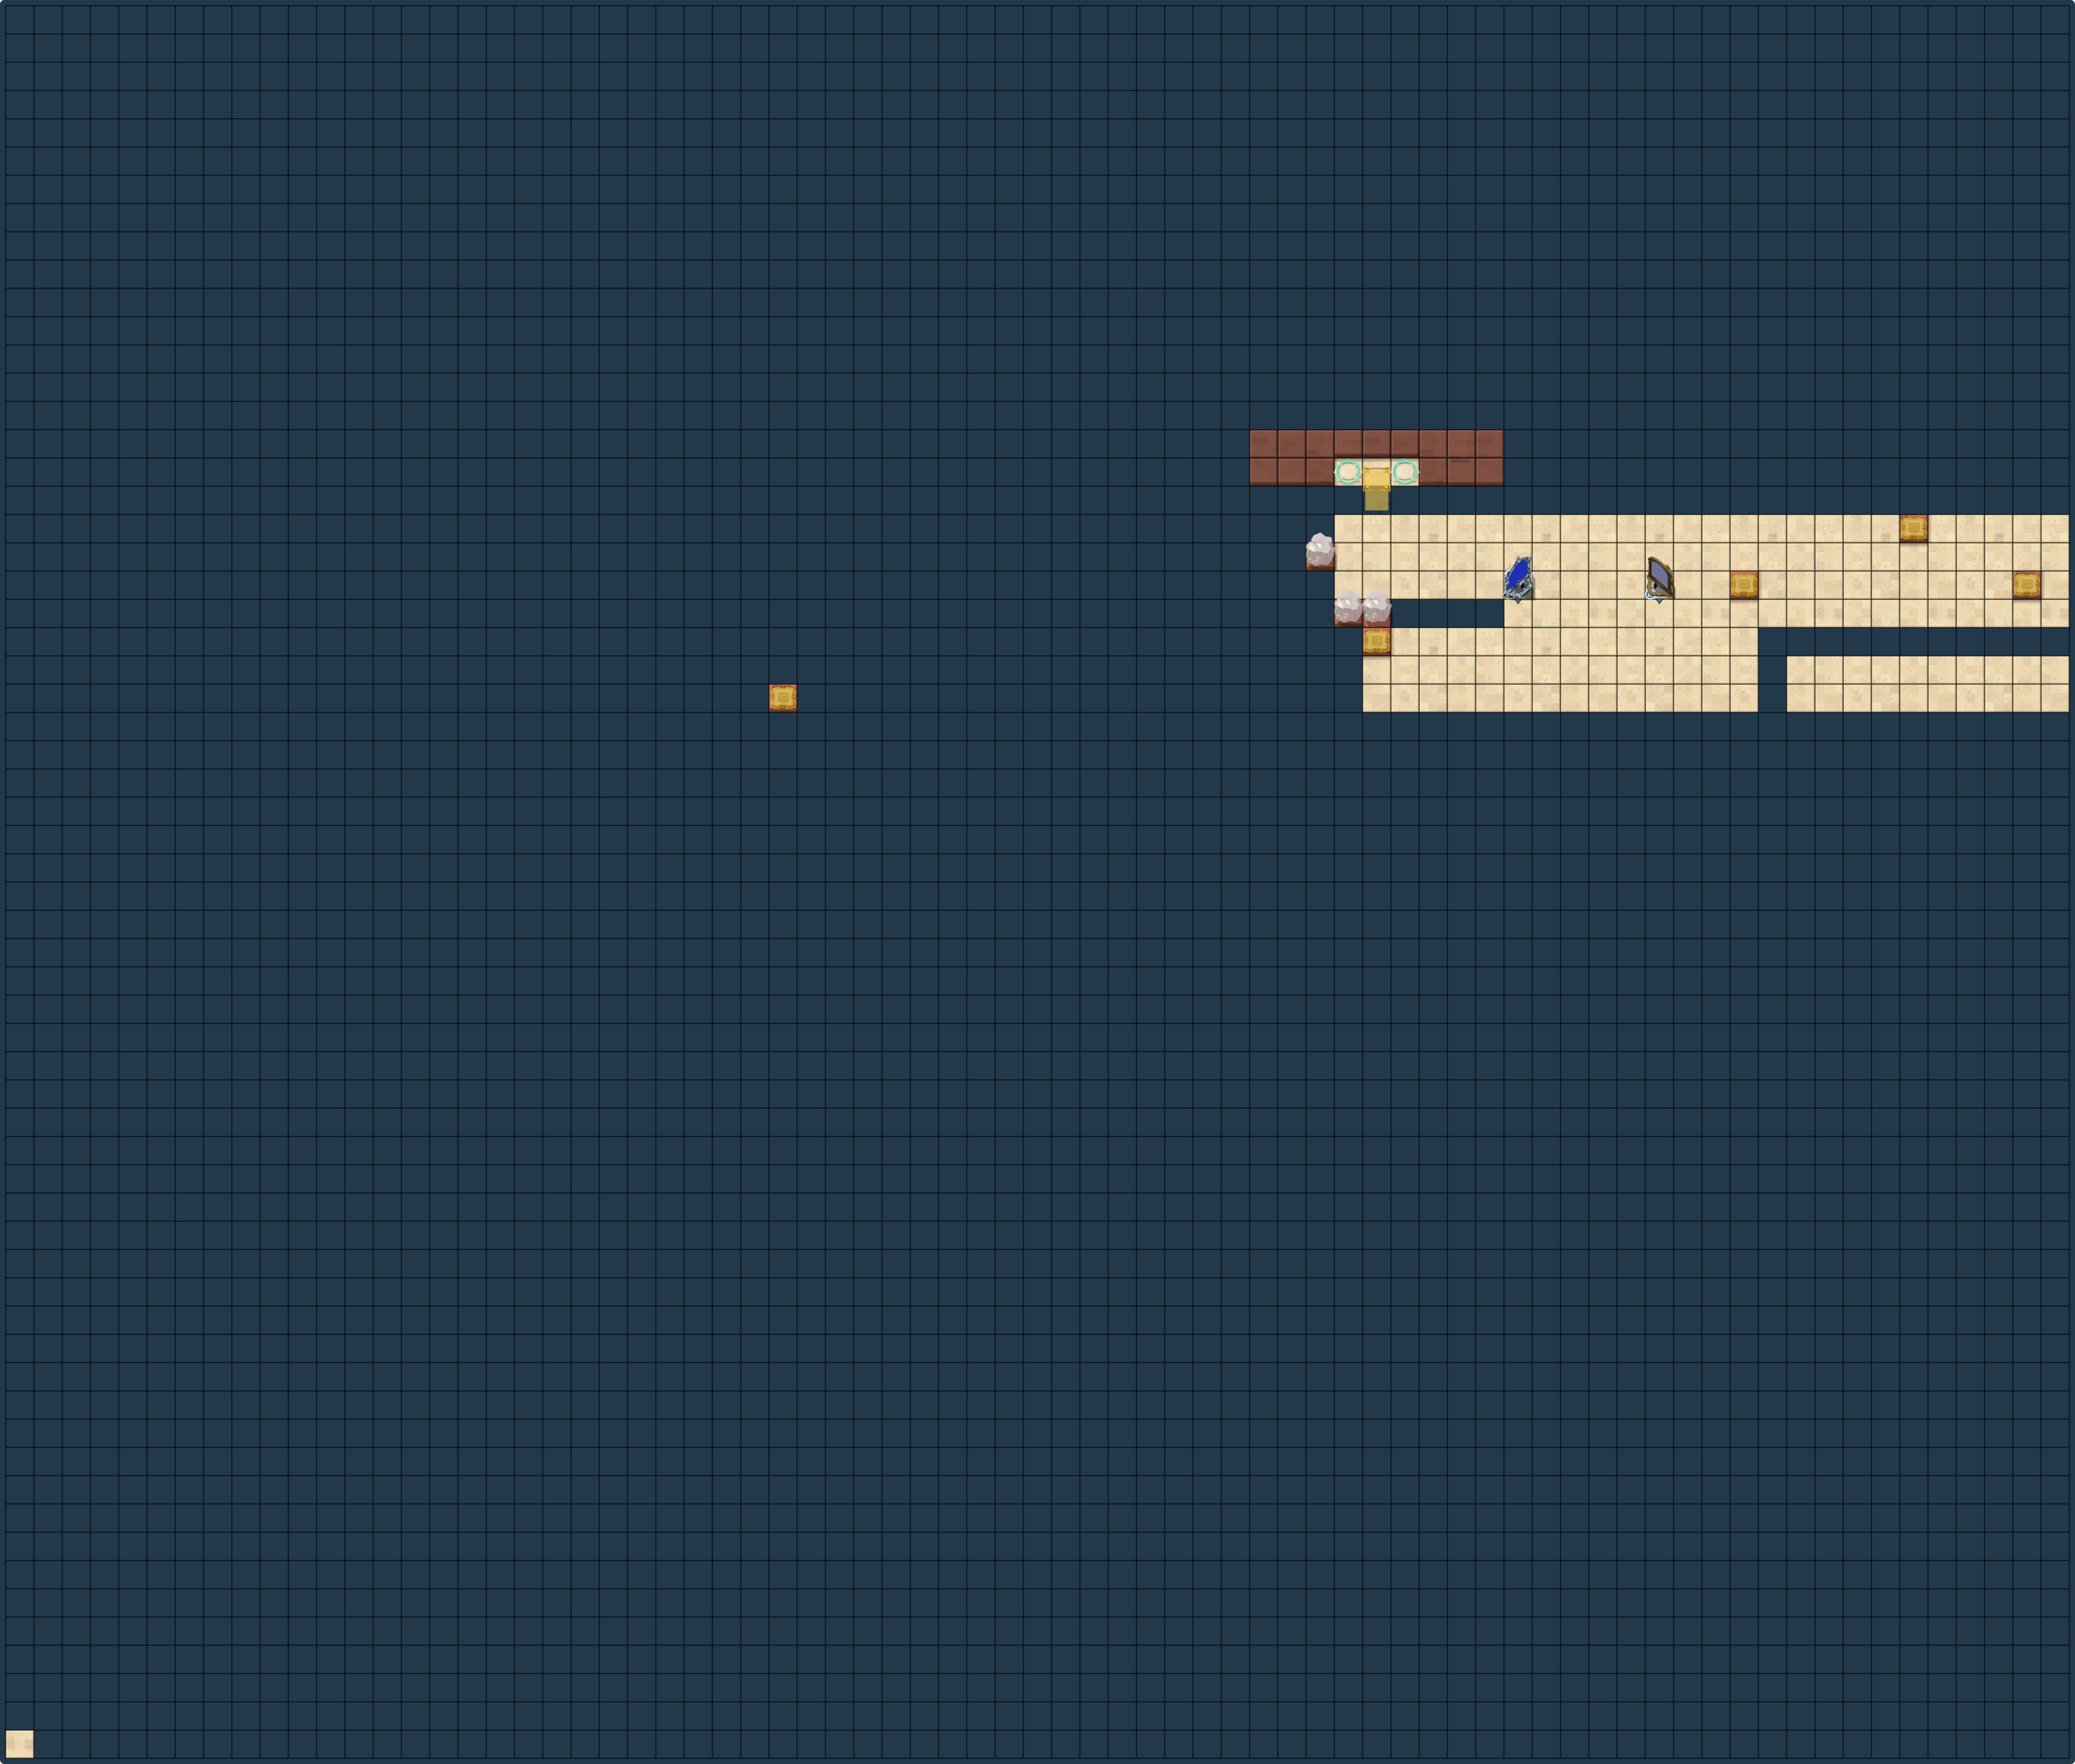
Clues
Use the move list below in order. The layout board shows the route as you step through it.
Full solution · 164 steps
Move sequence · 164 steps
Move order
- Hero 2
↓×4 · →×3 · ↑ - Hero 1
↑ · →×9 · ↓×2 · ← · activate · → · ↑×2 · ←×4 · ↓×2 · ← - Hero 2
↑ · ←×4 - Hero 1
activate · →×5 · ↑×2 · ← - Hero 2
↓×2 · →×4 · ↑ - Hero 1
activate · ←×8 · ↓×3 · ←×4 · ↓ - Hero 2
↓ · ←×12 - Hero 1
activate · →×11 · ↑×4 · ← - Hero 2
→×10 · ↑×4 - Hero 1
activate · ←×5 - Hero 2
↓ · ←×5 · ↑ - Hero 1
activate - Hero 2
→×2 · ↑×2 · → - Hero 1
↓ · →×3 · ↑ · activate · ←×9 · ↑×3 · ← - Hero 2
←×9 · ↑×2 · →
Mirror Falling
Choose a puzzle board
Local solutions
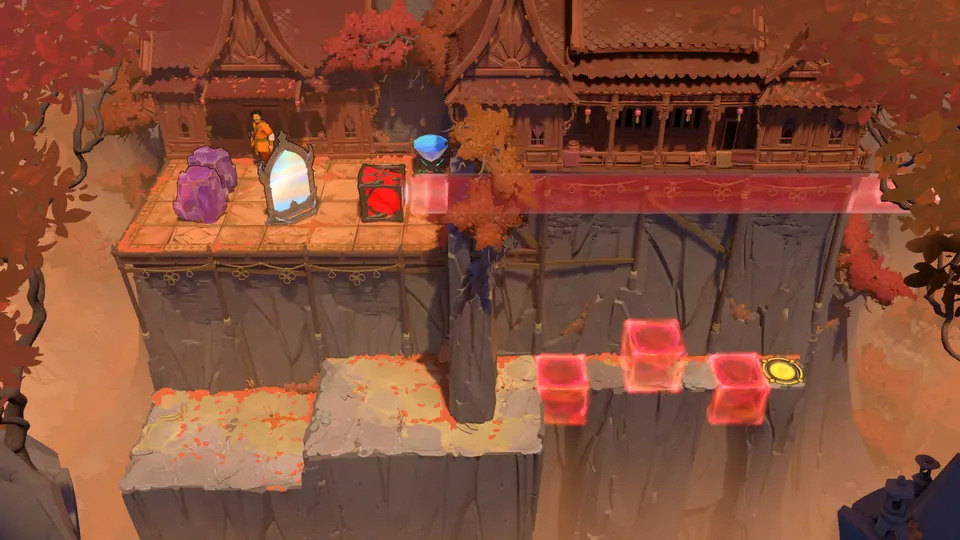 Mirror Falling puzzle 11Community route
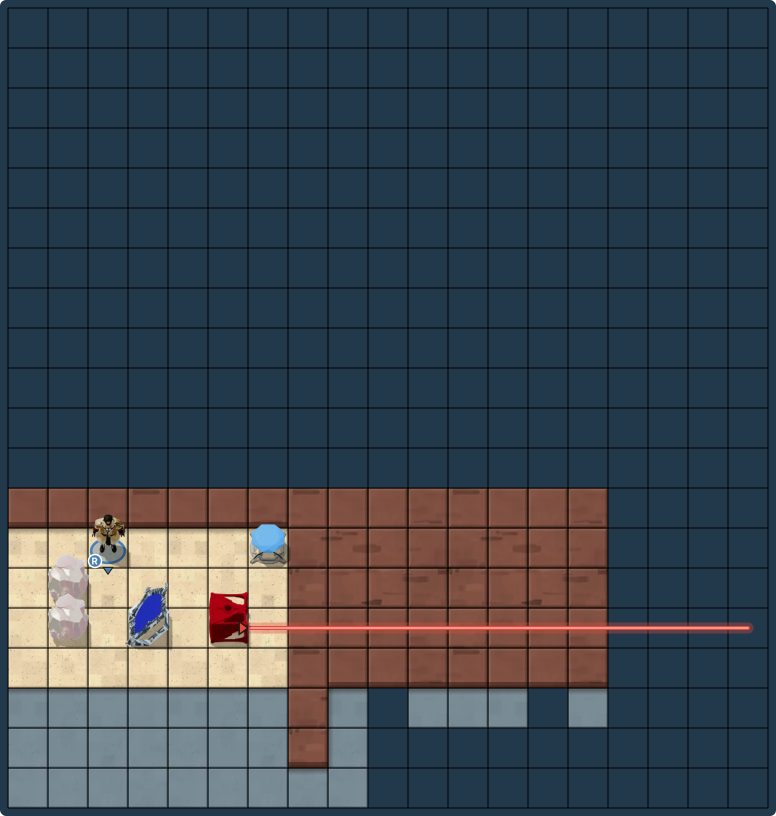
Clues
Use the move list below in order. The layout board shows the route as you step through it.
Full solution · 71 steps
Community move sequence · 71 steps
Move order
- Hero
↓ · → · ↓ · → · ↓ · ←×3 · → · ↑×3 · ←×2 · ↓×2 · →×2 · ↑ · → · ↓×2 · ↑ · ←×3 · ↑ · →×2 · ↑ · → · ↓×3 · ↑×2 · →×3 · ↓ · ←×2 · ↑ · ← · ↓×2 · ←×2 · ↑ · ← · ↓ · →×3 · ↓ · →×3 · ↓×2 · →×2 · ↑×2 · →×2 · Activate · →×3 · Activate · →×2
High Skipping Stones
Solve any 6 of these 7 puzzles in the Skipping Stones region of Antipode High.
Skipping and Falling
Choose a puzzle board
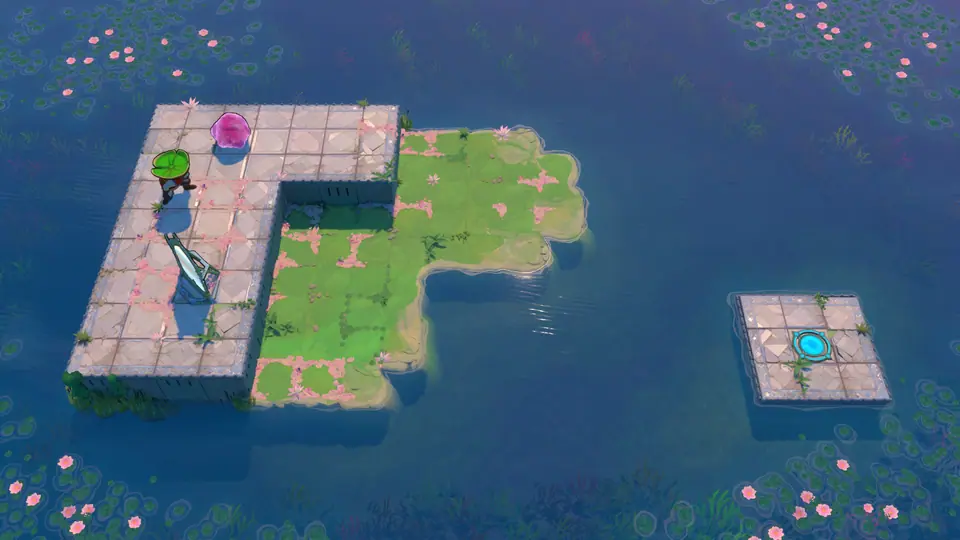 5RouteSkipping and Falling puzzle 5
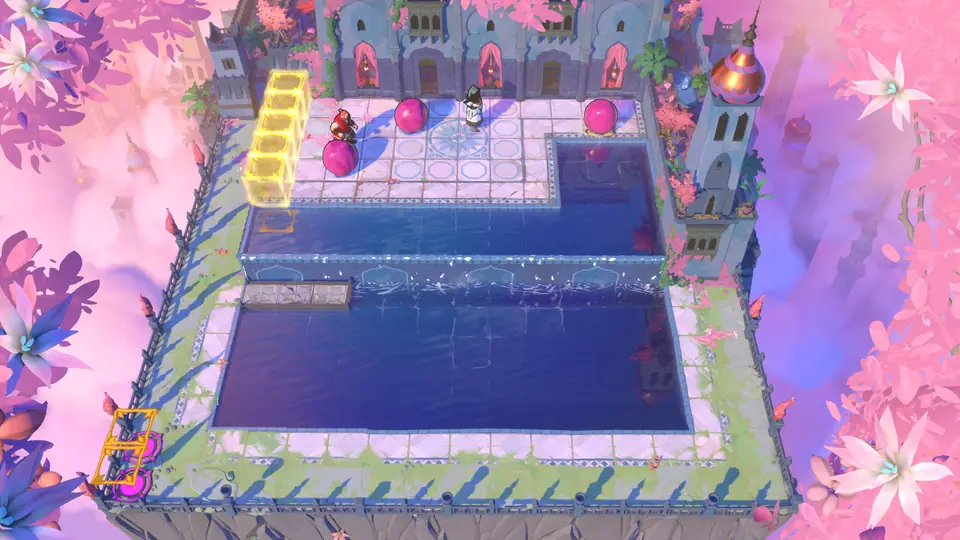
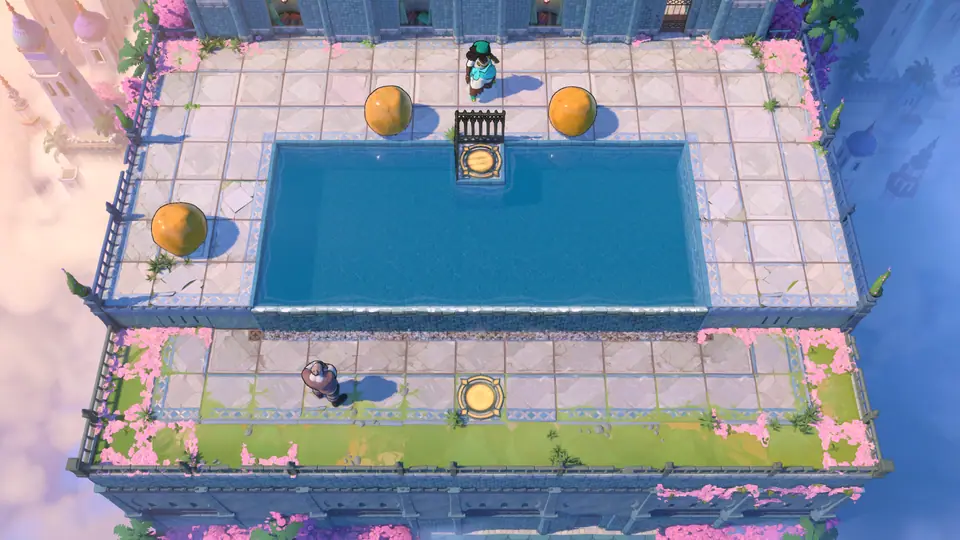 7RouteSkipping and Falling puzzle 7
 9BoardSkipping and Falling puzzle 9
Local solutions
Skipping and Falling puzzle 5Full route
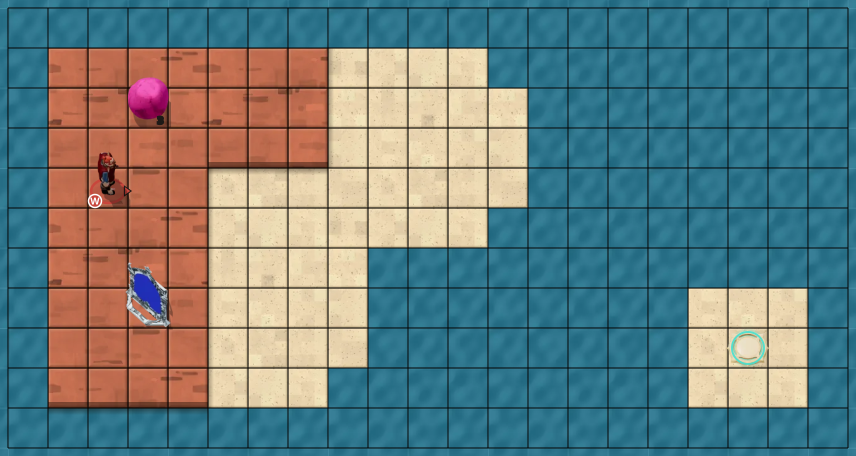
Clues
Use the move list below in order. The layout board shows the route as you step through it.
Full solution · 81 steps
Move sequence · 81 steps
Move order
- Warrior
wait 0.8 s, ↑, wait 1 s · ↑, wait 1 s · →, wait 1.4 s×4 · ↑, wait 1 s · →, wait 1 s · ↓, wait 1.4 s×2 · ←, wait 1 s×5 · ↓, wait 1 s×5 · →, wait 1 s · ↑, wait 1.4 s×5 · ←, wait 1 s · ↑, wait 1 s · →, wait 1.4 s×4 · ↓, wait 1 s · →, wait 1 s · ↓, wait 1 s · activate, wait 1.6 s · ↑, wait 1 s · →, wait 1 s×2 · ↓, wait 1.4 s×3 · ←, wait 4 s · ↓, wait 1 s · →, wait 1.4 s×4 · ←, wait 1 s×4 · ↑, wait 1 s · →, wait 1.4 s · ↓, wait 1 s · →, wait 1 s×2 · ↑, wait 1 s×2 · ←, wait 1 s · ↓, wait 1.4 s×2 · ←, wait 1 s · ↓, wait 1 s · →, wait 1.4 s · wait 0.378 s · activate while falling · ↑, wait 1 s×2 · →, wait 1 s×2 · ↓, wait 1.4 s · activate, wait 1 s · wait 1.078 s, →, wait 4 s · wait 3.2 s×5 · ↓, wait 4 s · ↓, wait 0.278 s
Skipping and Falling puzzle 7Full route
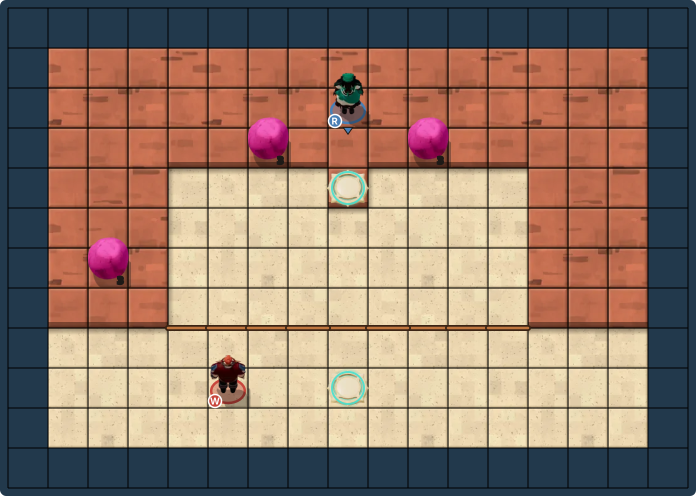
Clues
Use the move list below in order. The layout board shows the route as you step through it.
Full solution · 87 steps
Move sequence · 87 steps
Move order
- Warrior
→, wait 1 s · ↑, wait 1 s - Hero
→, wait 1 s×3 · ↓, wait 1 s · ←, wait 1 s · ↑, wait 1 s · ←, wait 1 s×4 · ↓, wait 1 s - Warrior
←, wait 1 s×4 - Hero
↑, wait 1 s · ←, wait 1 s×5 · ↓, wait 1 s×5 · →, wait 1 s · ↓, wait 1 s · ↑, wait 1 s · ←, wait 1 s · ↑, wait 1 s×2 · →, wait 1 s · ↓, wait 1 s×3 - Warrior
←, wait 1 s · ↓, wait 1 s×2 · →, wait 1 s · ↑, wait 1 s · ←, wait 1 s · ↑, wait 1 s · →, wait 1 s×7 · ↓, wait 1 s · →, wait 1 s - Hero
↑, wait 1 s · ↓, wait 1 s - Warrior
←, wait 1 s×7 · ↑, wait 1 s - Hero
↑, wait 1 s×6 · →, wait 1 s×7 · ↓, wait 1 s×2 · ←, wait 1 s - Warrior
→, wait 1 s×5 · ↓, wait 1 s · →, wait 0.16 s
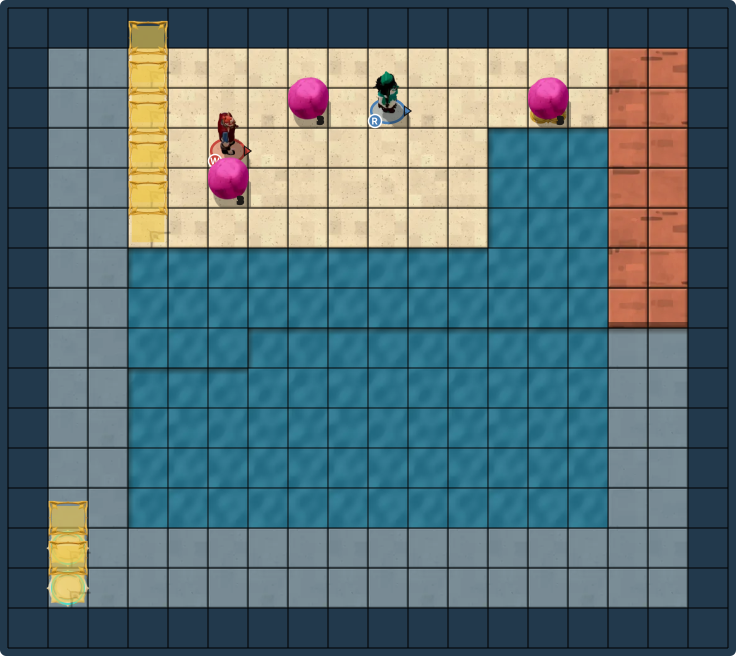
Skipping and Falling puzzle 9No route
Clues
A complete move-by-move solution is not currently available for this puzzle.
No complete move sequence is listed yet. The board is available to inspect locally.
Vertical Mirror Skipping
Choose a puzzle board
Local solutions
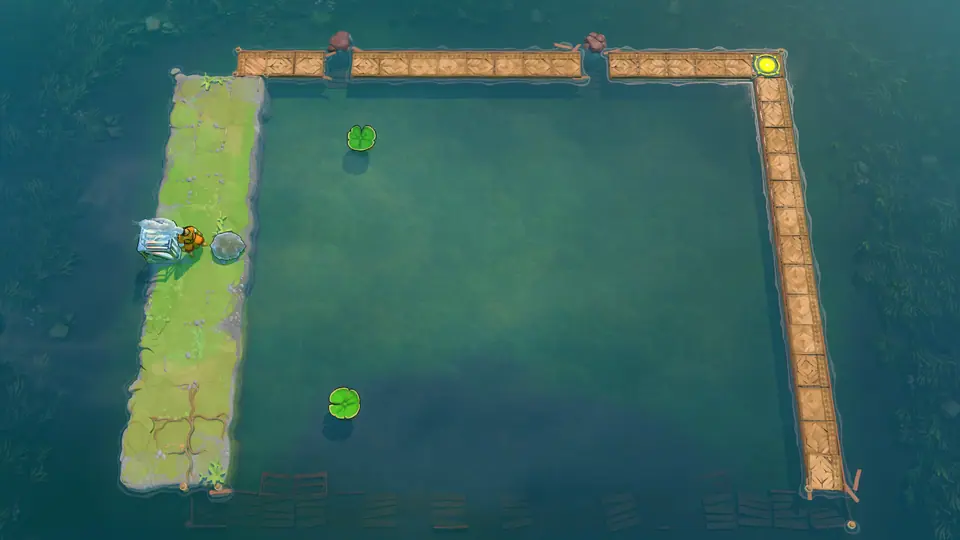 Vertical Mirror Skipping puzzle 3Full route
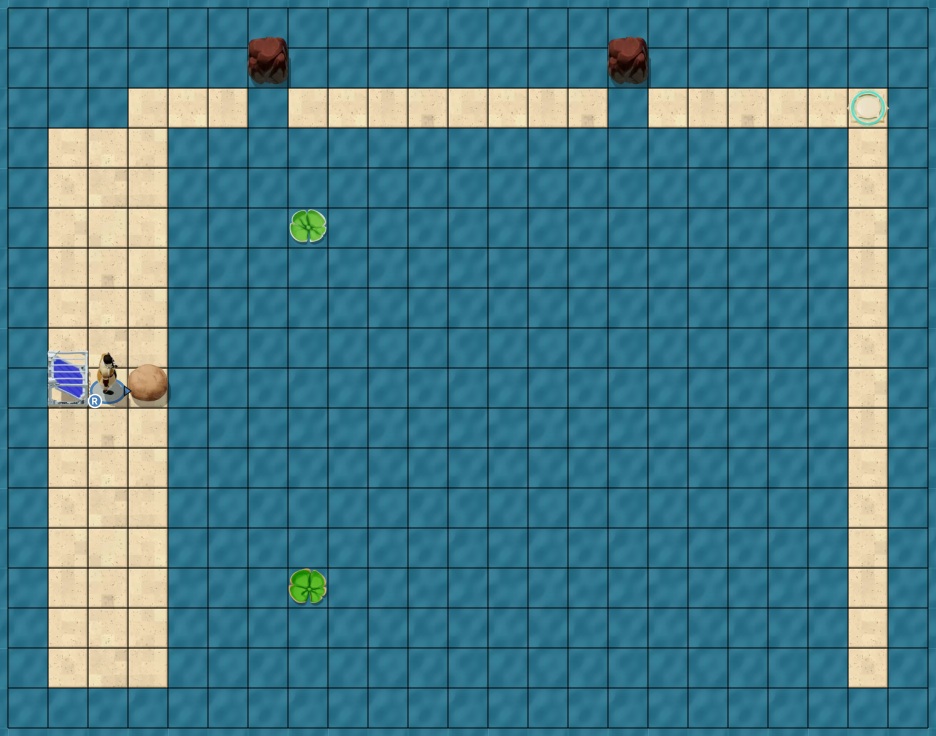
Clues
Use the move list below in order. The layout board shows the route as you step through it.
Full solution · 267 steps
Move sequence · 267 steps
Move order
- Controls
Start: hold Ctrl. Keep each modifier state until the next change. Directions are taps; waits use real seconds at 60 frames per second. - Hero
wait 0.683 s, ↓, wait 1 s · ←, wait 1 s · ↑, wait 1.4 s×4 · →, wait 1 s · ↓, wait 1 s×4 · →, wait 1 s · ↑, wait 1.4 s×4 · ←, wait 1 s · ↑, wait 0.433 s · →, wait 1.967 s · ↓, wait 1 s · activate, wait 1.617 s · wait 0.6 s×2 · activate, wait 1 s · ←, wait 1 s · ↑, wait 1 s×2 · ←, wait 1 s · ↓, wait 1.4 s · →, wait 1 s · ↑, wait 1 s · →, wait 1 s · ↓, wait 1.4 s · ←, wait 1 s · ↓, wait 1 s · wait 8 s×4 · wait 7.983 s · →, wait 1.4 s · ↓, wait 1 s · wait 0.6 s×7 · wait 2 s · activate, wait 1.617 s · wait 8 s×3 · activate, wait 1 s · ↑, wait 1 s×2 · ←, wait 1 s×2 · ↓, wait 1.4 s · →, wait 1.4 s · ↑, wait 1 s · →, wait 1 s · ↓, wait 1.4 s×9 · ←, wait 1 s · ↑, wait 1 s×8 · ←, wait 1 s · ↓, wait 1.4 s×5 · ↓, wait 1.383 s · ↓, wait 1.4 s×2 · →, wait 1 s · ↓, wait 1 s · →, wait 1.4 s · ↑, wait 1 s · wait 0.6 s×7 · wait 2 s · activate, wait 1.617 s · wait 0.6 s×7 · wait 0.7 s · activate, wait 1 s · ←, wait 1 s · ↓, wait 1 s×2 · ←, wait 1 s · ↑, wait 1.4 s×11 · →, wait 1 s · ↓, wait 1 s×11 · →, wait 1 s · ↑, wait 1.4 s×11 · ←, wait 1 s · ↑, wait 1 s · wait 7.983 s · →, wait 1.4 s · ↓, wait 2.4 s · activate, wait 1.617 s · wait 0.6 s · wait 0.3 s · activate, wait 1 s · wait 0.6 s · ←, wait 1 s · ↑, wait 1 s×2 · ←, wait 1 s · ↓, wait 1.4 s×10 · →, wait 1 s · ↑, wait 1 s×10 · →, wait 1 s · ↓, wait 1.4 s×10 · ←, wait 1 s · ↓, wait 1 s · →, wait 1.4 s · ↓, wait 1 s · wait 9.1 s · activate, wait 1.6 s · activate, wait 1 s · ←, wait 1 s · ↑, wait 1 s×2 · ←, wait 1 s · wait 0.6 s×6 · activate, wait 1.6 s · activate, wait 1 s · ↓, wait 1.4 s · →, wait 1 s · ↑, wait 1 s · →, wait 1 s · ↓, wait 1.4 s · ←, wait 1 s · ↓, wait 1 s · →, wait 1.4 s · ↓, wait 1 s · wait 8 s×10 · ↑, wait 1 s×14 · →, wait 1 s×3 · →, wait 4 s · →, wait 1 s×8 · →, wait 4 s · →, wait 1 s×4 · →
Spinning Beams
Choose a puzzle board
Local solutions
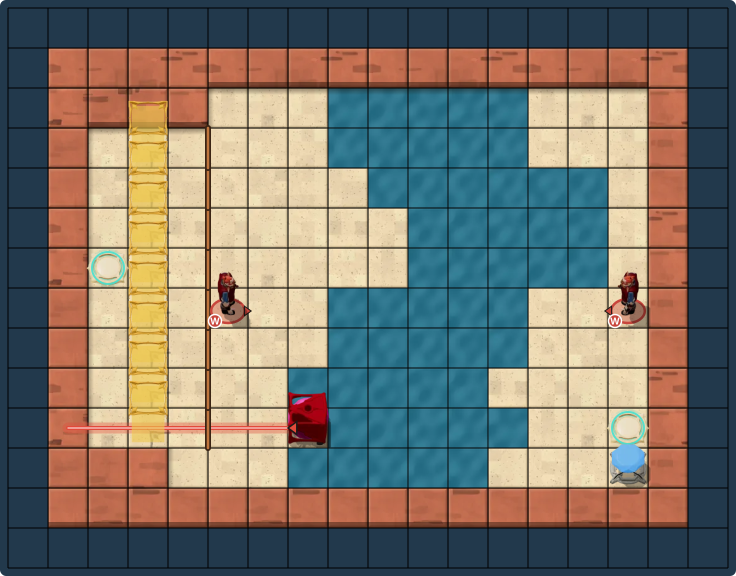
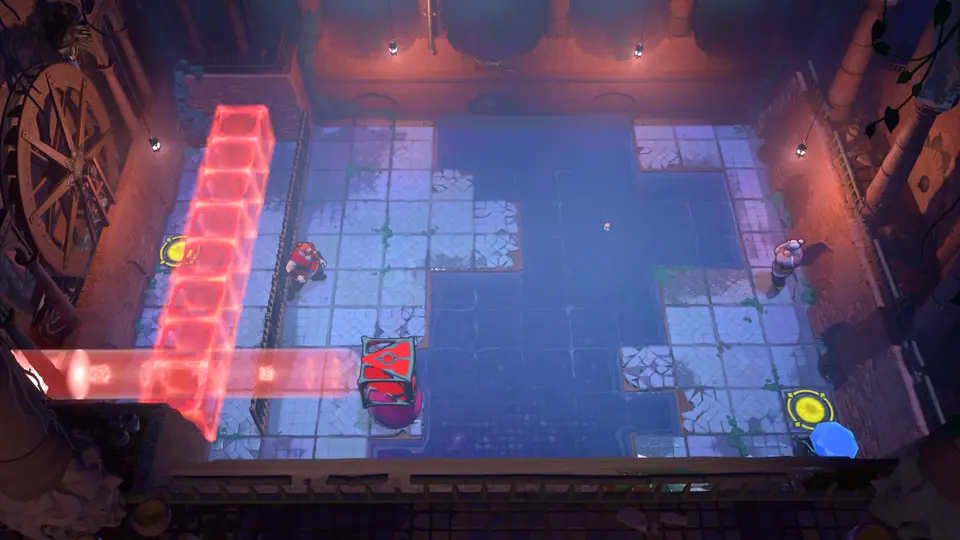 Spinning Beams puzzle 1Community route
Clues
Use the move list below in order. The layout board shows the route as you step through it.
Full solution · 94 steps
Community move sequence · 94 steps
Move order
- Warrior 1
↓×3 · →×2 - Warrior 2
↓×3 · ← · ↓ · ← · ↑ · → · ↑ · ←×2 - Warrior 1
← · ↑ · ← · ↑ · → · ↑ · → · ↓ · ← · ↓×2 · → - Warrior 2
→×2 · ↓×2 · ← · ↑ · → · ↑ · ←×2 · →×3 · ↑×5 - Warrior 1
← · ↑×5 · ← · ↑ · → · ← · → · ← · → · ↑ · → · ↓ · ← · ↓ · → - Warrior 2
↓ - Warrior 1
→×2 · ←×4 · ↓×6 · ← · ↑×6 · ←×3 · ↓ - Warrior 2
↓×5
Skipping Stacks
Choose a puzzle board
Local solutions
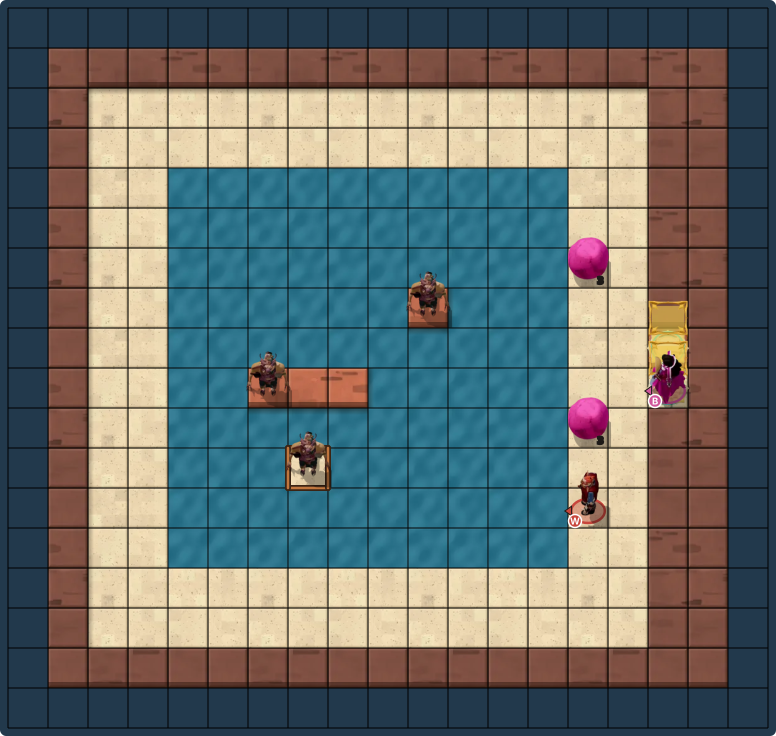
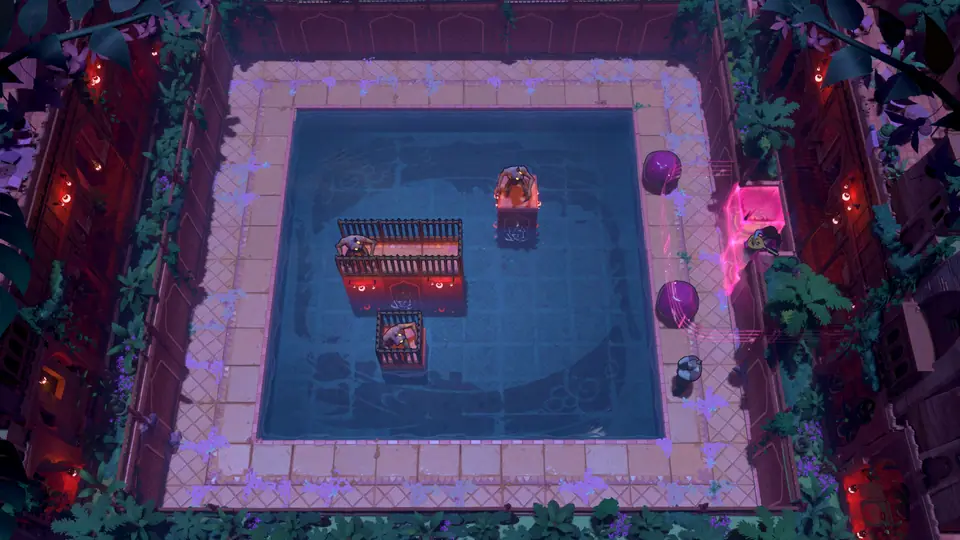 Skipping Stacks puzzle 1No route
Clues
A complete move-by-move solution is not currently available for this puzzle.
No complete move sequence is listed yet. The board is available to inspect locally.
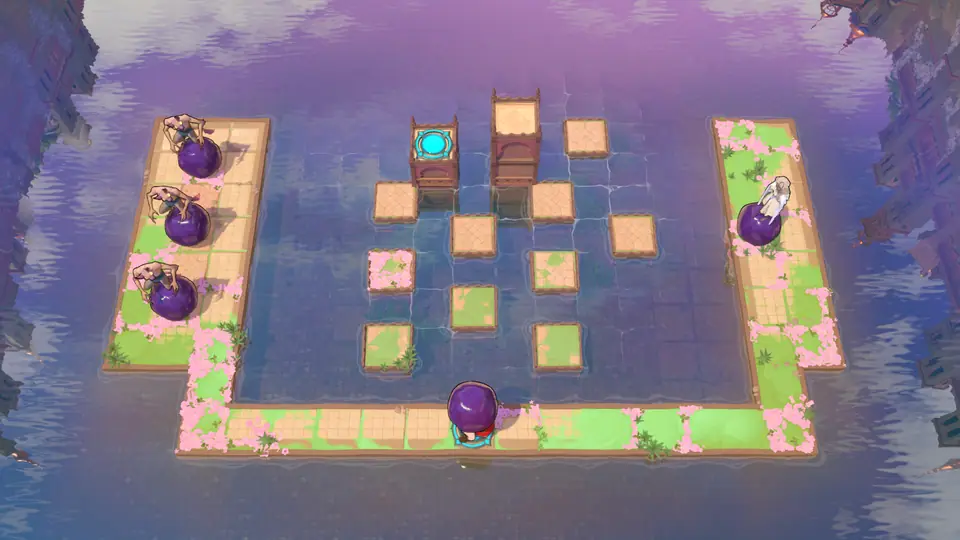 Skipping Stacks puzzle 8Full route
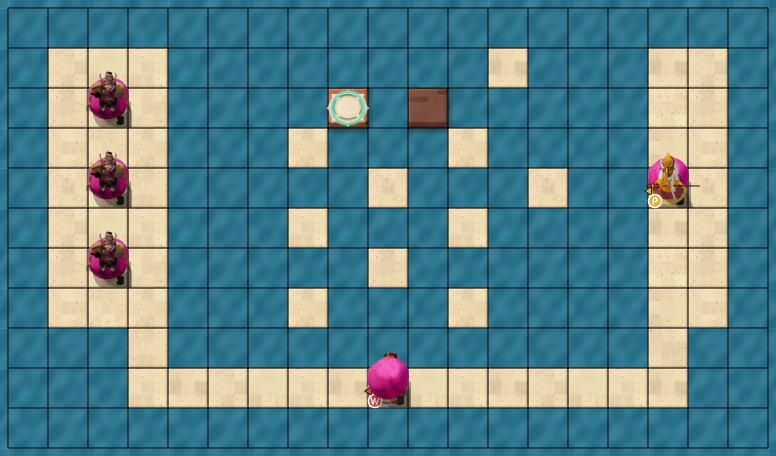
Clues
Use the move list below in order. The layout board shows the route as you step through it.
Full solution · 81 steps
Move sequence · 81 steps
Move order
- Warrior
→, wait 1 s×7 · ↑, wait 1 s×2 · →, wait 1 s · ↑, wait 1 s×4 · ←, wait 1 s · ↓, wait 1 s×2 · →, wait 1 s · ↓, wait 1 s · ←, wait 1 s · ↓, wait 1 s×3 · ←, wait 1 s×13 · ↑, wait 1 s×2 · ←, wait 1 s×2 · ↑, wait 1 s×3 · →, wait 1 s×2 · ↓, wait 1 s×3 · ←, wait 1 s · ↑, wait 1 s · ←, wait 1 s · ↑, wait 1 s · →, wait 1 s×2 · ↑, wait 1 s×4 · ←, wait 1 s · ↓, wait 1 s · ←, wait 1 s · ↓, wait 1 s · →, wait 1 s×2 - Priest
↑, wait 1 s · ←, wait 1 s · ↑, wait 1 s×3 - Warrior
↓, wait 1 s×6 · →, wait 1 s×5 · →, wait 0.16 s
High Beamcasters
Solve any 10 of these 12 puzzles in the Beamcasters region of Antipode High.
Goblin Turning
Choose a puzzle board
Local solutions
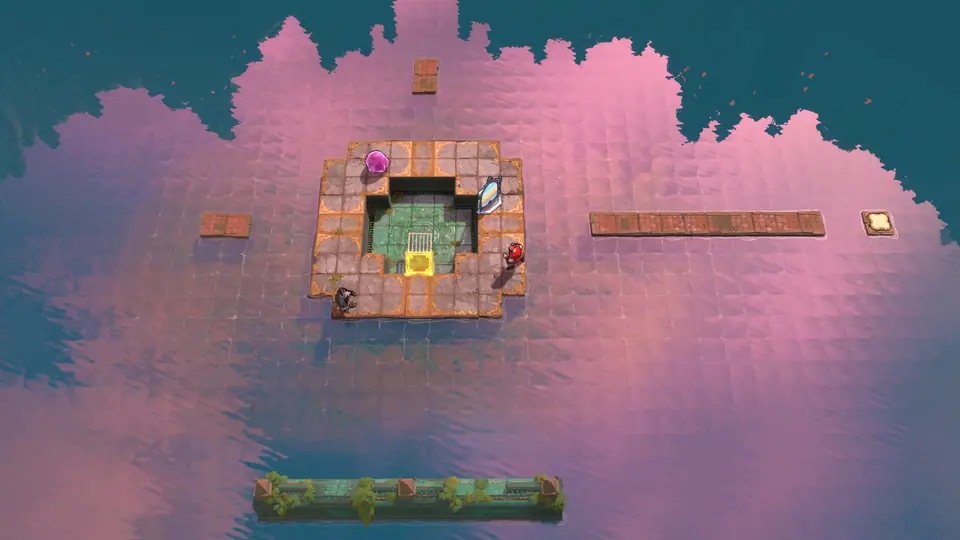 Goblin Turning puzzle 1No route
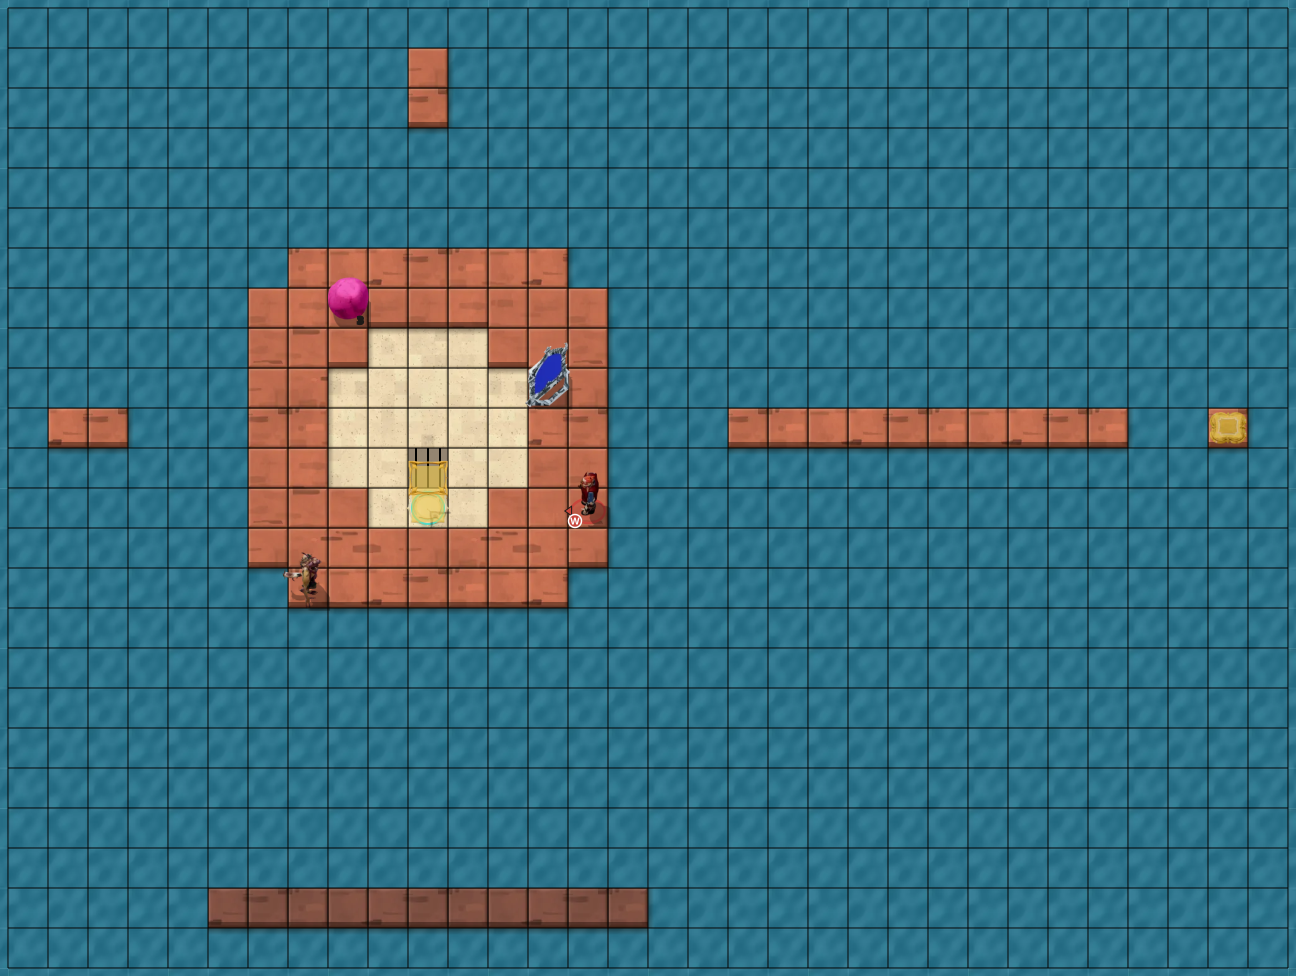
Clues
A complete move-by-move solution is not currently available for this puzzle.
No complete move sequence is listed yet. The board is available to inspect locally.
Double Beam Falling
Choose a puzzle board
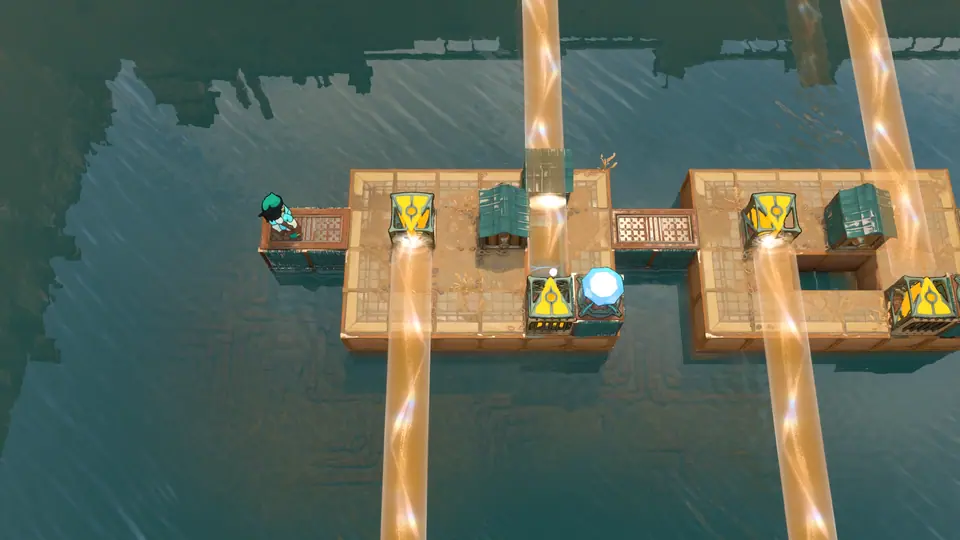 8RouteDouble Beam Falling puzzle 8
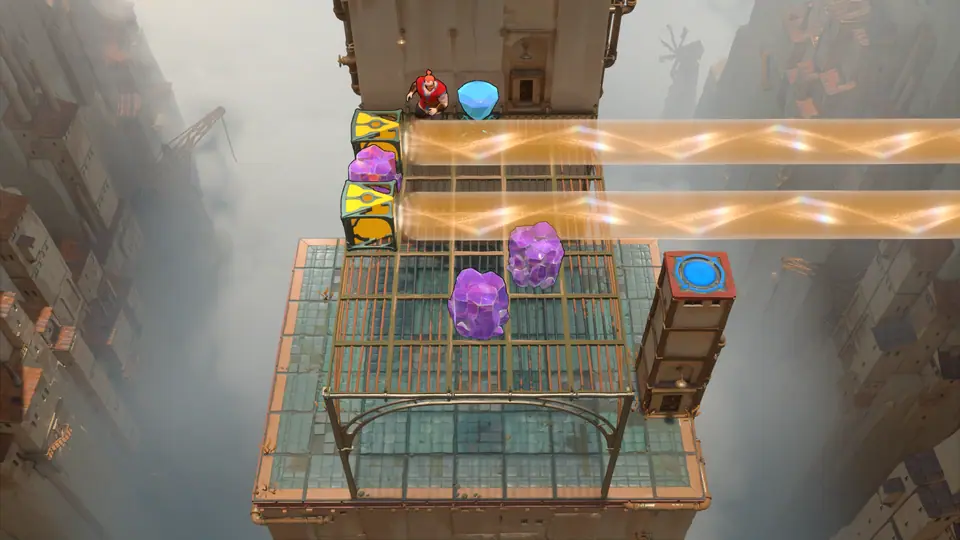 14RouteDouble Beam Falling puzzle 14
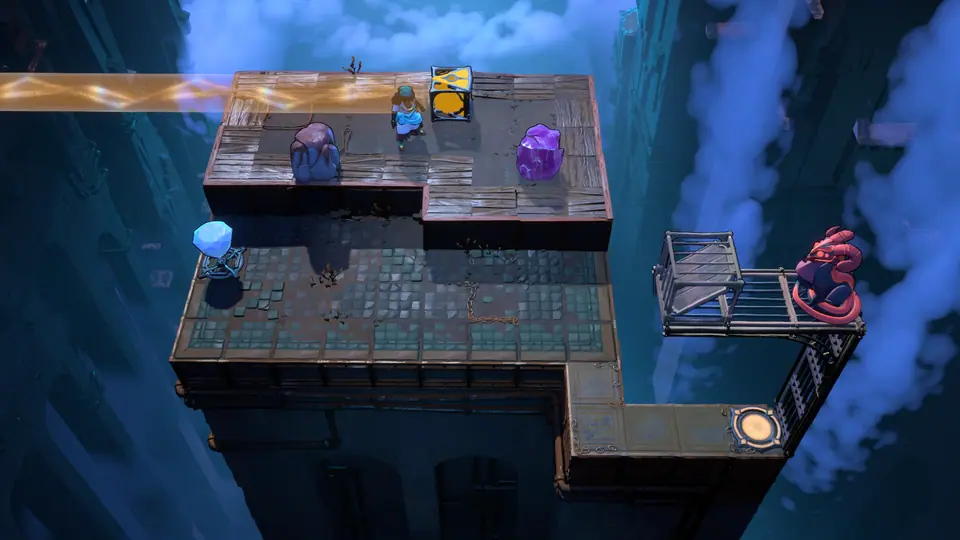 17RouteDouble Beam Falling puzzle 17
Local solutions
Double Beam Falling puzzle 8Full route

Clues
Use the move list below in order. The layout board shows the route as you step through it.
Full solution · 125 steps
Move sequence · 125 steps
Move order
- Hero
→×3 · ↓×2 · → · ↑ · ← · → · ↑ · → · ↓×2 · →×2 · ↑ · →×4 · ↑ · ↓×3 · → · ↑ · →×5 · ↑ · → · ↓ · ← · ↓ · →×2 · ← · ↑×2 · →×3 · ↓ · →×3 · ↑ · ↓×3 · → · ↑ · ← · → · ↑ · →×3 · ←×2 · ↓×3 · →×2 · ↑ · →×2 · ↑ · →×7 · ↑ · ↓×3 · → · ↑ · ← · → · ↑ · →×2 · ← · ↓×3 · →×2 · ↑ · →×4 · ↑ · ↓×3 · → · ↑ · ← · → · ↑ · → · ↓×2 · → · ↑ · → · ←×2 · → · ↑ · →×3 · ↓ · →×2
Double Beam Falling puzzle 14Community route
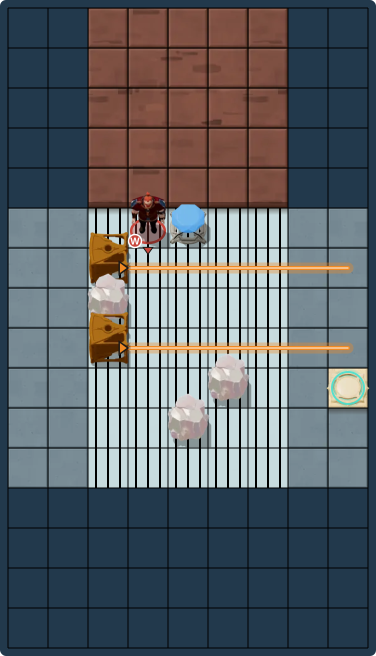
Clues
Use the move list below in order. The layout board shows the route as you step through it.
Full solution · 50 steps
Community move sequence · 50 steps
Move order
- Warrior
→ · ←×2 · ↓×2 · → · ↓×2 · ← · → · ↓×2 · ← · ↑ · → · ↑ · ← · →×3 · ←×2 · ↓×2 · → · ↑×2 · ← · ↑ · →×2 · ←×2 · ↑ · ← · ↓ · ↑ · →×4 · ↑×2 · ← · → · ↓×4 · →
Double Beam Falling puzzle 17Full route
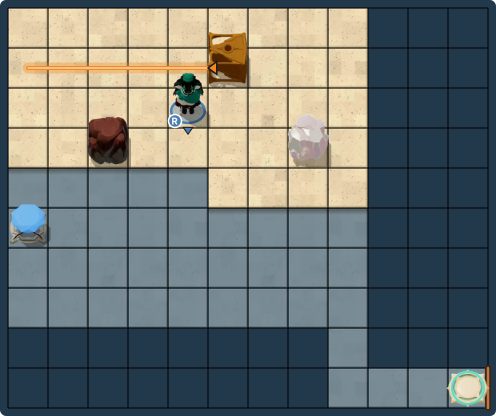
Clues
Use the move list below in order. The layout board shows the route as you step through it.
Full solution · 79 steps
Move sequence · 79 steps
Move order
- Hero
←×3 · ↓ · →×3 · ↑ · → · ↓×2 · → · ↑×4 · ← · →×3 · ↓×3 · ←×7 · ↑ · →×5 · ↑×2 · ← · ↓×2 · ←×5 · ↓ · ↑ · →×5 · ↑ · ↓×4 · ←×5 · ↓ · →×4 · ↓ · →×4 · ↓×3 · →×3
Elevators
Choose a puzzle board
Local solutions
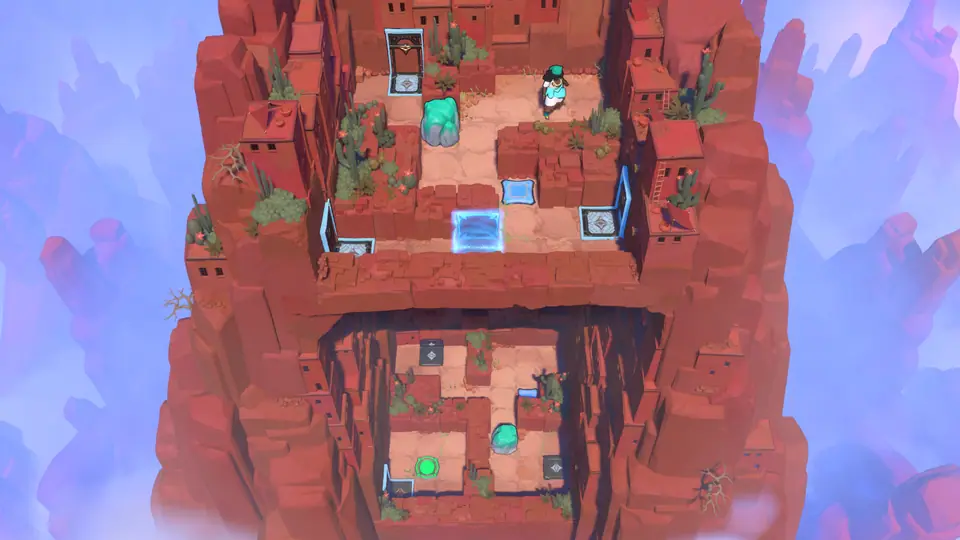 Elevators puzzle 6Full route
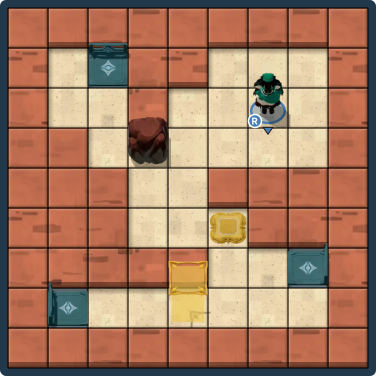
Clues
Use the move list below in order. The layout board shows the route as you step through it.
Full solution · 93 steps
Move sequence · 93 steps
Move order
- Hero
←×2 · ↓×3 · → · ↓ · →×2 · take/drop gem · ←×2 · ↑×3 · → · ↑×2 · ← · ↓×2 · ←×2 · ↑×2 · ← · take/drop gem · ↓×2 · →×2 · ↓×2 · → · ↓ · →×2 · take/drop gem · ↑ · ←×2 · ↑ · ↓ · →×2 · ↓ · take/drop gem · ←×2 · ↑ · ← · ↑×3 · →×2 · ↓ · ← · ↑ · ← · ↓×2 · ← · ↓ · → · ↑×2 · ←×2 · ↑×2 · take/drop gem · → · ↓×2 · →×2 · ↓×2 · →×2 · ↓ · take/drop gem · ←×2 · ↓ · ←×4 · take/drop gem · → · ↑
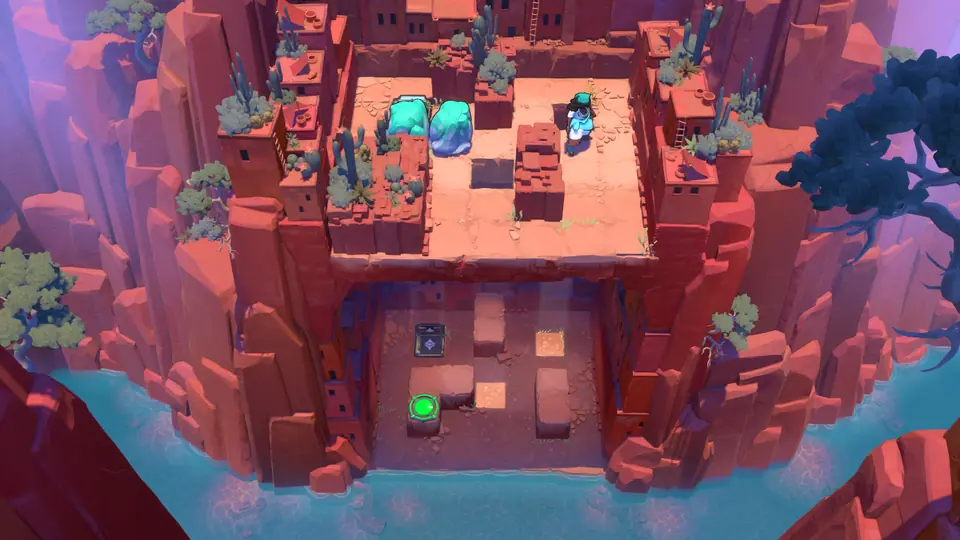 Elevators puzzle 7Full route
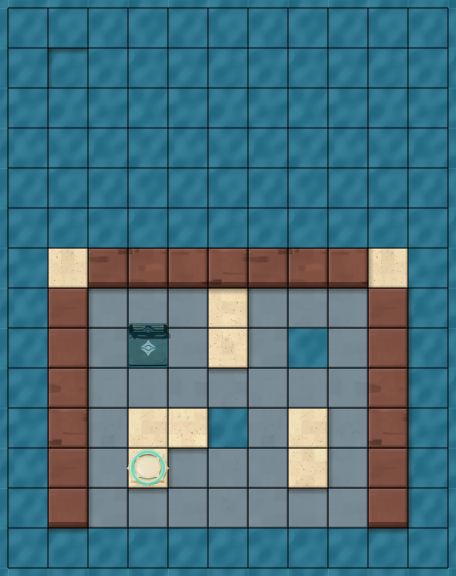
Clues
Use the move list below in order. The layout board shows the route as you step through it.
Full solution · 130 steps
Move sequence · 130 steps
Move order
- Hero
↑ · ← · ↓ · ←×2 · ↑ · ← · take/drop gem · → · ↓ · ↑ · ←×2 · ↓ · →×4 · ↑×2 · →×2 · ↓×3 · ← · ↑ · ↓×3 · ←×2 · ↑ · ← · ↑ · →×2 · ↑ · →×2 · ↑ · ← · ↑ · ← · ↓×4 · ↑×2 · →×2 · ↓×3 · ←×2 · ↑ · ← · ↓ · ↑×3 · ← · ↑ · ← · take/drop gem · ↓ · →×3 · ↑×2 · →×2 · ↓×3 · ← · ↑×2 · → · ← · ↑ · ← · ↓×4 · ↑×2 · →×2 · ↓×3 · ←×2 · ↑×3 · ←×2 · ↑ · ← · take/drop gem · → · ↓×3 · → · ↓×2 · ↑×2 · → · ↑×2 · ←×2 · ↑ · ← · take/drop gem · → · ↓ · → · ↓ · ←×2 · ↓
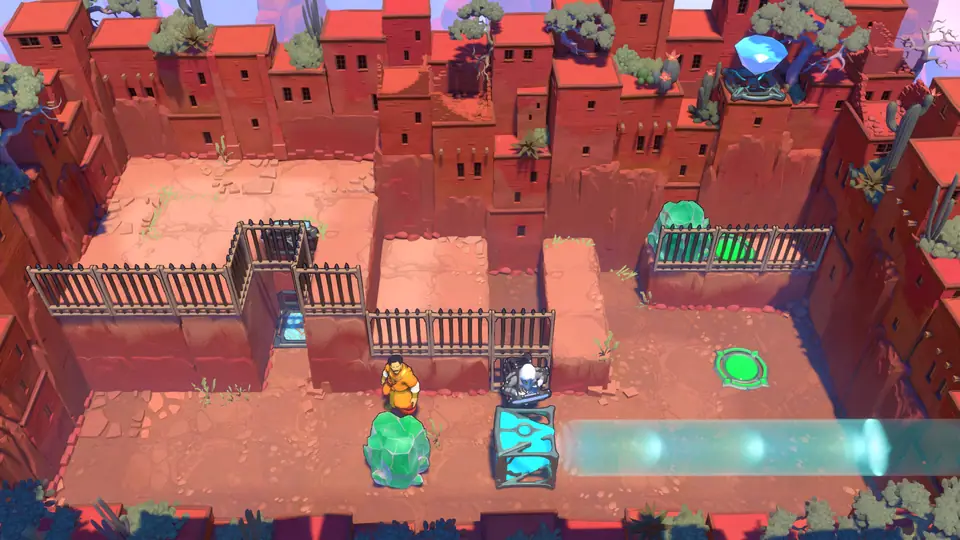 Elevators puzzle 9Full route
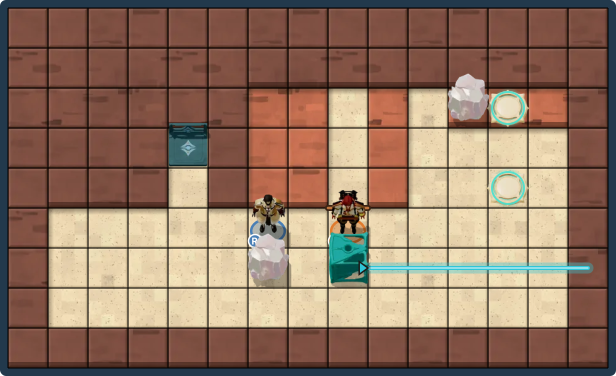
Clues
Use the move list below in order. The layout board shows the route as you step through it.
Full solution · 111 steps
Move sequence · 111 steps
Move order
- Hero
← · ↓ - Gemsman
←×4 · ↑×2 · take/drop gem · → - Hero
↓ · →×4 · ↑ · ←×4 · ↑ · ← · ↑×2 · ↓×2 · → · ↓×2 · ← · ↑×3 - Gemsman
←×3 - Hero
↑ · ↓×2 · ←×2 · ↓ · → · ↓ · → · ↑×3 - Gemsman
→×2 · ← - Hero
↑ · take/drop gem · ↑ · →×2 · ↓ - Gemsman
→×3 · ← - Hero
→×4 · ↓×2 · ←×6 · ↑×2 · take/drop gem · ↑ · ←×3 · ↓×2 · → · ↑ · ← · ↑ · →×6 · ↓ · →×3 · ↑ - Gemsman
↑ · →×2 · ↓ · →×2 · ↑ · →×3 - Hero
↓×2 · →×2
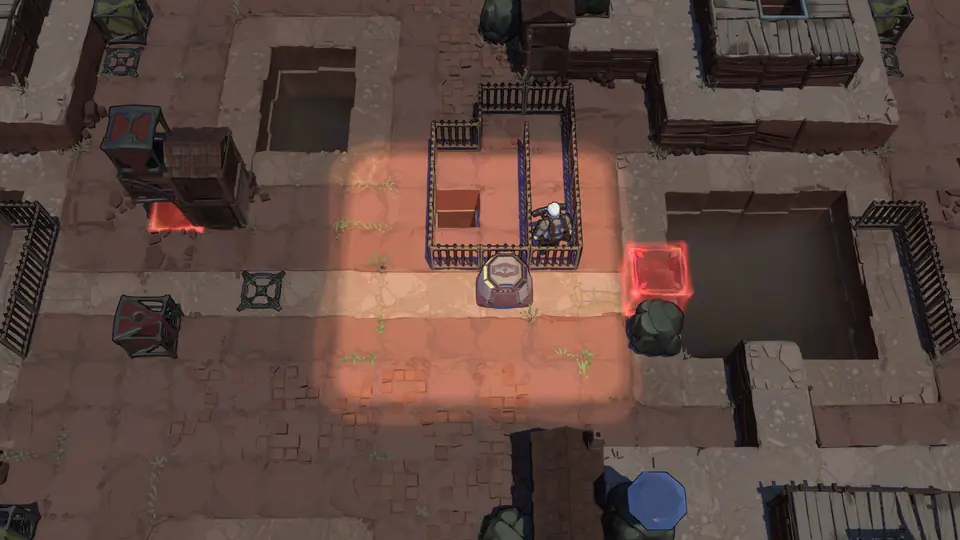 Elevators puzzle 12No route
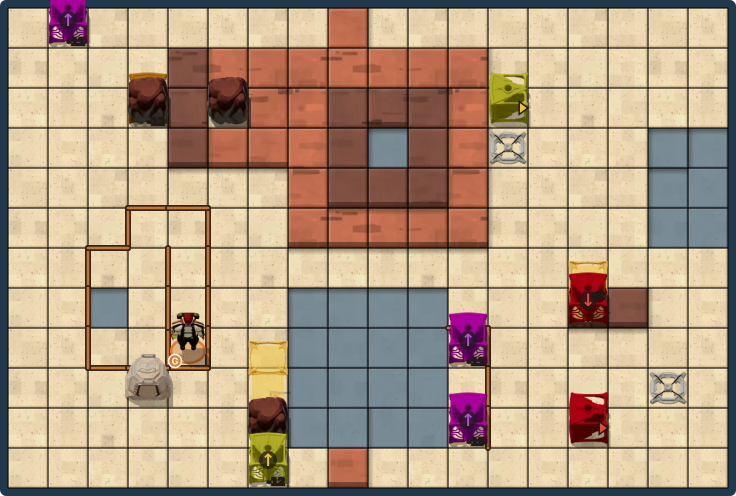
Clues
A complete move-by-move solution is not currently available for this puzzle.
No complete move sequence is listed yet. The board is available to inspect locally.
Strength
Choose a puzzle board
Local solutions
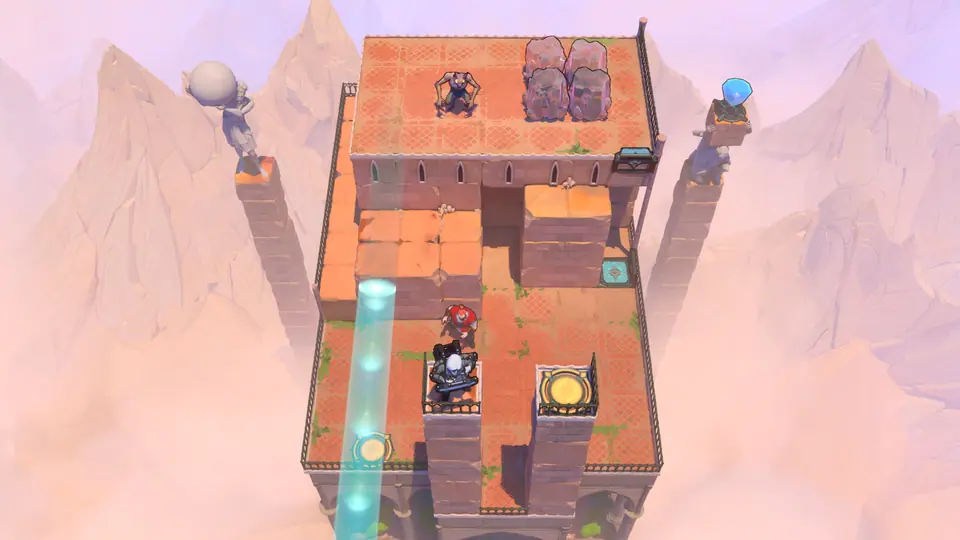 Strength puzzle 1Full route
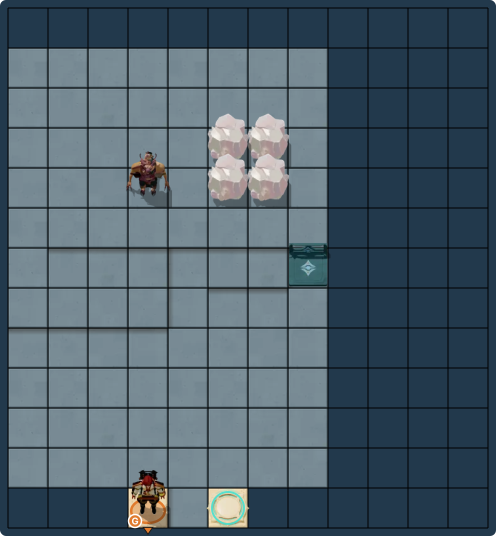
Clues
Use the move list below in order. The layout board shows the route as you step through it.
Full solution · 162 steps
Move sequence · 162 steps
Move order
- Warrior
→×4 · ↑×2 · take/drop gem · ↑×4 · ←×6 · ↓×4 · ← · ↑×5 · →×3 · ←×3 · ↓×7 · →×7 · ↑×2 · take/drop gem · ↑×2 · ← · → · ↑ · ←×2 · ↓×2 · → · ↓ · ← · → · ↓ · → · ↑ · take/drop gem · ↑×3 · ←×2 · ↑ · ←×2 · ↓×2 · ↑ · →×2 · ↓ · ←×2 · ↑×2 · ← · ↓×3 · ← · ↓ · →×2 · ←×2 · ↓ · ← · ↓ · →×7 · ↑×2 · take/drop gem · ↑×2 · ←×5 · ↓ · →×2 · ↑ · → · ↓ · → · ↓ · ← · → · ↓ · → · ↑ · take/drop gem · ↑×3 · ←×2 · ↑ · ← · ↓×3 · → · ↓×2 · → · ↓ · → · ↑×3 · ←×3 · ↓×6 - Gemsman
→×2 - Warrior
←×3
Vertical Endpoints
Choose a puzzle board
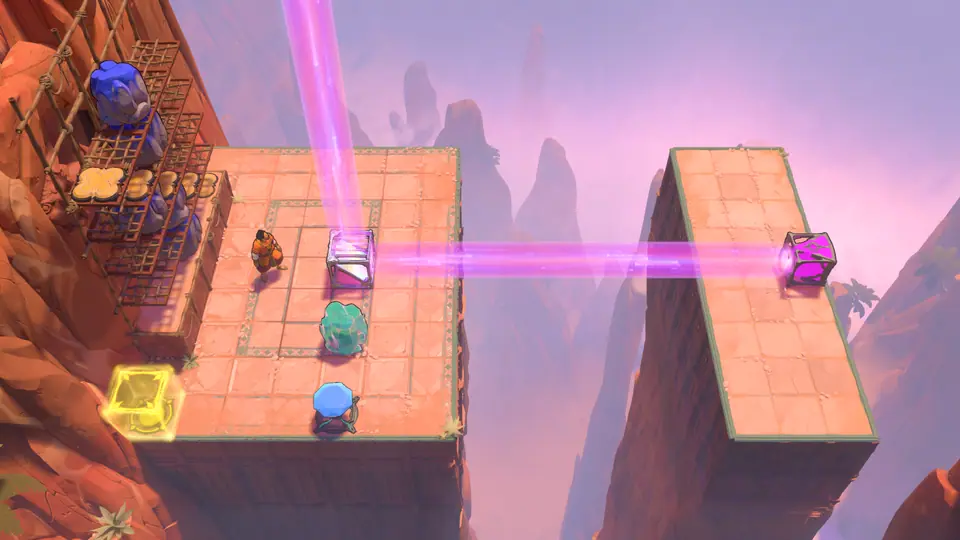 1RouteVertical Endpoints puzzle 1
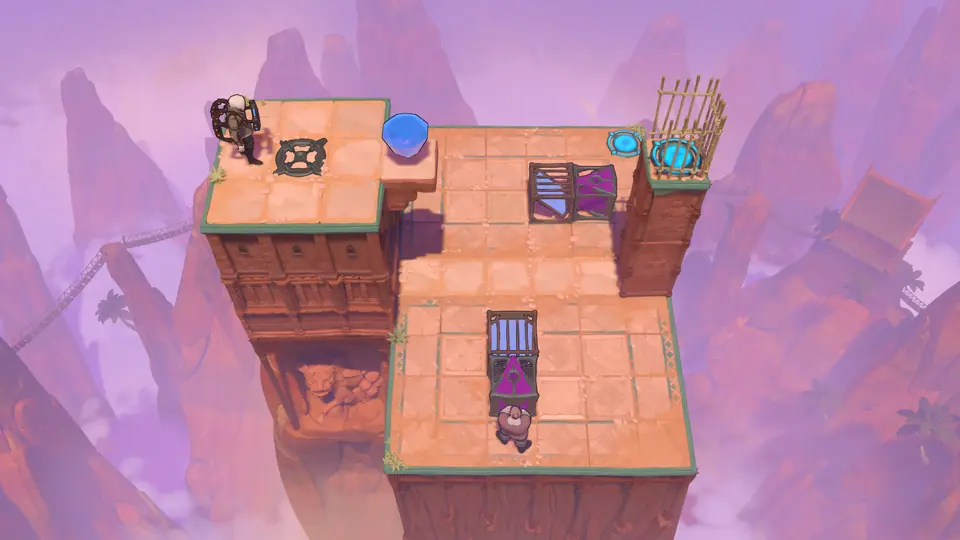 8RouteVertical Endpoints puzzle 8
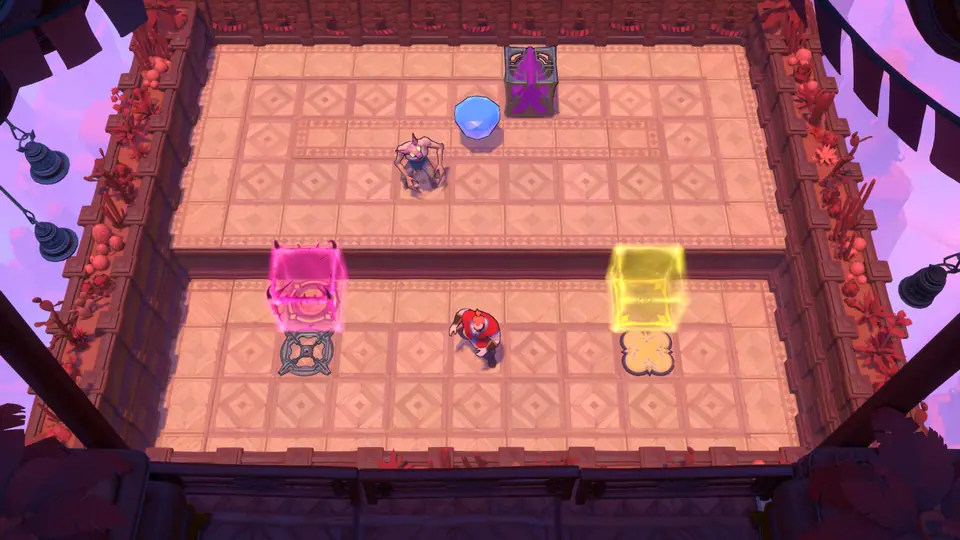 12RouteVertical Endpoints puzzle 12
Local solutions
Vertical Endpoints puzzle 1Full route
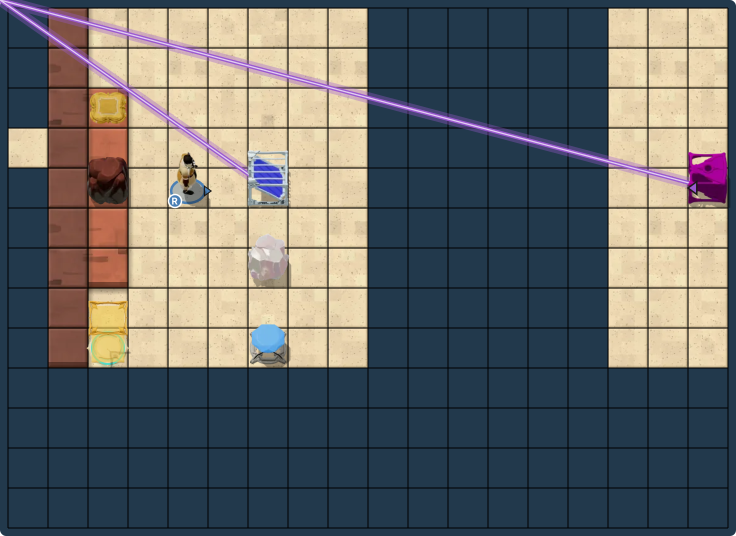
Clues
Use the move list below in order. The layout board shows the route as you step through it.
Full solution · 173 steps
Move sequence · 173 steps
Move order
- Hero
↓×4 · →×2 · ← · ↑×5 · →×2 · ↓ · ←×3 · ↓×3 · →×4 · ↓ · ← · ↑ · ←×3 · ↑×3 · activate · ↓×2 · → · ↑ · ← · ↑ · activate · ↓×2 · → · ↑×2 · ← · ↑ · ↓ · activate · ↑ · ↓ · → · ↓×4 · →×2 · ←×2 · ↑×3 · activate · ← · ↑×2 · →×2 · ↓×3 · ← · ↑×2 · →×4 · ↓×3 · ← · ↑×3 · →×2 · ↓×4 · ← · ↑×5 · activate×2 · ← · ↓ · →×6 · ↑ · activate · ← · ↓×2 · →×5 · ↑×2 · → · ↓ · activate · activate while falling · ↑ · → · ↑ · → · ↓×3 · ↑×3 · ←×2 · ↓×3 · → · ↑×2 · activate · ↑ · ↓×3 · activate · →×3 · ↓ · activate · ← · ↑ · →×3 · ↓ · activate · ← · ↑×2 · →×2 · ↓×4 · ←×2
Vertical Endpoints puzzle 8Full route
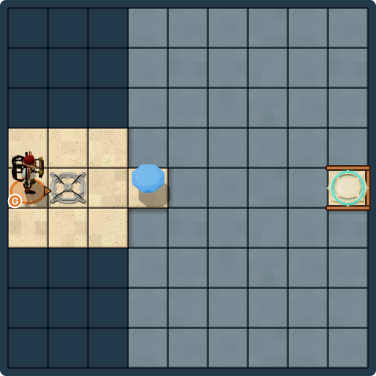
Clues
Use the move list below in order. The layout board shows the route as you step through it.
Full solution · 109 steps
Move sequence · 109 steps
Move order
- Gemsman
→×3 · take/drop gem - Warrior
↑×2 · → · ↑ · ← · → · ↑ · ← · ↑×3 · → · ↓×2 · → · ↓ · ← · ↑×3 · →×2 · ↓ · ← · ↑ · ← · ↓×2 - Gemsman
←×2 · take/drop gem · →×4 - Warrior
↑ · ←×3 · ↓×3 · → · ← · ↑ · → - Gemsman
→ - Warrior
↑ · → · ↓ · ← · ↓×2 · → · ← · ↑ · → · ↓×2 · → · ↑ · → · ↑×2 - Gemsman
↑ - Warrior
↓×2 · ← · ↑ · → · ↑×2 · ↓×2 · ←×2 · ↑×3 · → · ↑ · →×2 · ↓ · ↑ · ← · ↓ - Gemsman
→ - Warrior
← · ↓ · ← · ↓×2 · → · ← · ↑ · → - Gemsman
↓ · → - Warrior
↑×4 · →×2
Vertical Endpoints puzzle 12Full route
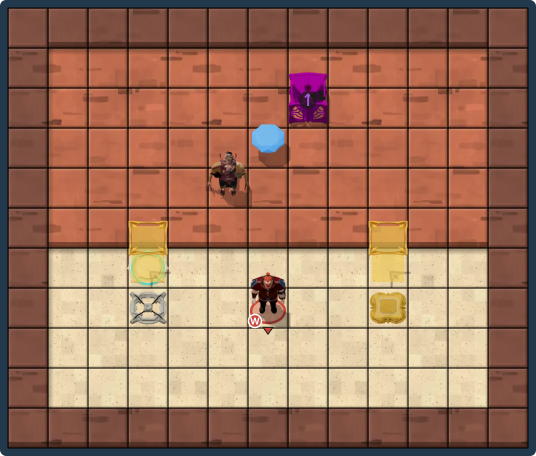
Clues
Use the move list below in order. The layout board shows the route as you step through it.
Full solution · 122 steps
Move sequence · 122 steps
Move order
- Warrior
→×3 · ↑×6 · ←×2 · ↓×4 · → · ↓ · ←×2 · ↓ · →×3 · ↑×3 · ←×2 · ↑ · ← · ↑ · ← · ↓×2 · →×2 · ↓×2 · ← · ↓ · ←×2 · ↑ · →×2 · ↓ · →×3 · ↑×3 · ←×5 · ↓ · →×2 · ← · ↓×2 · →×3 · ↑ · ←×2 · ↓ · →×3 · ↑×3 · ←×3 · ↓ · →×2 · ↑ · → · ↓×2 · ←×3 · ↓ · ←×2 · ↑ · →×4 · ↓×2 · →×2 · ↑ · ←×6 · →×5 · ↓ · ←×5 · ↑×2 · ←
Antipode Low puzzle sets
Low HxM
Activate the HxM Antipode teleporter, then solve any 7 of these 8 puzzles.
Mirrors and Artifacts
Choose a puzzle board
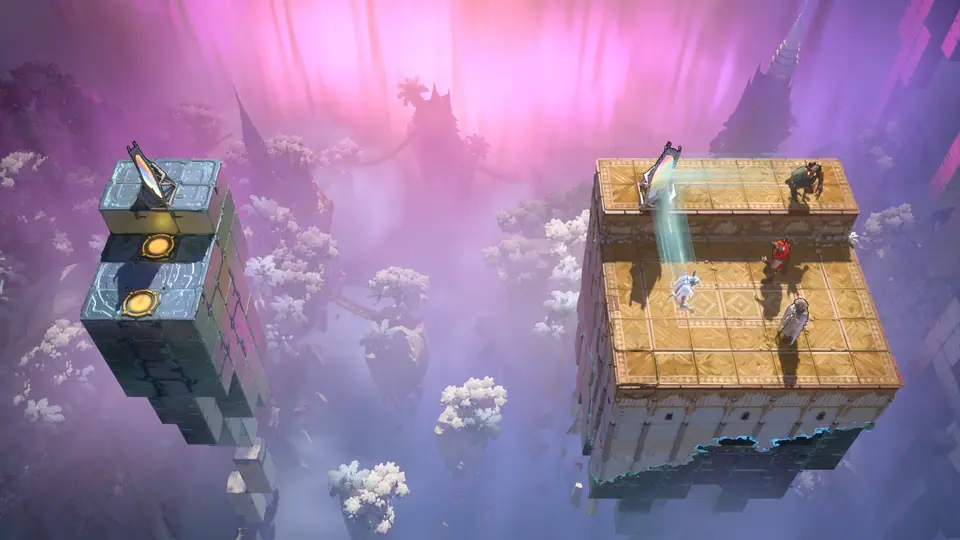 1RouteMirrors and Artifacts puzzle 1
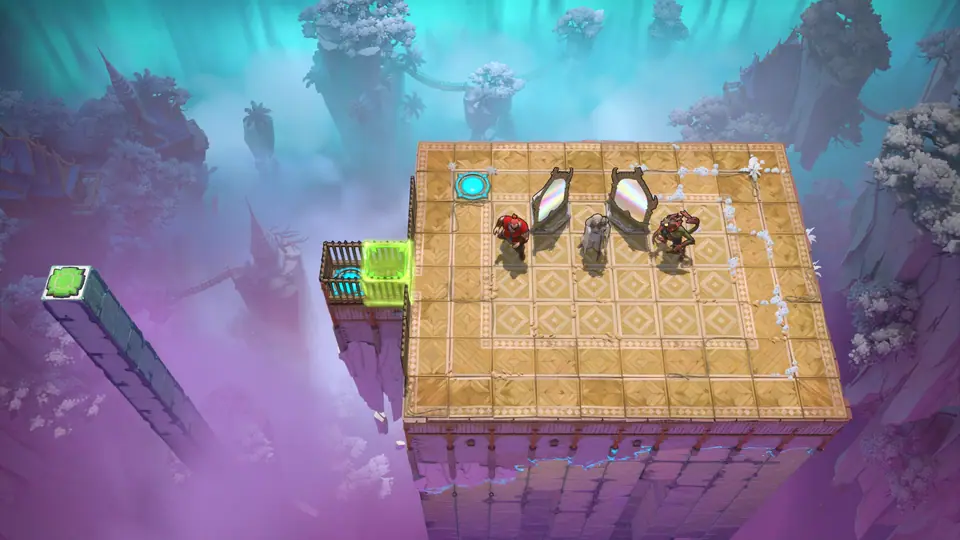 2RouteMirrors and Artifacts puzzle 2
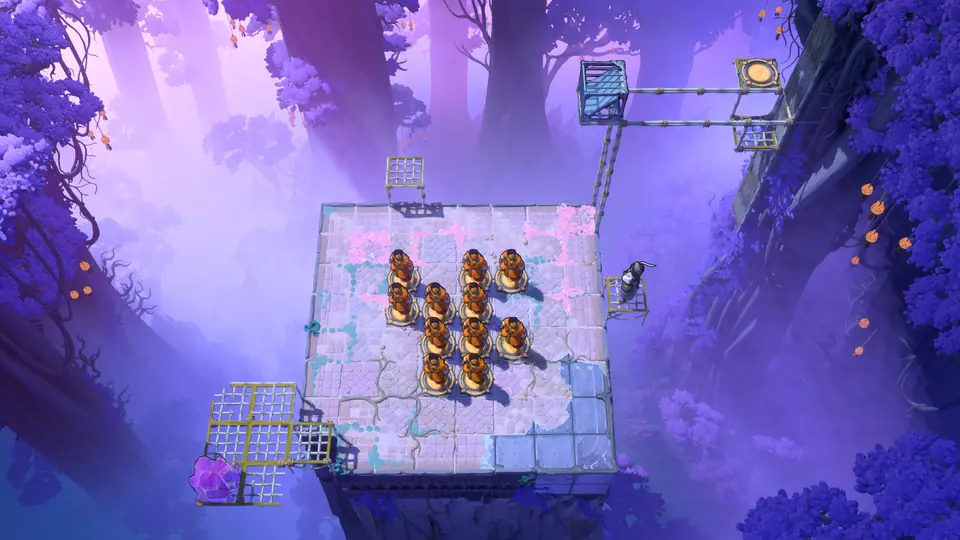 8RouteMirrors and Artifacts puzzle 8
Local solutions
Mirrors and Artifacts puzzle 1Full route
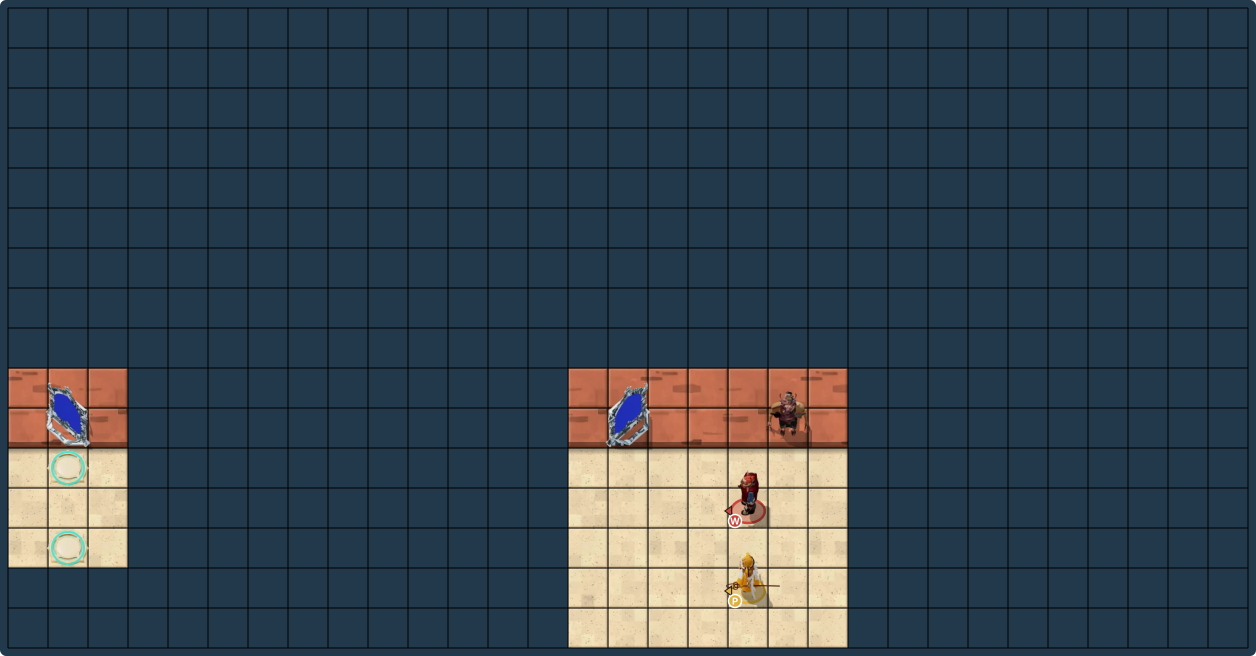
Clues
Use the move list below in order. The layout board shows the route as you step through it.
Full solution · 31 steps
Move sequence · 31 steps
Move order
- Warrior
↓ - Priest
← - Warrior
↓ · ←×2 - Priest
↑ - Warrior
← · activate · ↑ · activate - Priest
← · ↓ · activate - Warrior
←×14 · activate · ↑×2 - Priest
→
Mirrors and Artifacts puzzle 2Full route
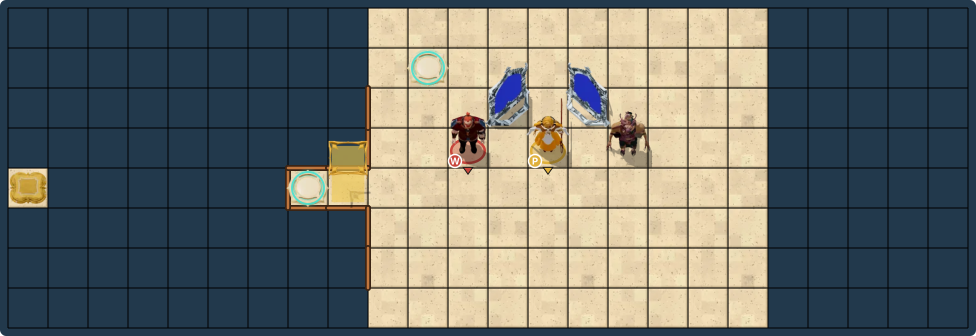
Clues
Use the move list below in order. The layout board shows the route as you step through it.
Full solution · 119 steps
Move sequence · 119 steps
Move order
- Priest
↑ · activate - Warrior
↑ · → · ↑ · → · ↓×2 · ← · ↓ · → · ↑ - Priest
↑×2 · ←×11 · ↓×3 · ↑×3 · →×16 · ↓×3 - Warrior
↓×2 · →×2 · ↑ · ←×2 · ↓ · ← · ↑×3 · ↓ · → - Priest
↑×4 · ←×16 - Warrior
↓ · → - Priest
↓×4 - Warrior
←×7 - Priest
↑×4 · →×13 · ↓ - Warrior
activate - Priest
←×2 · ↑
Mirrors and Artifacts puzzle 8Full route
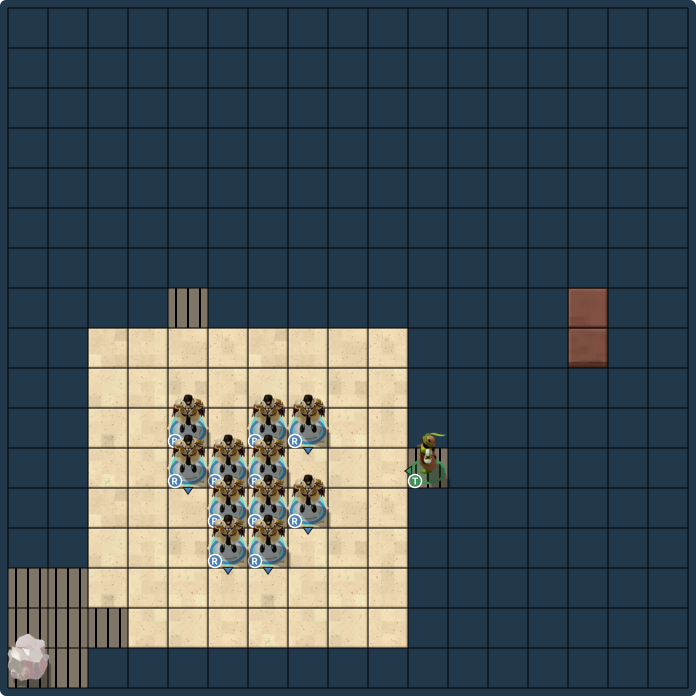
Clues
Use the move list below in order. The layout board shows the route as you step through it.
Full solution · 100 steps
Move sequence · 100 steps
Move order
- Hero
→×2 · ↑ - Thief
←×2 · ↑×2 · → - Hero
←×4 · ↓×3 - Thief
← · ↓×3 · ←×4 · ↑ · → · ↓ · →×3 - Hero
→ · ↑×2 - Thief
↑ · ← · ↑ · → · ↓ · → - Hero
→×3 · ↑ - Thief
→ - Hero
↓×2 - Thief
←×2 · ↓×2 · ← · ↑ · → · ↑ - Hero
←×4 · ↑×3 - Thief
↑ - Hero
→×2 - Thief
↓ - Hero
↓×3 · →×2 - Thief
↓ · → · ↓×2 · → · ↑ · → - Hero
↑×2 - Thief
→ - Hero
↓×2 - Thief
← · → - Hero
↑×3 · activate · ↓×3 - Thief
← - Hero
↑×3 - Thief
activate · ↑ - Hero
↓×2 · ←×2
Mirrors as Obstacles
Choose a puzzle board
Local solutions
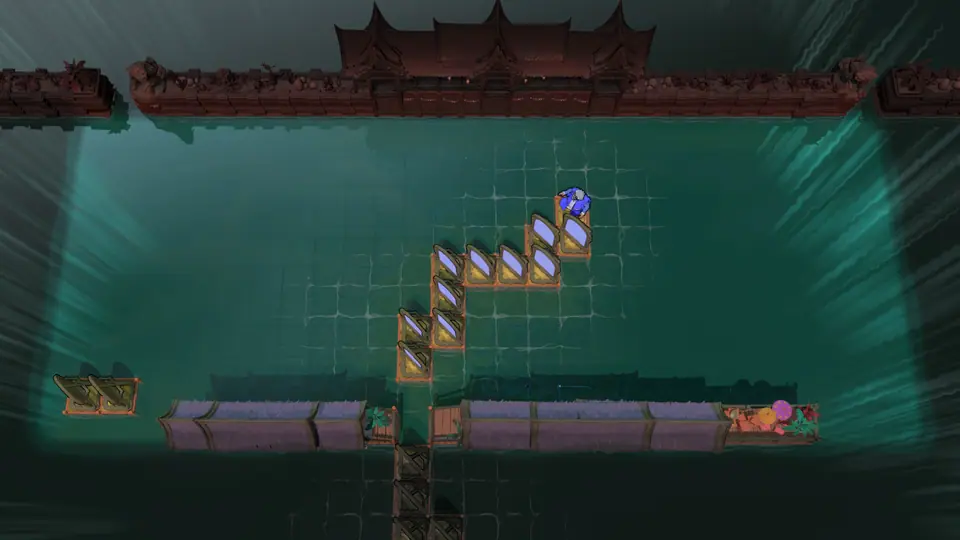 Mirrors as Obstacles puzzle 4Full route
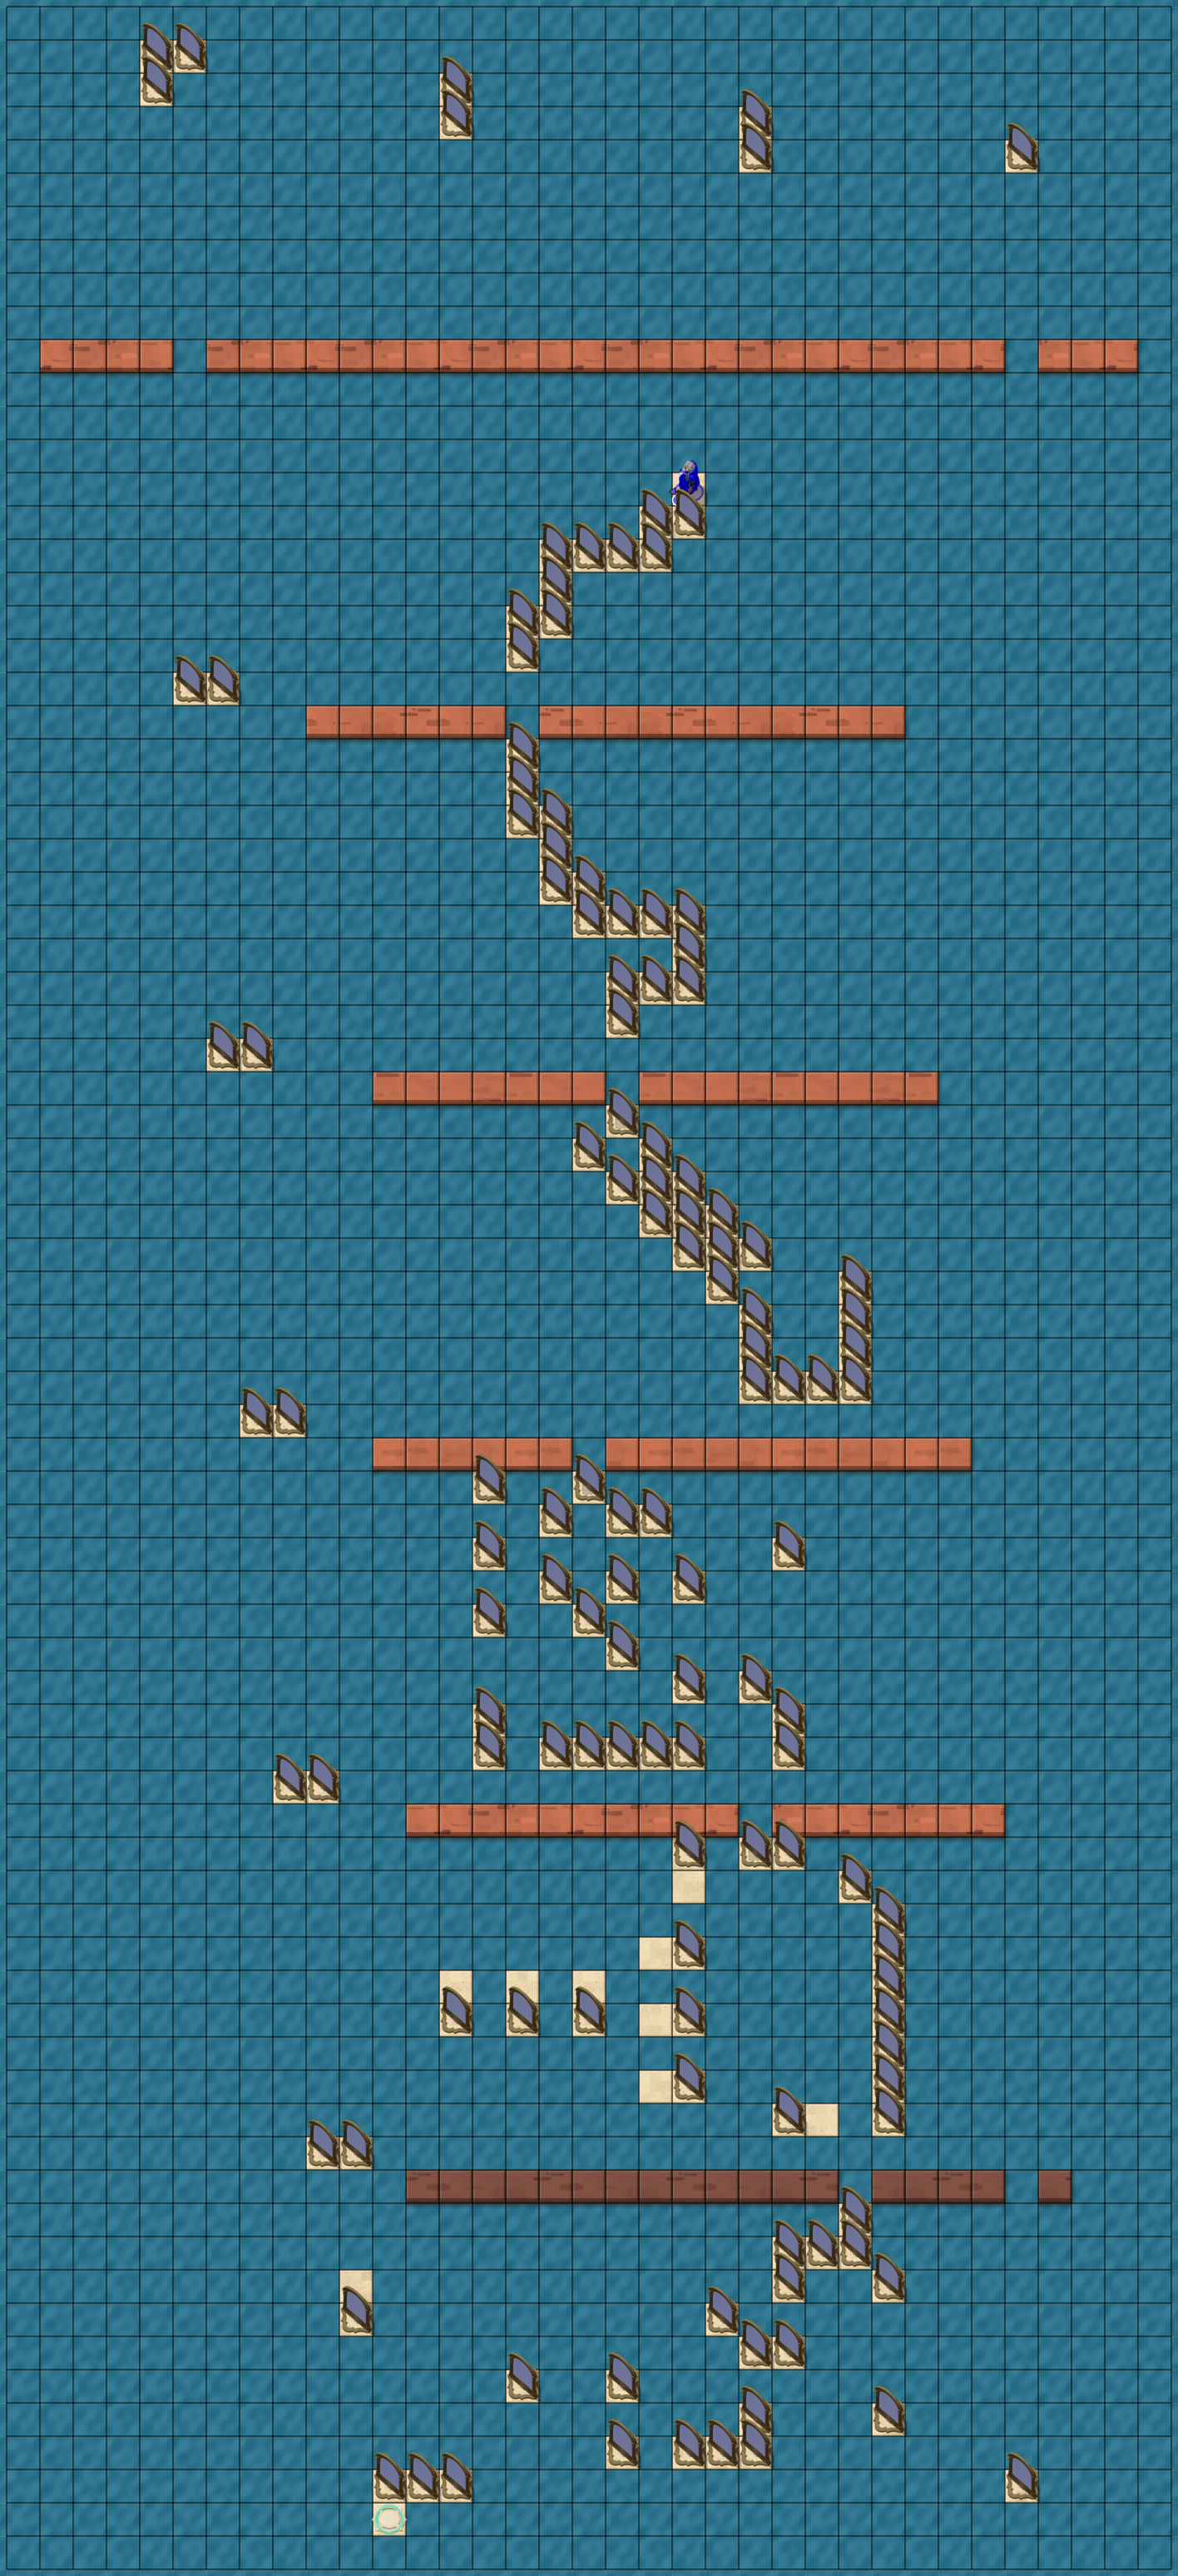
Clues
Use the move list below in order. The layout board shows the route as you step through it.
Full solution · 95 steps
Move sequence · 95 steps
Move order
- Wizard
↓ · ← · ↓ · ←×3 · ↓×2 · ← · ↓×4 · → · ↓ · →×2 · ↓×3 · →×4 · ← · ↑×4 · ↓ · ← · ↓ · → · ↓ · ←×2 · ↑ · ↓ · →×2 · ← · ↓ · ← · → · ↓ · ←×4 · ↑ · → · ←×3 · ↑ · → · ←×2 · ↑ · → · ←×2 · → · ↓ · ←×2 · → · ← · ↑ · ← · ↓ · → · ↓ · ←×2 · ↓ · → · ← · ↓ · ← · ↑×7 · ↓ · →×3 · ←×3 · ↓
Mirrorable Mirror Medley
Choose a puzzle board
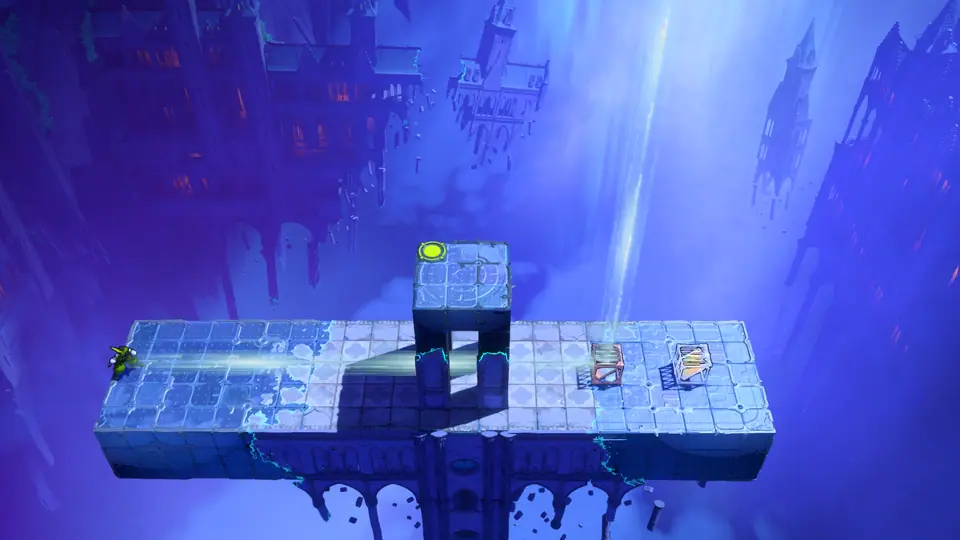 1BoardMirrorable Mirror Medley puzzle 1
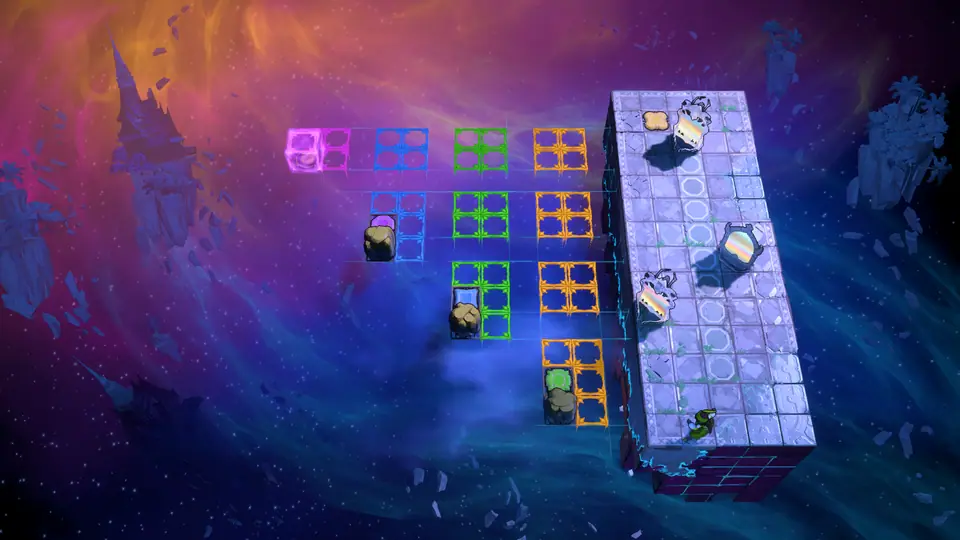 4RouteMirrorable Mirror Medley puzzle 4
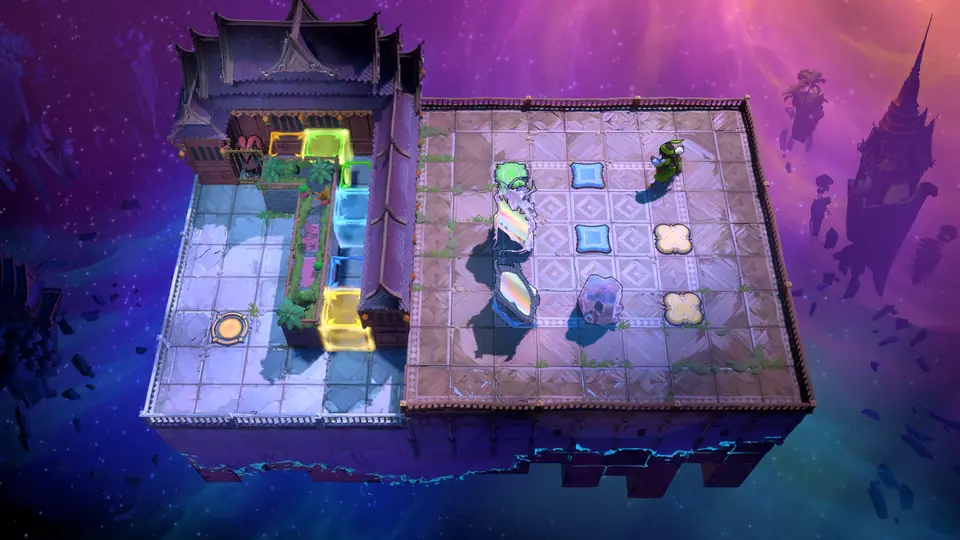 5RouteMirrorable Mirror Medley puzzle 5
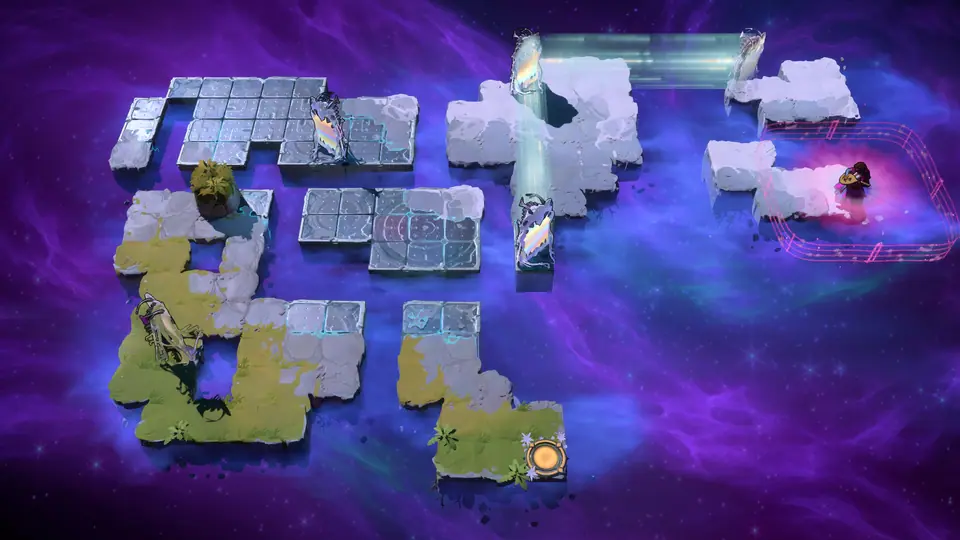 15RouteMirrorable Mirror Medley puzzle 15
Local solutions
Mirrorable Mirror Medley puzzle 1Under review
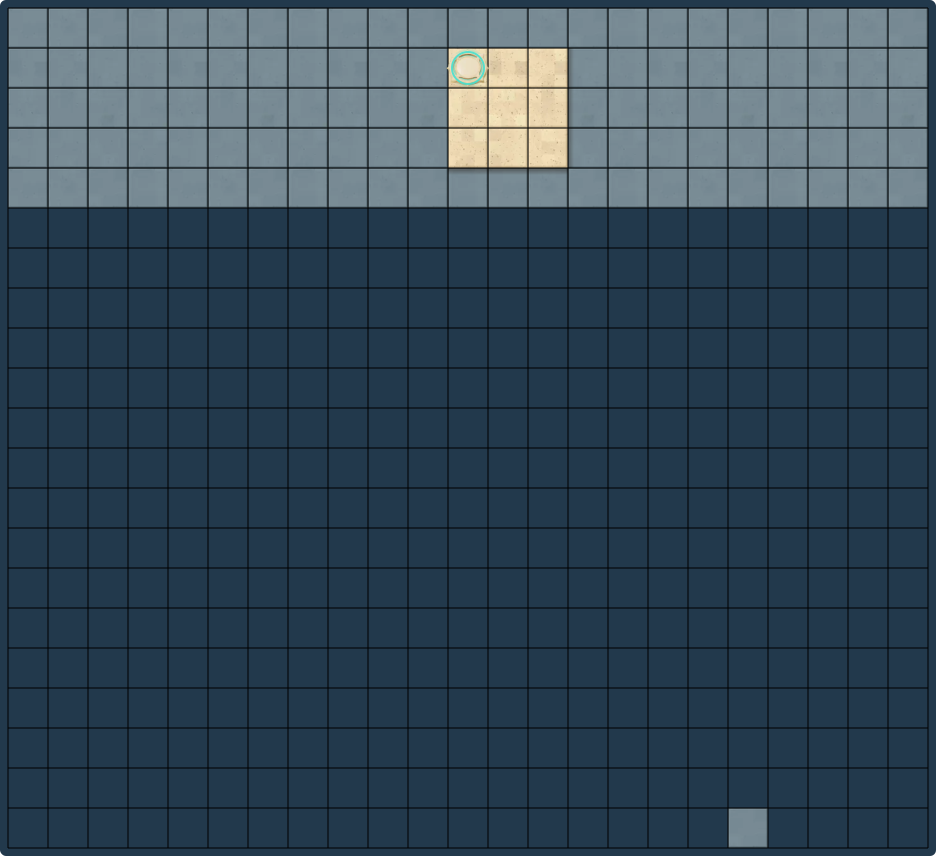
Clues
A complete move-by-move solution is not currently available for this puzzle.
No complete move sequence is listed yet. The board is available to inspect locally.
Mirrorable Mirror Medley puzzle 4Full route
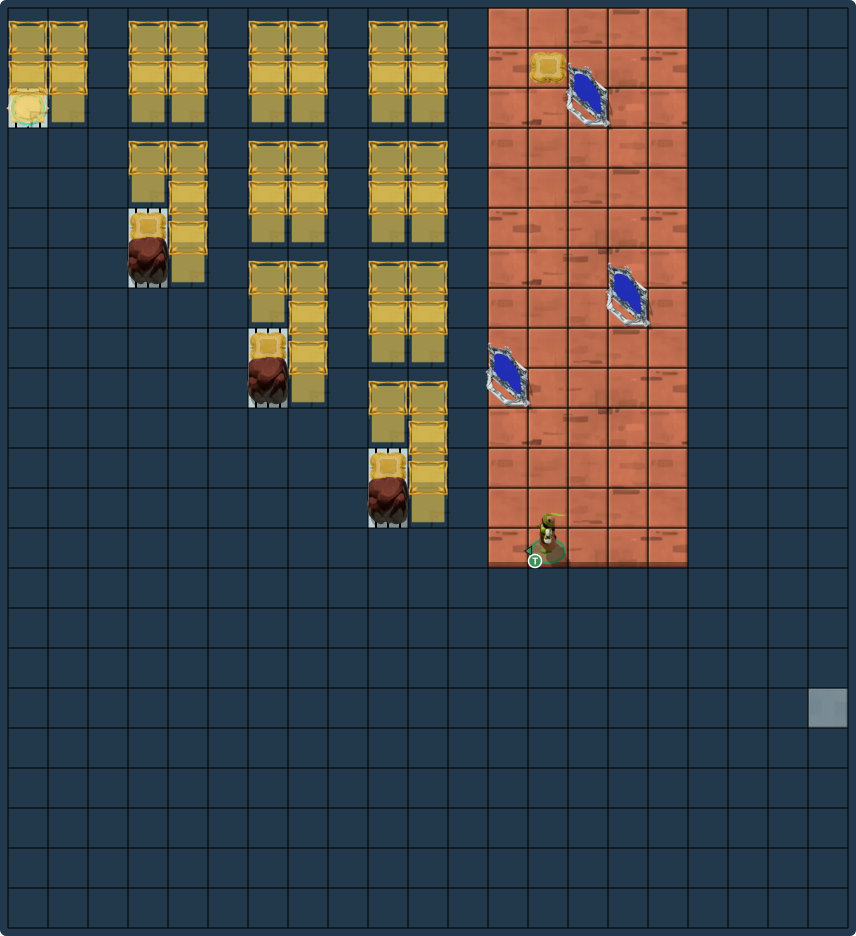
Clues
Use the move list below in order. The layout board shows the route as you step through it.
Full solution · 347 steps
Move sequence · 347 steps
Move order
- Thief
↑, wait 0.583 s×5 · ←, wait 0.567 s · ↑, wait 0.583 s×2 · ↑, wait 0.533 s×5 · →, wait 0.517 s · →, wait 0.583 s×3 · ↓, wait 0.567 s · ↓, wait 0.583 s×4 · ←, wait 0.567 s · ↑, wait 0.583 s×2 · ↑, wait 0.533 s×4 · ←, wait 0.517 s · ↓, wait 0.567 s · ←, wait 0.583 s · ↓, wait 0.583 s×2 · →, wait 0.567 s · →, wait 0.583 s · ↑, wait 0.567 s · →, wait 0.583 s · ↓, wait 0.583 s · ←, wait 0.567 s · ←, wait 0.583 s×2 · ↑, wait 0.567 s · →, wait 0.583 s · activate, wait 0.35 s · ↑, wait 0.533 s · ←, wait 0.583 s · ↓, wait 0.567 s · ↓, wait 0.583 s · →, wait 0.567 s · →, wait 0.583 s · ↓, wait 0.583 s · ↓, wait 0.6 s · ↓, wait 0.583 s×4 · ←, wait 0.55 s · ↑, wait 0.567 s · ↑, wait 0.583 s×5 · →, wait 0.567 s · ←, wait 0.583 s · ↓, wait 0.583 s · ←, wait 0.583 s · ↓, wait 0.567 s · ↑, wait 0.583 s×2 · ←, wait 0.6 s · activate, wait 0.217 s · ↓, wait 0.583 s · ↓, wait 0.6 s · →, wait 0.567 s · ↑, wait 0.567 s · ←, wait 0.583 s · →, wait 0.567 s · activate, wait 0.217 s · ←, wait 0.517 s · ↑, wait 0.567 s · ↑, wait 0.583 s · →, wait 0.567 s · →, wait 0.583 s · ↓, wait 0.583 s×2 · ↓, wait 0.533 s · ←, wait 0.517 s · activate, wait 0.217 s · ↑, wait 0.583 s×2 · →, wait 0.567 s · ↑, wait 0.583 s×2 · ←, wait 0.517 s · ↓, wait 0.567 s · ↓, wait 0.583 s×2 · →, wait 0.567 s · ↑, wait 0.583 s · ←, wait 0.583 s · ↓, wait 0.567 s · ↑, wait 0.567 s · ↑, wait 0.583 s×2 · →, wait 0.567 s · ↑, wait 0.583 s · →, wait 0.583 s · ↓, wait 0.567 s · ↓, wait 0.583 s×3 · →, wait 0.583 s · ↓, wait 0.583 s×2 · ←, wait 0.567 s · ←, wait 0.583 s · ↑, wait 0.567 s · ←, wait 0.583 s · ↑, wait 0.583 s · →, wait 0.567 s · ↑, wait 0.583 s · →, wait 0.583 s×2 · activate, wait 0.417 s · ↓, wait 0.567 s · →, wait 0.583 s · ↑, wait 0.583 s · ←, wait 0.567 s · ←, wait 0.583 s · ↓, wait 0.567 s · ↑, wait 0.6 s · ↑, wait 0.567 s · →, wait 0.517 s · ↓, wait 0.567 s · ↑, wait 0.6 s · ↑, wait 0.567 s · ←, wait 0.517 s · ↓, wait 0.567 s · ←, wait 0.583 s · ↓, wait 2.85 s · ↓, wait 0.583 s · →, wait 0.583 s×2 · ↑, wait 0.567 s · ↑, wait 0.583 s×2 · ←, wait 0.567 s · ←, wait 0.583 s · ↓, wait 0.567 s · ↑, wait 0.6 s · ↑, wait 0.567 s · →, wait 0.517 s · →, wait 0.583 s · ↓, wait 0.567 s · ↓, wait 0.583 s×2 · activate, wait 0.217 s · ↑, wait 0.567 s · →, wait 0.583 s · ↓, wait 0.583 s · activate, wait 0.217 s · ←, wait 0.567 s · ←, wait 0.583 s · ↓, wait 0.567 s · ←, wait 0.583 s · ↓, wait 0.583 s · →, wait 0.567 s · ↓, wait 0.583 s×2 · ↓, wait 0.533 s×5 · →, wait 0.517 s · ↑, wait 0.567 s · ↑, wait 0.583 s×8 · ↓, wait 0.583 s · ←, wait 0.583 s · ↑, wait 0.567 s · ←, wait 0.583 s · ↓, wait 0.583 s · →, wait 0.567 s · ↓, wait 0.583 s×2 · ↓, wait 0.533 s×2 · →, wait 0.517 s · activate, wait 0.417 s · ↑, wait 0.567 s · ↑, wait 0.583 s×4 · →, wait 0.567 s · ↑, wait 0.567 s · ←, wait 0.567 s · ↓, wait 0.567 s · ←, wait 0.567 s · activate, wait 0.217 s · ↓, wait 0.567 s · ↓, wait 0.583 s×2 · ↑, wait 0.583 s×2 · ↑, wait 0.533 s×4 · →, wait 0.517 s · ↓, wait 0.567 s · →, wait 0.583 s · ↓, wait 0.583 s · ←, wait 0.567 s · ↓, wait 0.583 s · →, wait 0.583 s · activate, wait 0.217 s×2 · ←, wait 0.567 s · ←, wait 0.583 s · ↓, wait 0.567 s · ←, wait 0.583 s · ↓, wait 0.583 s · →, wait 0.567 s · ↓, wait 0.583 s×2 · ↓, wait 0.533 s×2 · →, wait 0.517 s · ↑, wait 0.567 s · ↑, wait 0.583 s×5 · →, wait 0.567 s · activate, wait 0.217 s×2 · ←, wait 0.567 s · ←, wait 0.583 s · ↓, wait 0.567 s · ←, wait 0.583 s · ↓, wait 0.583 s · →, wait 0.567 s · ↓, wait 0.583 s×2 · →, wait 0.517 s · ↑, wait 0.567 s · ↑, wait 0.583 s×3 · →, wait 0.567 s · activate, wait 0.217 s×2 · ↓, wait 0.567 s · ↓, wait 0.583 s · ←, wait 0.567 s · ↓, wait 0.583 s×2 · →, wait 0.517 s · ↑, wait 0.567 s · ↑, wait 0.583 s×2 · ←, wait 0.567 s · ↑, wait 0.567 s · ↓, wait 0.6 s · →, wait 0.583 s · activate, wait 0.217 s · ↓, wait 0.567 s · ↓, wait 0.583 s · ←, wait 0.567 s · ↑, wait 0.583 s · ←, wait 0.583 s · ↓, wait 0.567 s · ←, wait 0.583 s · ↓, wait 0.583 s · →, wait 0.567 s · →, wait 0.583 s · ↑, wait 0.567 s · ↑, wait 0.583 s×2 · ↓, wait 0.583 s×2 · ↓, wait 0.533 s×5 · ←, wait 0.517 s · ↑, wait 0.567 s · ←, wait 0.583 s×2 · ↑, wait 0.517 s · ↑, wait 0.583 s · →, wait 0.567 s · →, wait 0.583 s×3 · ↑, wait 0.567 s · ↑, wait 0.583 s×2 · activate, wait 3.017 s · ←, wait 0.583 s×2 · ↑, wait 0.583 s×2 · →, wait 0.517 s · ↓, wait 0.567 s · ↓, wait 0.583 s×8 · ←, wait 0.567 s · ←, wait 0.583 s · ↓, wait 0.567 s · activate, wait 0.567 s · ←, wait 0.583 s · ↓, wait 0.567 s · ↑, wait 0.6 s · →, wait 0.583 s · activate, wait 0.217 s · ↓, wait 0.583 s · ←, wait 0.567 s · ↑, wait 0.583 s · →, wait 0.583 s · ↓, wait 0.567 s · activate, wait 0.217 s · ↓, wait 0.583 s · activate, wait 0.217 s · ↑, wait 0.583 s · →, wait 0.583 s · activate, wait 0.217 s · ←, wait 0.583 s · ↓
Mirrorable Mirror Medley puzzle 5Full route
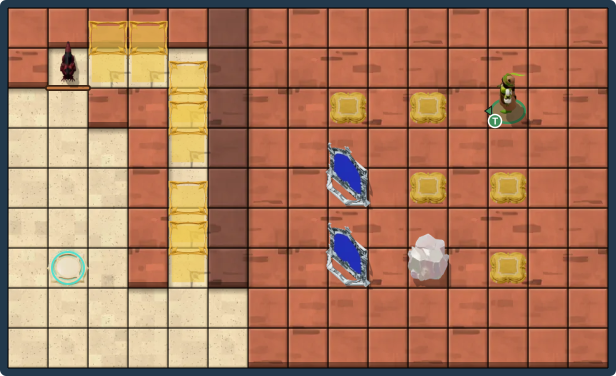
Clues
Use the move list below in order. The layout board shows the route as you step through it.
Full solution · 346 steps
Move sequence · 346 steps
Move order
- Thief
←×3 · ↓×2 · →×2 · ↓×3 · ← · ↓ · ← · ↑ · ←×2 · ↑×2 · →×2 · ↑ · ← · ↓ · → · ↓×3 · → · activate · → · ↑ · ← · ↑×4 · ← · ↓×3 · ↑ · activate · → · ↓×2 · ← · ↓ · → · activate · →×3 · ↑ · ← · ↑×4 · ← · ↓×2 · ← · ↑×2 · ← · ↓×3 · ↑ · activate · →×2 · ↓×2 · ←×2 · ↓ · → · activate · ↑×2 · ← · ↑ · ← · ↑×4 · → · ↓ · →×2 · ↑ · ←×2 · ↓×4 · ↑×5 · ← · ↓ · ← · ↓×4 · → · ↓ · →×2 · ↑ · ← · ↑×3 · ←×2 · ↑×2 · →×4 · ↓×3 · ← · →×2 · ↑ · ←×3 · →×2 · ↑ · →×2 · ↓×6 · ←×5 · ↓ · ←×2 · ↑ · → · ↑×7 · →×5 · ↓ · → · ↓×3 · ← · ↓ · → · ↑×2 · ←×2 · ↓×4 · → · ↑ · → · ↑×5 · ←×2 · ↓ · →×2 · ↑ · ←×4 · →×2 · ↑ · ←×2 · ↓×2 · → · ↓ · ← · ↑×2 · → · ↑ · → · ↓×2 · ← · ↓ · →×2 · ↑ · → · ↑ · ←×2 · ↑ · ←×2 · ↓×2 · → · ↓ · ← · ↓×2 · →×2 · ↓×3 · → · ↑×5 · ←×3 · ↓×2 · →×2 · ↑×2 · ↓×2 · → · ↑ · →×2 · ↓×4 · ←×2 · ↑ · →×2 · ↑×3 · activate×6 · ↓ · ←×4 · ↓×3 · ←×3 · ↑ · ←×3 · → · ↑×3 · activate · ↑×3 · activate · ←×2 · →×2 · activate×6 · ←×3 · ↓ · →×3 · activate×5 · ↓×3 · activate×5 · ↓×3 · ←×2 · ↑ · ←
Mirrorable Mirror Medley puzzle 15Full route
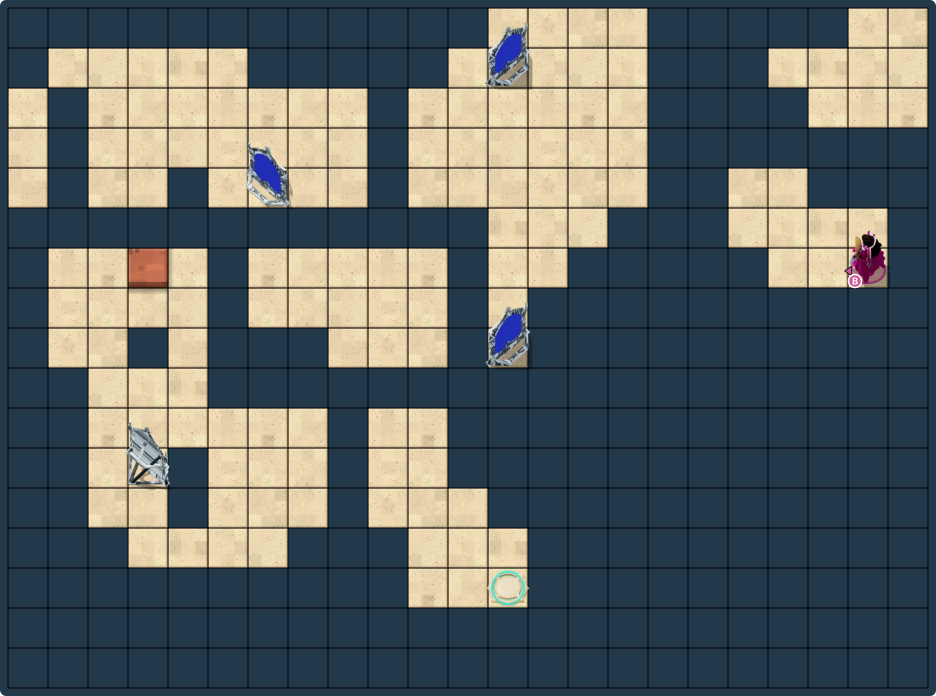
Clues
Use the move list below in order. The layout board shows the route as you step through it.
Full solution · 64 steps
Move sequence · 64 steps
Move order
- Bard
↑ · ←×2 · ↑ · activate×2 · ←×2 · activate · ← · activate · ↑×5 · ← · ↓ · ← · activate · ↓×2 · activate · ← · ↓ · ←×3 · ↑ · → · activate · ↑×2 · ←×2 · ↑ · ←×2 · activate · ← · ↓ · activate · ↓×2 · activate · ↓ · → · activate · ←×2 · ↑ · →×2 · ↓×2 · activate · →×2 · activate · →×2 · ↓ · → · ↓
Low HxS
Activate the HxS Antipode teleporter, then solve all 6 listed puzzles.
Bard and Water
Choose a puzzle board
Local solutions
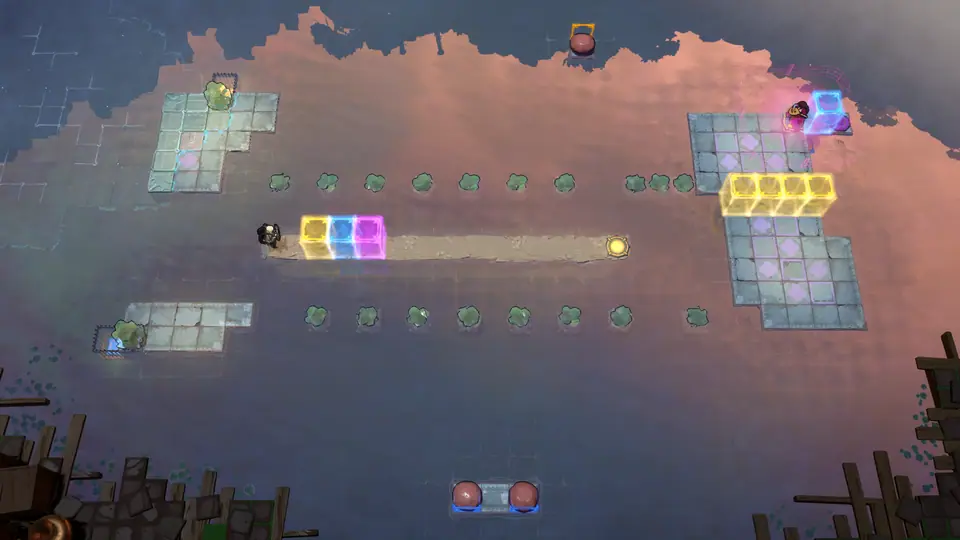 Bard and Water puzzle 4No route
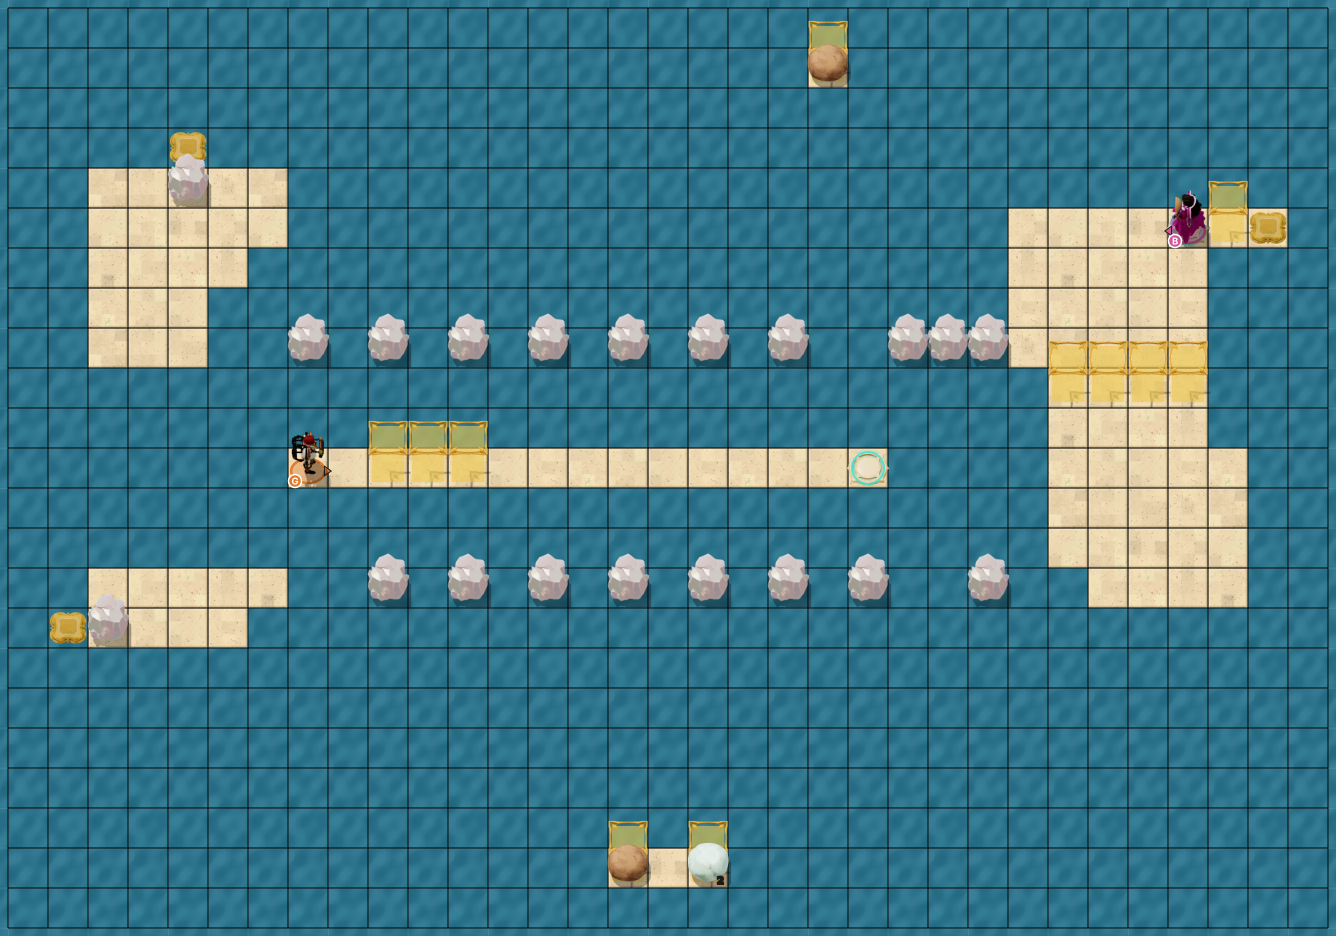
Clues
A complete move-by-move solution is not currently available for this puzzle.
No complete move sequence is listed yet. The board is available to inspect locally.
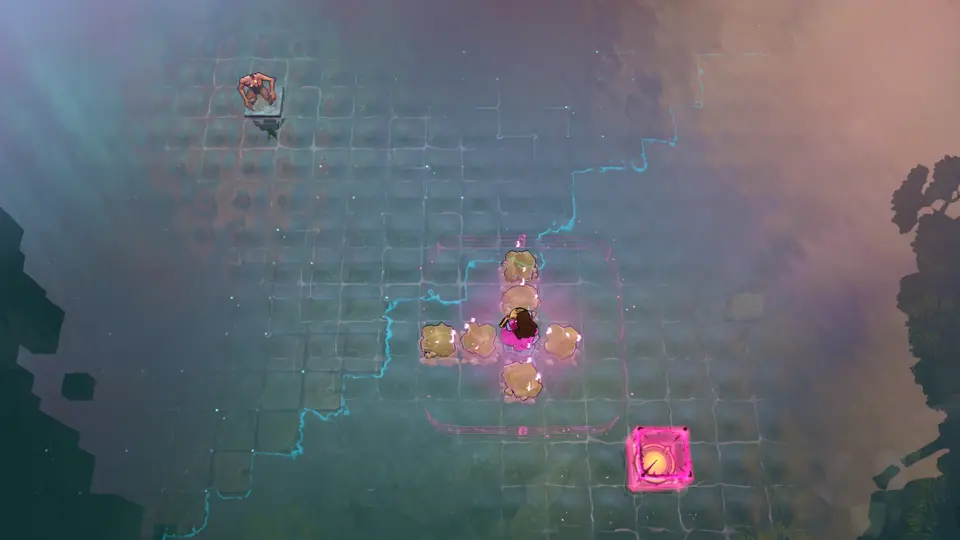 Bard and Water puzzle 9Full route
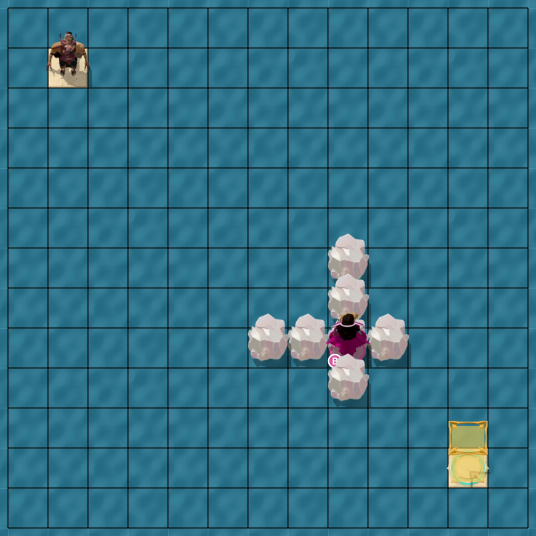
Clues
Use the move list below in order. The layout board shows the route as you step through it.
Full solution · 49 steps
Move sequence · 49 steps
Move order
- Bard
↑×2 · ↓ · ↑ · ↓ · ↑ · ↓ · ↑ · ↓ · ↑ · ↓×3 · ↑ · ↓ · ↑×2 · ←×2 · → · ← · →×3 · ← · → · ← · → · ← · → · ← · → · ← · → · ← · → · ← · → · ←×3 · → · ↓×2 · ↑ · ↓ · ↑ · ↓×2
Moving the Flat Things
Choose a puzzle board
Local solutions
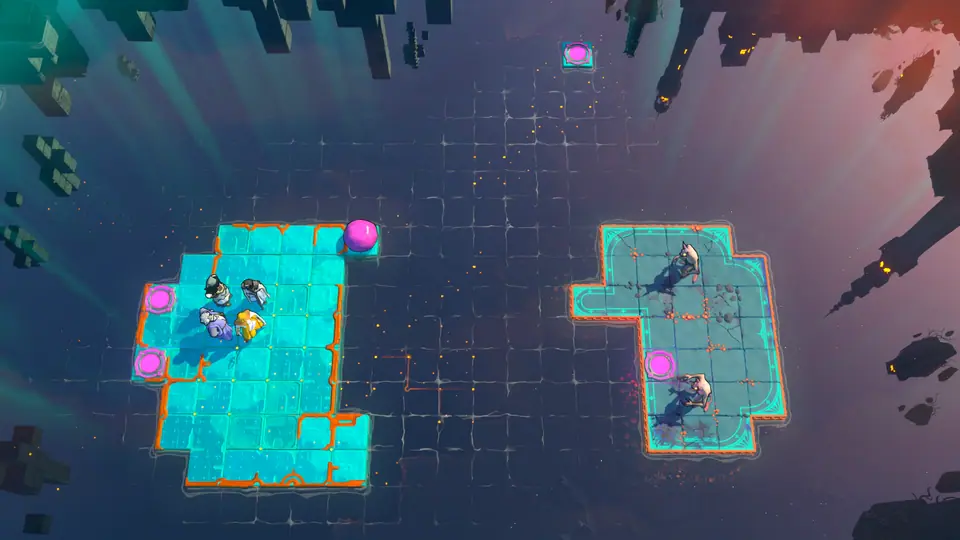 Moving the Flat Things puzzle 10No route
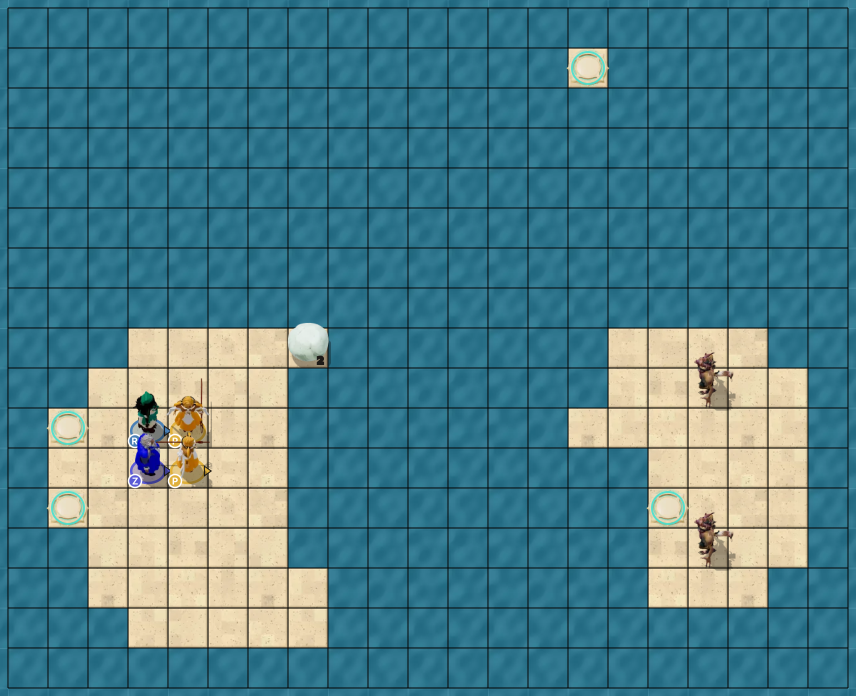
Clues
A complete move-by-move solution is not currently available for this puzzle.
No complete move sequence is listed yet. The board is available to inspect locally.
Endpoint Skipping
Choose a puzzle board
Local solutions
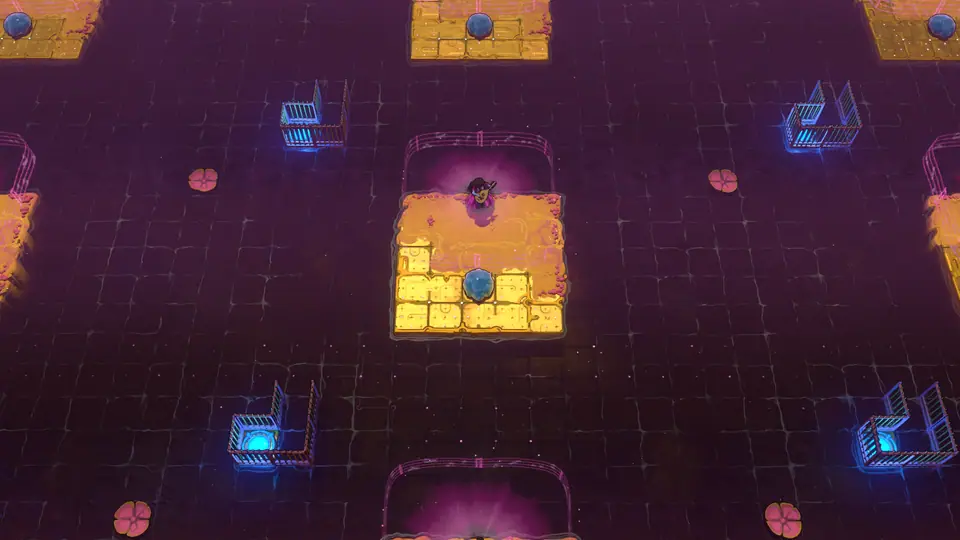 Endpoint Skipping puzzle 17Full route
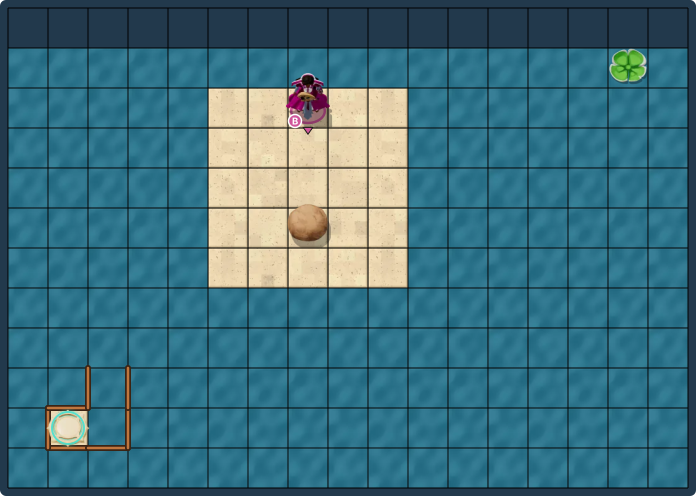
Clues
Use the move list below in order. The layout board shows the route as you step through it.
Full solution · 245 steps
Move sequence · 245 steps
Move order
- Bard
wait 0.8 s, ←, wait 1 s · ↓, wait 1 s · ↓, wait 1.4 s×2 · ↑, wait 1 s · wait 1.28 s×8 · →, wait 1.4 s×3 · wait 1.28 s×12 · ←, wait 1 s×2 · ←, wait 1.4 s · ←, wait 1 s · wait 1.28 s×12 · →, wait 1 s×2 · wait 1.28 s×18 · →, wait 1.4 s · wait 1.28 s×16 · ←, wait 1 s×2 · ←, wait 1.4 s · ↑, wait 1 s×2 · ←, wait 1 s · →, wait 4 s · ↓, wait 1 s×2 · wait 1.28 s×12 · →, wait 1 s×2 · ↓, wait 1.4 s · →, wait 1.4 s · ↑, wait 1 s×3 · ←, wait 1 s×2 · wait 1.28 s×14 · ←, wait 1.4 s · ↓, wait 1 s×3 · →, wait 1 s×4 · wait 1.28 s×12 · ←, wait 1.4 s×4 · ↑, wait 1.4 s · wait 1.28 s×2 · ↑, wait 1.4 s · wait 1.28 s×8 · →, wait 1 s×3 · ↓, wait 1 s×3 · ←, wait 1 s · wait 1.28 s×22 · ←, wait 1.4 s · →, wait 1 s · wait 1.28 s×35 · →, wait 1.4 s · ←, wait 1 s×3 · ↓, wait 1 s · wait 1.28 s · ←, wait 4 s · wait 1.28 s×10 · ←, wait 0.278 s
Mirrors and Rivers
Choose a puzzle board
Local solutions
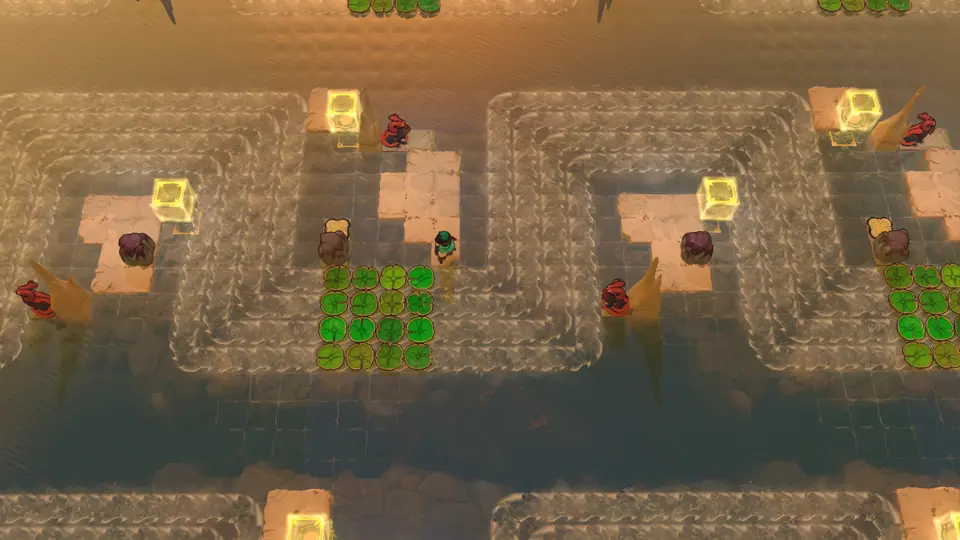 Mirrors and Rivers puzzle 3Under review
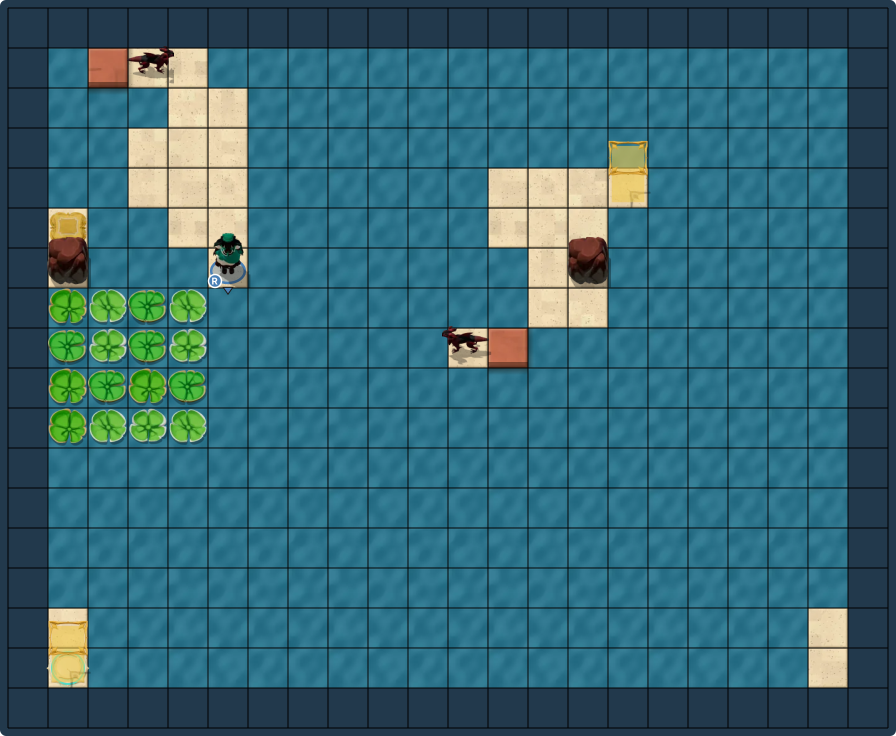
Clues
A complete move-by-move solution is not currently available for this puzzle.
No complete move sequence is listed yet. The board is available to inspect locally.
Crossroads Low
Choose a puzzle board
Local solutions
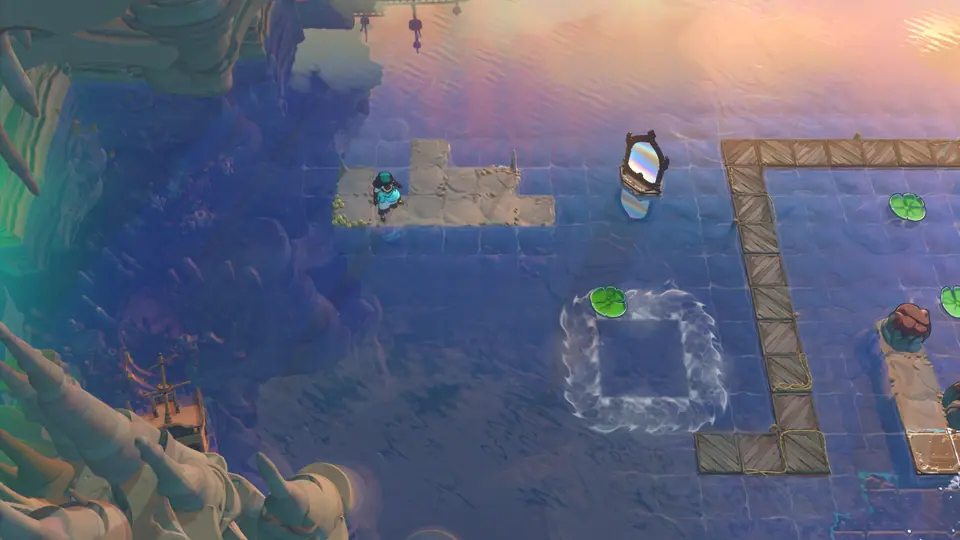 Crossroads Low puzzle 3No route

Clues
A complete move-by-move solution is not currently available for this puzzle.
No complete move sequence is listed yet. The board is available to inspect locally.
Low HxB
Activate the HxB Antipode teleporter, then solve any 8 of these 9 puzzles.
Exit Low
Choose a puzzle board
Local solutions
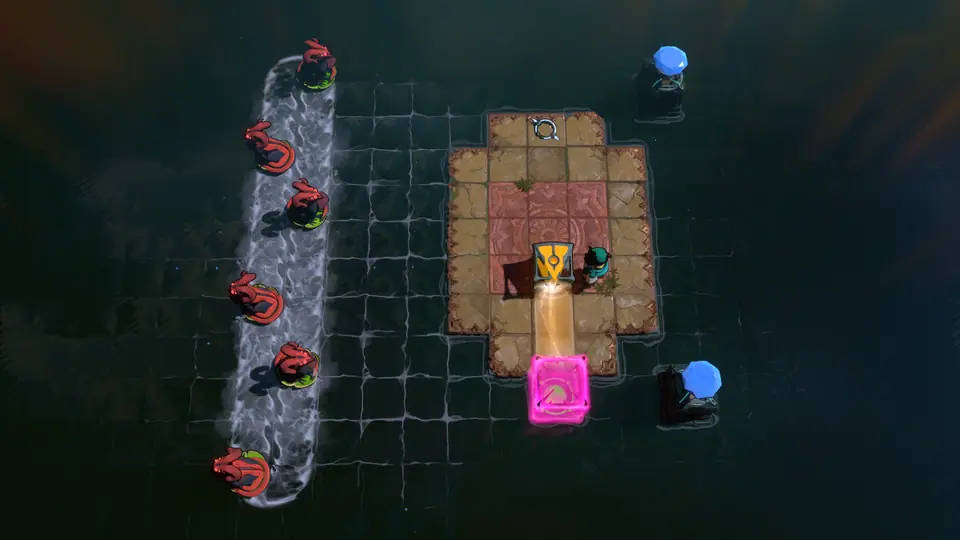 Exit Low puzzle 41Full route
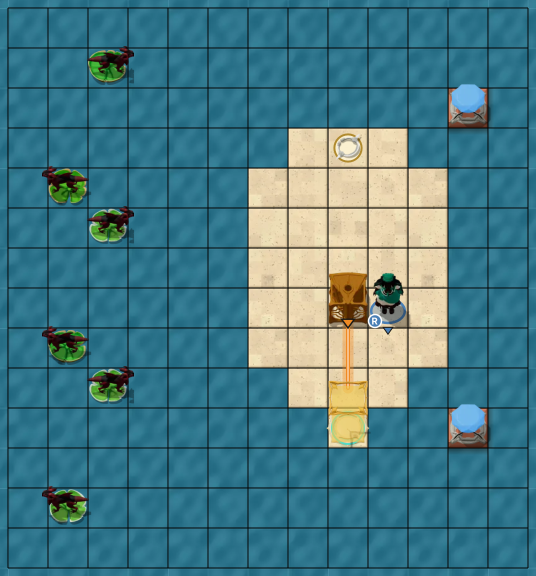
Clues
Use the move list below in order. The layout board shows the route as you step through it.
Full solution · 59 steps
Move sequence · 59 steps
Move order
- Hero
wait 0.8 s, ↓, wait 1.6 s · ↓, wait 1.6 s · ←, wait 1.6 s · ↑, wait 2 s · →, wait 1.6 s · ↑, wait 1.6 s · wait 2 s · wait 0.2 s×4 · ↓, wait 1.6 s×2 · ←, wait 1.6 s×2 · ↑, wait 2 s · →, wait 1.6 s · ↑, wait 1.6 s · wait 2 s · ↓, wait 1.6 s×2 · ←, wait 1.6 s×2 · ↑, wait 2 s · wait 2 s · ↑, wait 1.6 s · →, wait 1.6 s · ↓, wait 1.6 s · ←, wait 2 s · activate, wait 1.6 s · wait 2 s×6 · ↓, wait 1.6 s · ←, wait 1.6 s · activate, wait 1.6 s · →, wait 1.6 s · ↑, wait 1.6 s · wait 2 s×11 · wait 2.76 s · ↓, wait 1.6 s×5 · ↓, wait 0.278 s
Bard and Water
Choose a puzzle board
Local solutions
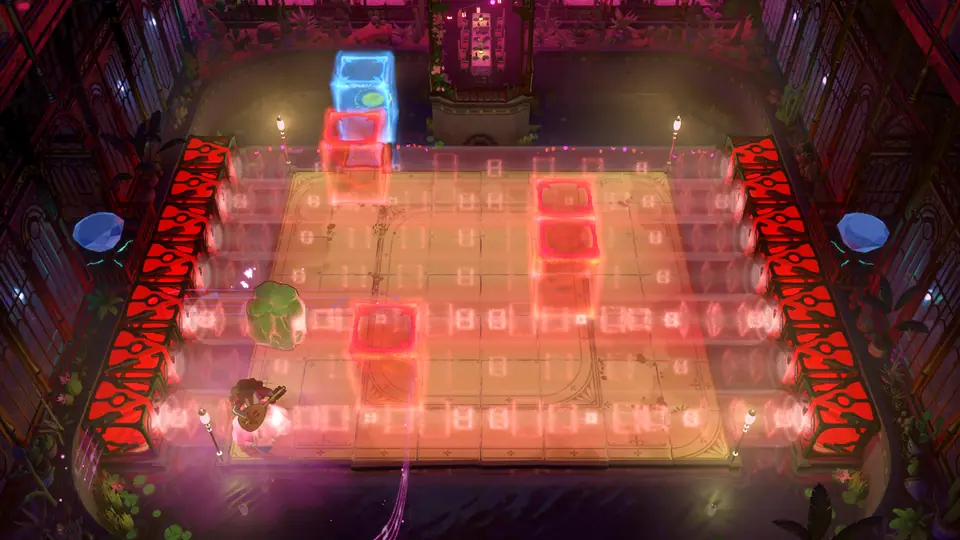 Bard and Water puzzle 5Full route
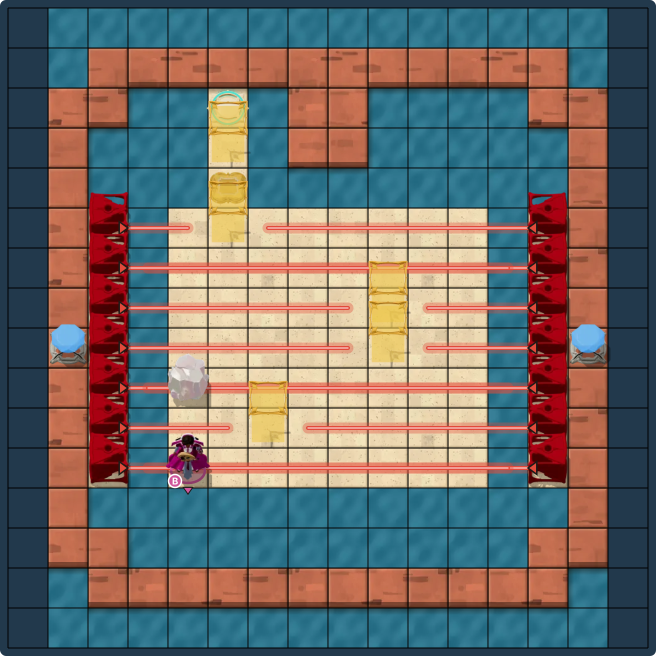
Clues
Use the move list below in order. The layout board shows the route as you step through it.
Full solution · 34 steps
Move sequence · 34 steps
Move order
- Bard
↑×4 · →×3 · ↓×2 · →×3 · ↓ · → · ↑×5 · ←×3 · ↓ · ←×2 · ↓×2 · ↑×3 · ← · ↑×3
Gate Opening
Choose a puzzle board
Local solutions
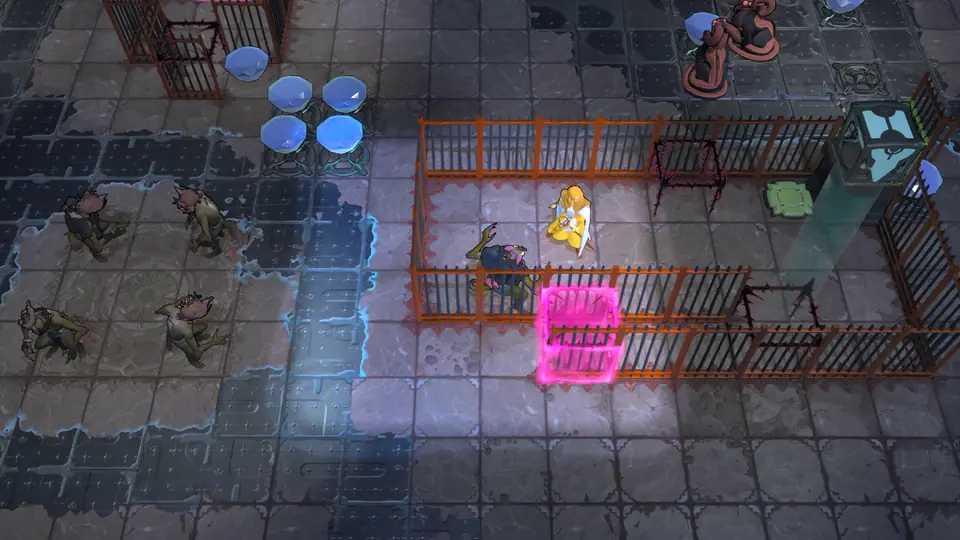 Gate Opening puzzle 2No route
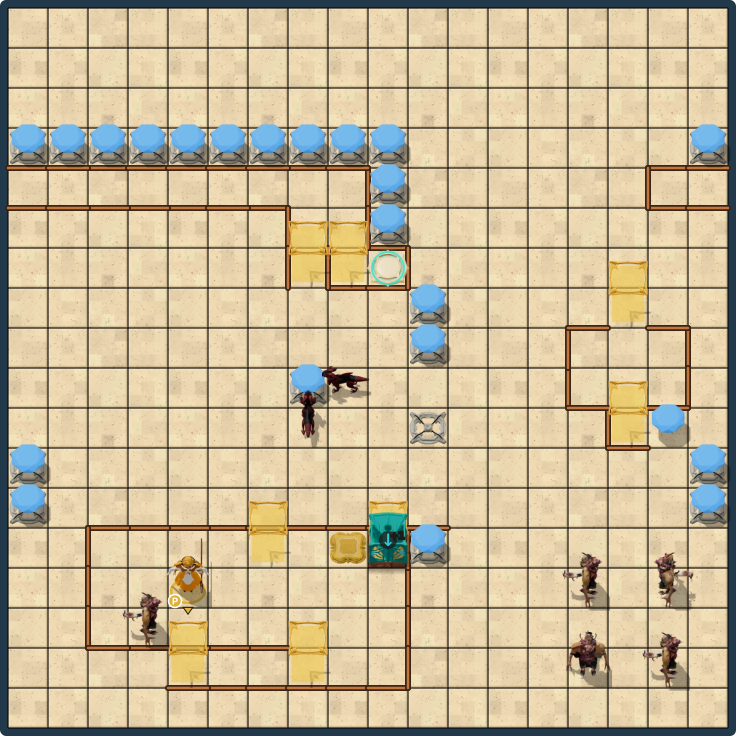
Clues
A complete move-by-move solution is not currently available for this puzzle.
No complete move sequence is listed yet. The board is available to inspect locally.
Beam Computation
Choose a puzzle board
Local solutions
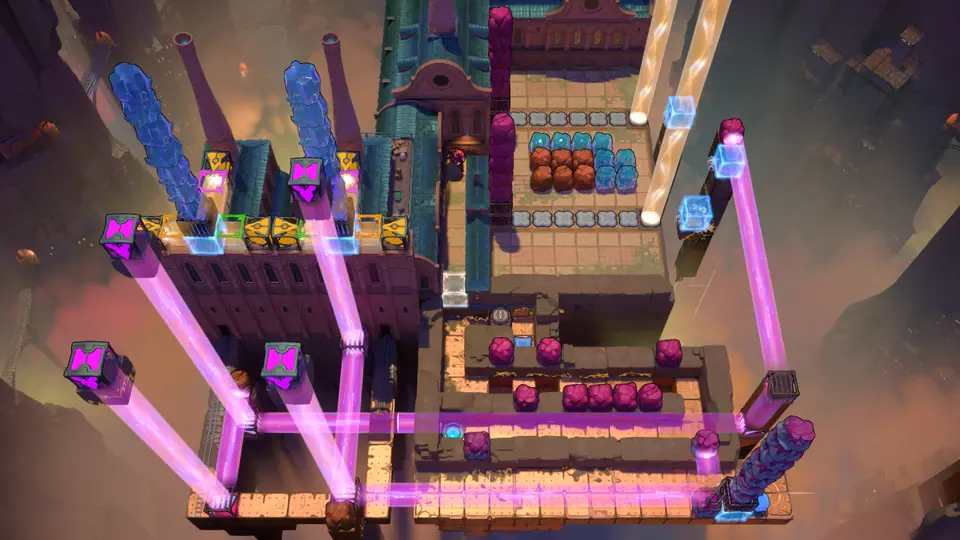 Beam Computation puzzle 4Under review
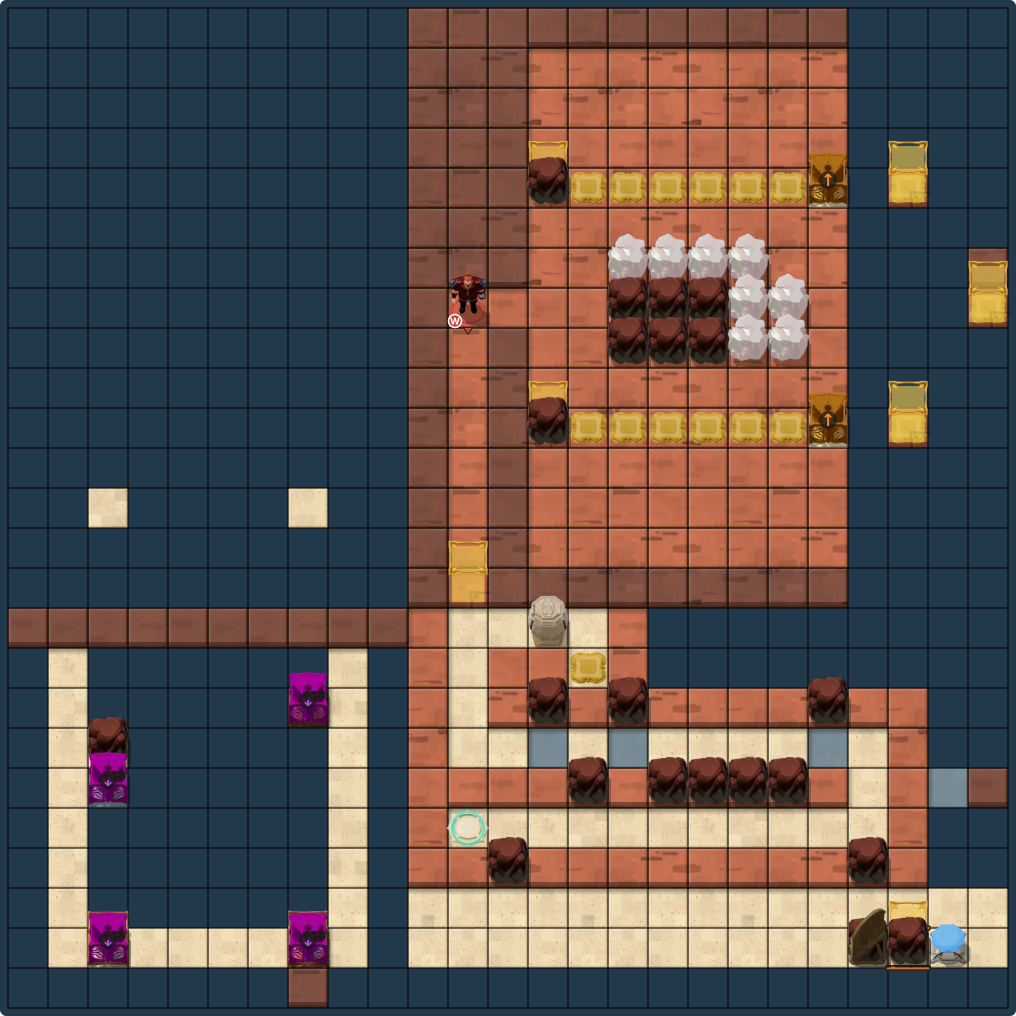
Clues
A complete move-by-move solution is not currently available for this puzzle.
No complete move sequence is listed yet. The board is available to inspect locally.
Crystal Carts
Choose a puzzle board
Local solutions
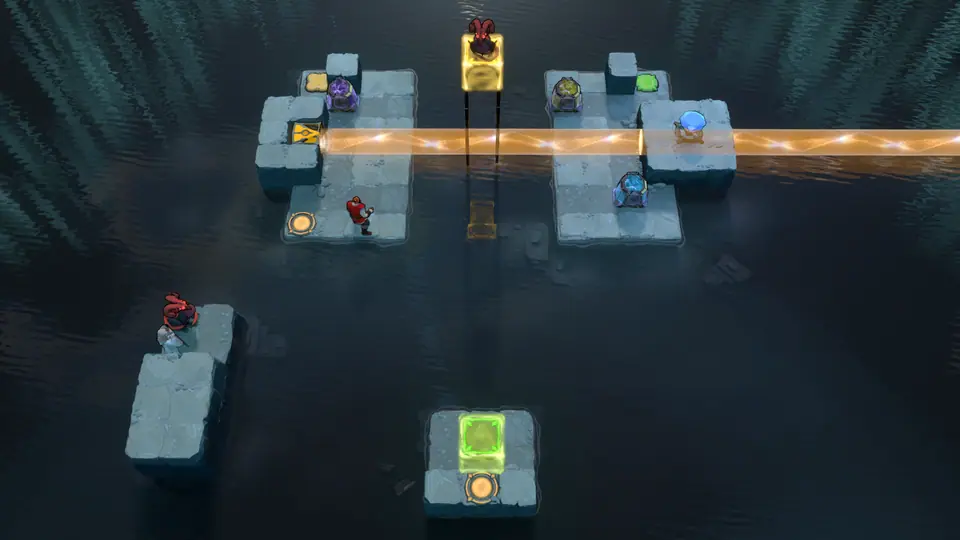 Crystal Carts puzzle 6Under review
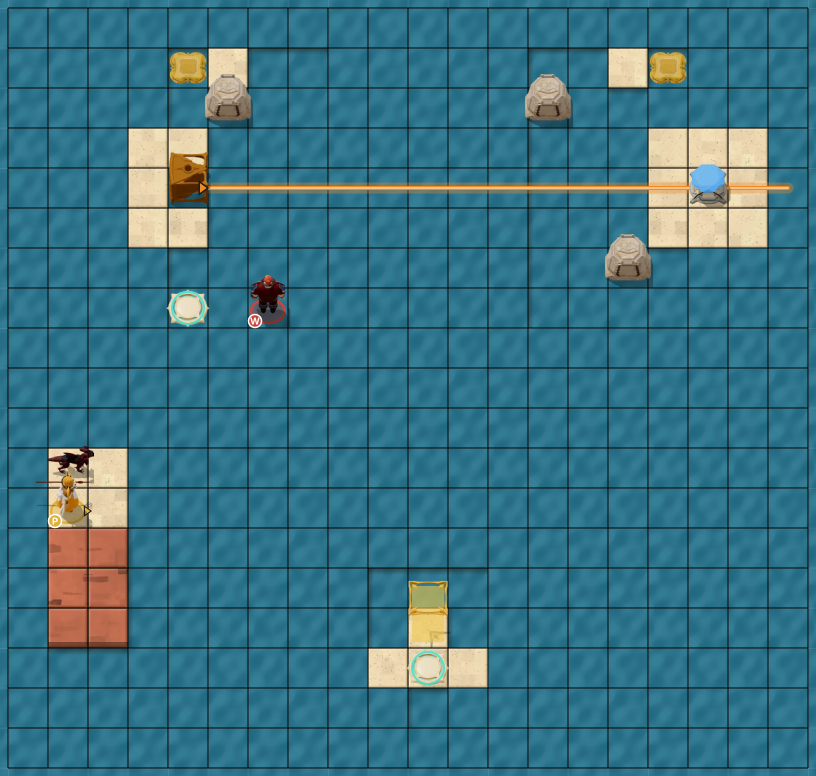
Clues
A complete move-by-move solution is not currently available for this puzzle.
No complete move sequence is listed yet. The board is available to inspect locally.
Gems as Obstacles
Choose a puzzle board
Local solutions
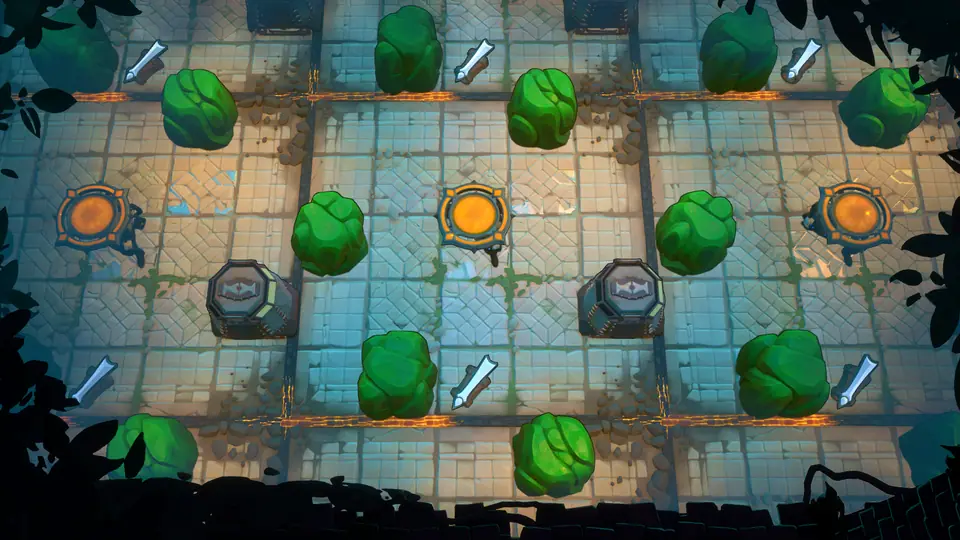 Gems as Obstacles puzzle 3Under review
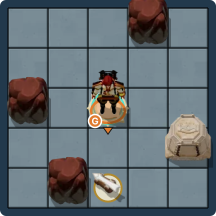
Clues
A complete move-by-move solution is not currently available for this puzzle.
No complete move sequence is listed yet. The board is available to inspect locally.
Three at Once
Choose a puzzle board
Local solutions
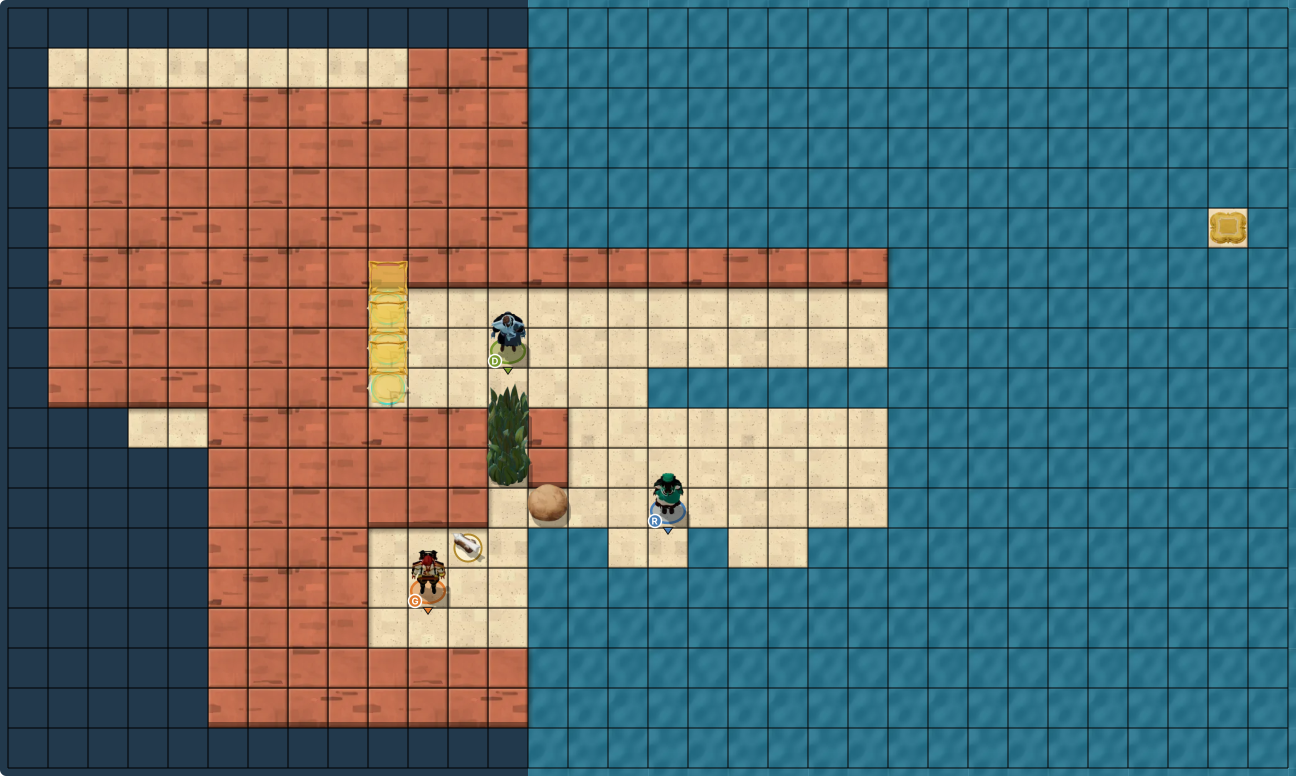
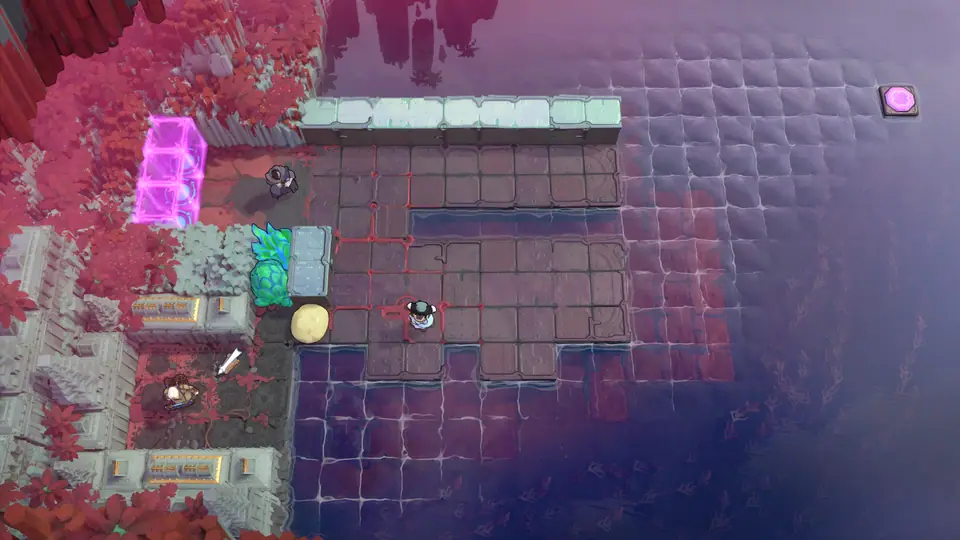 Three at Once puzzle 3Full route
Clues
Use the move list below in order. The layout board shows the route as you step through it.
Full solution · 343 steps
Move sequence · 343 steps
Move order
- Gemsman
wait 0.8 s, →, wait 1 s · ↑, wait 1 s · →, wait 1 s · ↑, wait 1 s · activate, wait 1 s - Druid
↓, wait 1 s×3 · →, wait 1 s · ↑, wait 1 s×2 - Gemsman
↓, wait 1 s - Hero
←, wait 1 s×2 · ←, wait 1.4 s - Gemsman
←, wait 1 s · ↓, wait 1 s · →, wait 1 s · ↑, wait 1 s · activate, wait 1.12 s · ↑, wait 1 s - Hero
→, wait 1 s - Gemsman
→, wait 1 s - Hero
↑, wait 1 s×4 · ←, wait 1 s×3 · ↓, wait 1 s · →, wait 1.4 s×2 - Druid
↓, wait 1 s · ↑, wait 1 s · ←, wait 1 s - Hero
↑, wait 1 s · ←, wait 1 s - Gemsman
→, wait 1 s · ↑, wait 1 s×2 · activate, wait 1.12 s · ↓, wait 1 s×2 · →, wait 1 s - Druid
→, wait 1 s · ↓, wait 1 s×2 · →, wait 1 s · ↓, wait 1 s×3 · ←, wait 1 s×2 · ↑, wait 1 s - Gemsman
↑, wait 1 s×2 - Druid
→, wait 1 s×3 - Gemsman
←, wait 1 s · ↓, wait 1 s×2 · ←, wait 1 s×2 · ↓, wait 1 s · ↑, wait 1 s · activate, wait 1.12 s · →, wait 1 s - Druid
←, wait 1 s×3 · ↑, wait 1 s×2 - Gemsman
←, wait 1 s · ↓, wait 1 s · ↑, wait 1 s · activate, wait 1 s · ↓, wait 1 s - Druid
↓, wait 1 s×2 · ←, wait 1 s×2 · ↑, wait 1 s×2 - Gemsman
↑, wait 1 s · activate, wait 1.12 s - Hero
→, wait 1 s · ↓, wait 1 s · →, wait 1.4 s×2 · ↑, wait 1 s · ←, wait 1 s×4 · ↓, wait 1 s · →, wait 1.4 s×3 · ↑, wait 1 s · ←, wait 1 s×3 - Gemsman
→, wait 1 s×2 · ↑, wait 1 s×2 · →, wait 1 s - Druid
↓, wait 1 s×2 · →, wait 1 s×2 · ↑, wait 1 s×4 · →, wait 1 s - Hero
↓, wait 1 s×2 · →, wait 1.4 s×2 - Druid
↑, wait 1 s · ←, wait 1 s×2 - Hero
←, wait 1 s · ↓, wait 1 s×3 · →, wait 1 s×2 · ↑, wait 1 s×2 · ↑, wait 1.4 s×2 · ←, wait 1 s · ↑, wait 1 s · →, wait 1.4 s · ↓, wait 1 s - Druid
→, wait 1 s×4 · ←, wait 1 s - Hero
↑, wait 1 s · →, wait 1.4 s×3 - Druid
↓, wait 1 s · →, wait 1 s×2 · ←, wait 1 s - Hero
↓, wait 1 s · →, wait 1 s×2 - Gemsman
←, wait 1 s · ↑, wait 1 s×3 · →, wait 1 s×3 · ↓, wait 1 s · →, wait 1 s · ←, wait 1 s · activate, wait 1.12 s · ←, wait 1 s · activate, wait 1.12 s · ↑, wait 1 s · ←, wait 1 s×3 - Hero
←, wait 1 s×3 · ↑, wait 1 s · ←, wait 1 s×2 · ↓, wait 1.4 s - Druid
↑, wait 1 s - Hero
→, wait 1 s×2 · ↑, wait 1 s · →, wait 1 s · →, wait 1.4 s×2 · ←, wait 1 s×3 · ↓, wait 1 s · ←, wait 1 s×2 · ←, wait 1.4 s - Gemsman
→, wait 1 s · ↓, wait 1 s · activate, wait 1.12 s · ↓, wait 1 s · activate, wait 1.12 s · ↓, wait 1 s · →, wait 1 s · ↓, wait 1 s · ↑, wait 1 s - Hero
→, wait 1 s×8 · ↑, wait 1 s · ←, wait 1.4 s×5 · ↓, wait 1 s · ←, wait 1 s×3 - Druid
→, wait 1 s×3 - Hero
↑, wait 1 s · ←, wait 1 s×2 · ↓, wait 1 s · →, wait 1.4 s×3 · ←, wait 1 s - Druid
↓, wait 1 s · →, wait 1 s - Hero
←, wait 1 s · ↓, wait 1 s×4 · →, wait 1 s×2 · ↑, wait 1.4 s×2 · ↓, wait 1 s×2 · ←, wait 1 s×2 · ↑, wait 1 s×3 · →, wait 1 s - Druid
↑, wait 1 s · →, wait 1 s · ←, wait 1 s · →, wait 1 s×3 · ↓, wait 1 s · ←, wait 1 s - Hero
→, wait 1.4 s · ↓, wait 1 s - Gemsman
→, wait 1 s · ↓, wait 1 s · ↑, wait 1 s - Hero
↑, wait 1 s×3 · →, wait 1.4 s · ←, wait 1 s · ↓, wait 1 s - Druid
↑, wait 1 s · →, wait 1 s×3 · ↓, wait 1 s - Hero
→, wait 1.4 s · ←, wait 1 s - Druid
↓, wait 1 s · →, wait 1 s - Hero
↓, wait 1 s - Druid
↑, wait 1 s · →, wait 1 s · ←, wait 1 s - Hero
↑, wait 1 s · →, wait 1 s · ↑, wait 1 s · →, wait 1.4 s · ←, wait 1 s · ↓, wait 1 s - Druid
→, wait 1 s×3 · ↓, wait 1 s · ←, wait 1 s - Hero
→, wait 1.4 s · ←, wait 1 s - Druid
←, wait 1 s - Hero
↑, wait 1 s - Druid
→, wait 1 s · ↓, wait 1 s · →, wait 1 s×2 - Gemsman
→, wait 1 s · ↓, wait 1 s · ↑, wait 1 s - Druid
↑, wait 1 s · ←, wait 1 s - Hero
←, wait 1 s · ↓, wait 1 s×2 - Druid
↓, wait 1 s · →, wait 1 s - Hero
→, wait 1.4 s - Gemsman
activate, wait 1.12 s - Hero
wait 3.2 s×4 - Druid
←, wait 1 s×7 - Hero
←, wait 1 s×6 - Gemsman
↓, wait 1 s · ←, wait 1 s×3 · ↑, wait 1 s×4 · ←, wait 1 s×4 · ←, wait 0.278 s
Heterogeneous Stacks
Choose a puzzle board
Local solutions
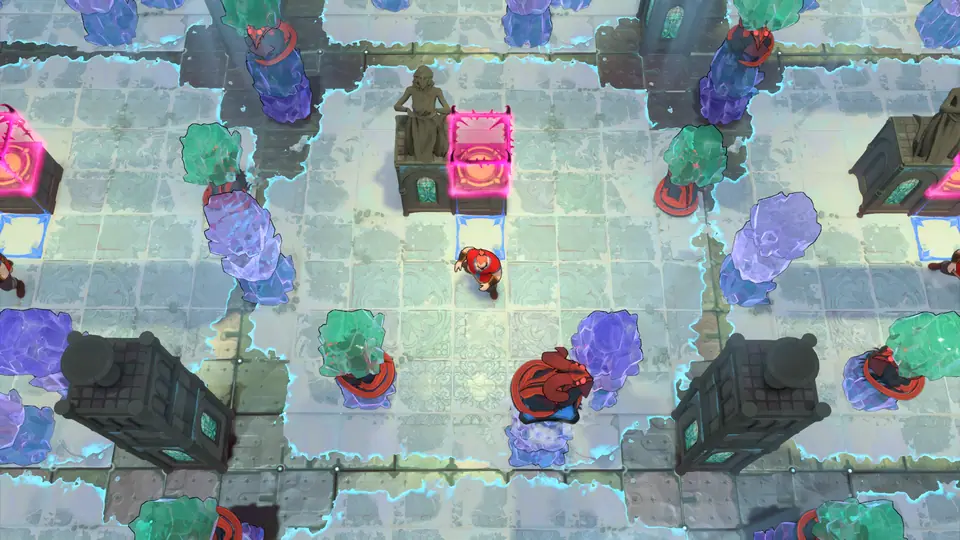 Heterogeneous Stacks puzzle 2Full route
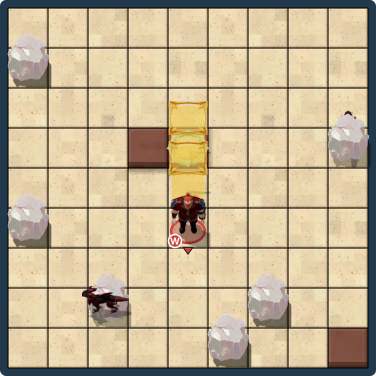
Clues
Use the move list below in order. The layout board shows the route as you step through it.
Full solution · 107 steps
Move sequence · 107 steps
Move order
- Warrior
↑ · →×5 · ↑ · ← · ↑×3 · ←×6 · ↑×2 · ← · ↑×5 · ← · ↑×3 · ↓ · →×6 · ↑×4 · → · ↑ · ←×5 · →×5 · ↓×3 · →×2 · ← · ↑×2 · →×2 · ← · ↓×2 · → · ← · ↑×3 · →×2 · ← · ↓×3 · → · ← · ↑×2 · →×2 · ↓ · → · ↑ · ←×3 · ↓×2 · →×2 · ↓×2 · →×2 · ↑ · ←×2 · ↑×3 · ← · ↑ · →×2 · ↑
Gem Beams
Choose a puzzle board
Local solutions
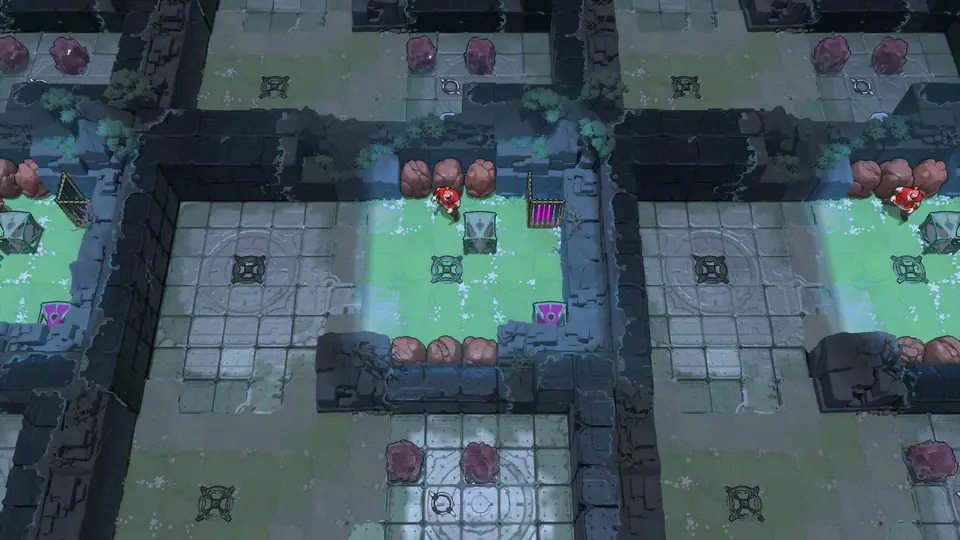 Gem Beams puzzle 2Full route
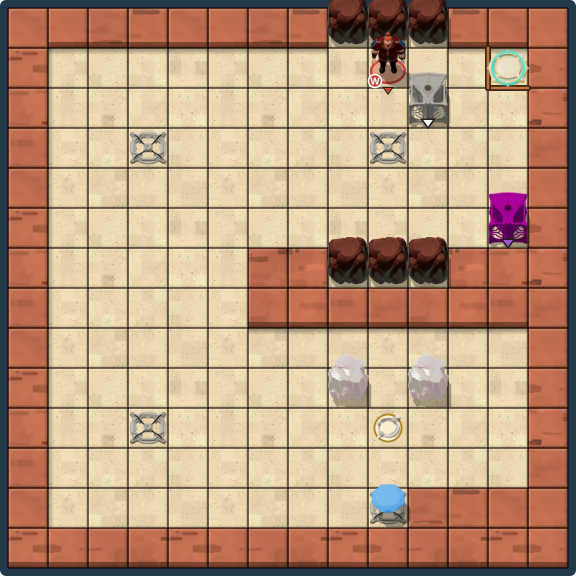
Clues
Use the move list below in order. The layout board shows the route as you step through it.
Full solution · 231 steps
Move sequence · 231 steps
Move order
- Warrior
→×2 · ↓ · ←×5 · ↑ · ← · ↓×8 · ← · ↓ · →×5 · ↓ · →×2 · ↑ · ← · ↓ · ← · activate · → · ↑×2 · ←×6 · ↑ · ← · ↓ · →×8 · ↑ · ←×5 · ↓ · ←×2 · ↑×2 · → · ↓×3 · → · ↓ · ← · →×4 · ↑ · ↓ · ←×4 · ↓ · ←×2 · ↑×2 · →×7 · ↑ · ←×5 · ↓ · ←×3 · ↑ · activate · ↓ · → · ↑×6 · ← · ↑ · → · ↓×7 · → · ↑×6 · ↓ · activate · ← · ↓×7 · → · ↑×7 · → · ↑×3 · ← · ↑ · ← · ↓ · ← · ↓×3 · →×2 · activate · ← · ↑ · →×5 · ↓ · → · ↑ · ←×7 · ↑ · →×4 · ↓ · → · ↑ · ← · ↑ · → · ↓ · → · ↓ · → · ↑ · ←×2 · ↑ · →×2 · ↓×2 · →×2 · ↑ · ← · ↓ · ← · ↑ · ← · ↑ · → · ←×4 · ↓×6 · →×7 · ↓
Low MxS
Activate the MxS Antipode teleporter, then solve any 6 of these 7 puzzles.
Moving the Flat Things
Choose a puzzle board
Local solutions
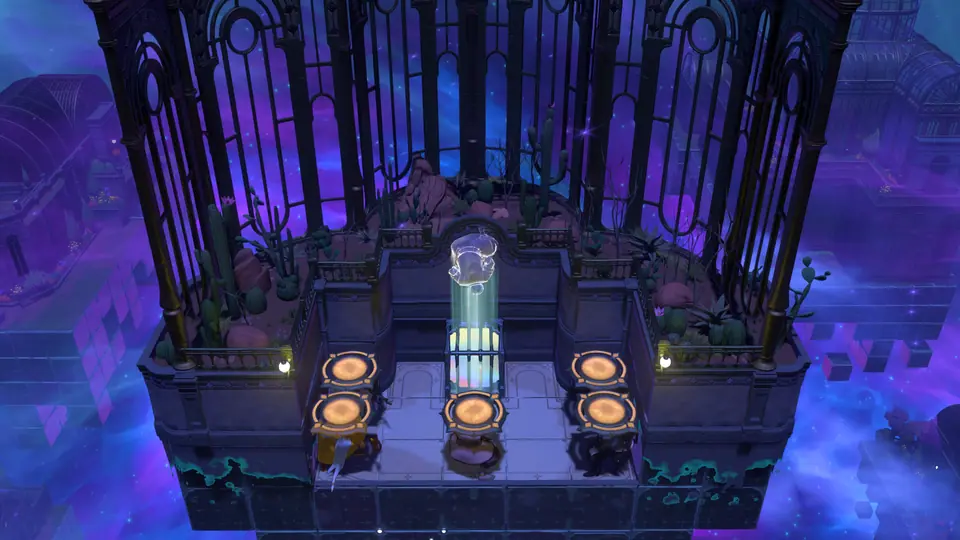 Moving the Flat Things puzzle 9Full route
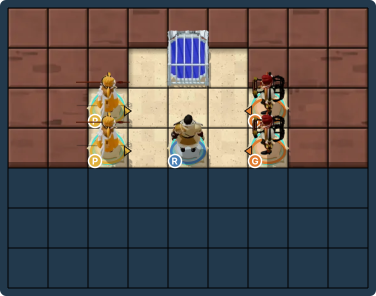
Clues
Use the move list below in order. The layout board shows the route as you step through it.
Full solution · 34 steps
Move sequence · 34 steps
Move order
- Hero
← · ↑×2 - Priest 2
→×2 · activate · ↓×2 · ←×2 - Priest 1
→×2 - Priest 2
activate - Priest 1
↓ · ←×2 - Hero
→ - Gemsman 2
← - Priest 2
activate - Gemsman 2
↓ · ← · ↓ · →×2 - Gemsman 1
← - Priest 2
activate - Hero
↓ · → - Gemsman 1
↓ - Gemsman 2
← - Priest 2
→×2 - Priest 1
→×2
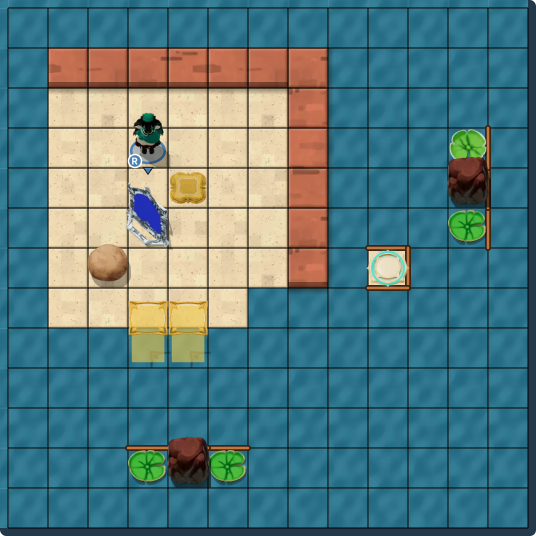
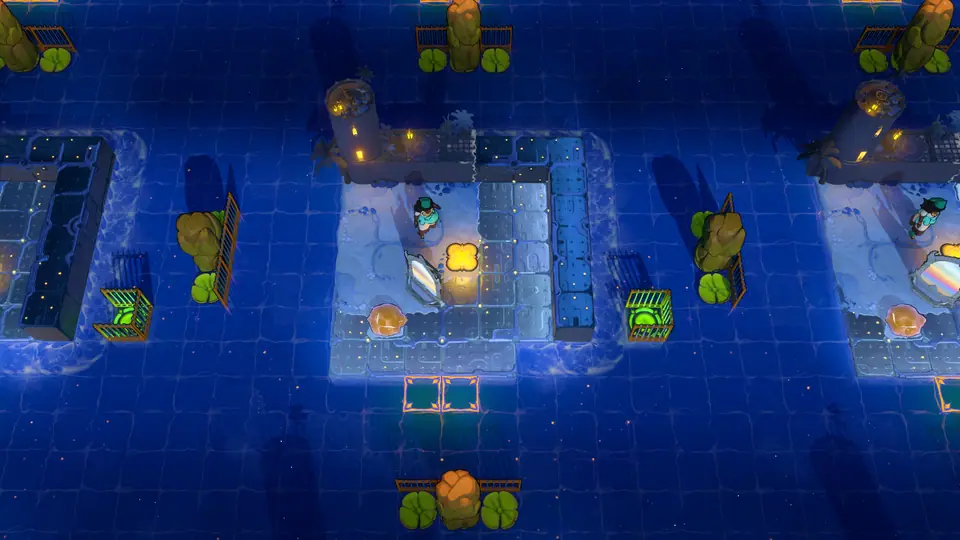 Moving the Flat Things puzzle 11No route
Clues
A complete move-by-move solution is not currently available for this puzzle.
No complete move sequence is listed yet. The board is available to inspect locally.
Mirrors and Rivers
Choose a puzzle board
 7RouteMirrors and Rivers puzzle 7
 11BoardMirrors and Rivers puzzle 11
 13RouteMirrors and Rivers puzzle 13
Local solutions
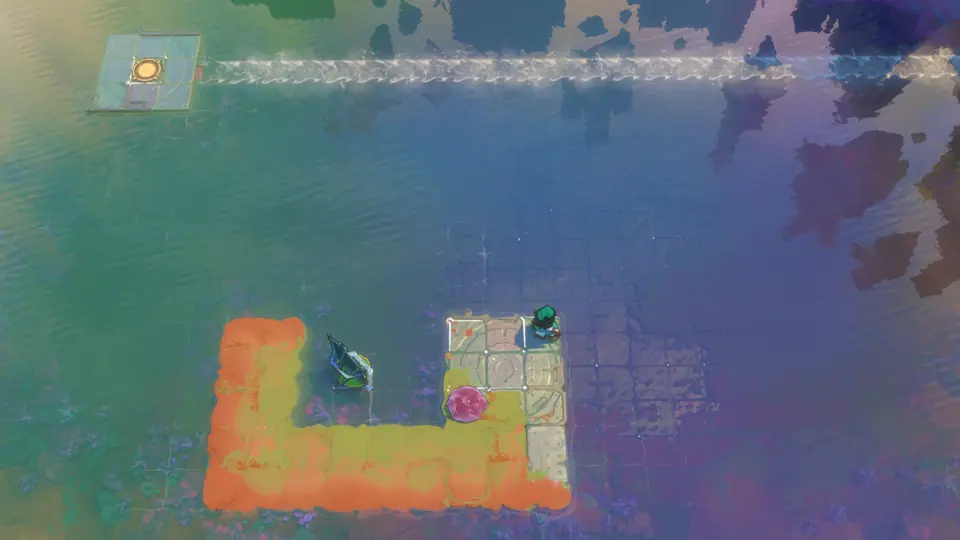
Mirrors and Rivers puzzle 7Full route
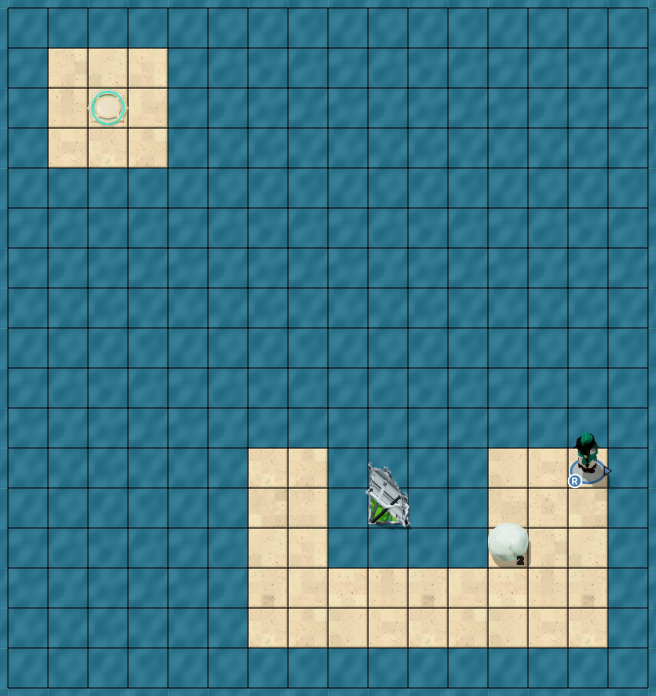
Clues
Use the move list below in order. The layout board shows the route as you step through it.
Full solution · 26 steps
Move sequence · 26 steps
Move order
- Hero
↓, wait 0.567 s×2 · ←, wait 0.55 s · ←, wait 0.667 s · ↓, wait 0.567 s · ←, wait 0.55 s · ←, wait 0.567 s×5 · ↑, wait 0.55 s · →, wait 0.567 s · ↓, wait 0.567 s · →, wait 0.55 s · →, wait 0.567 s×4 · ↑, wait 0.567 s · ↑, wait 2.8 s · ↑, wait 1.367 s · activate, wait 0.2 s · ↓, wait 2.267 s · activate, wait 30.217 s · ↑
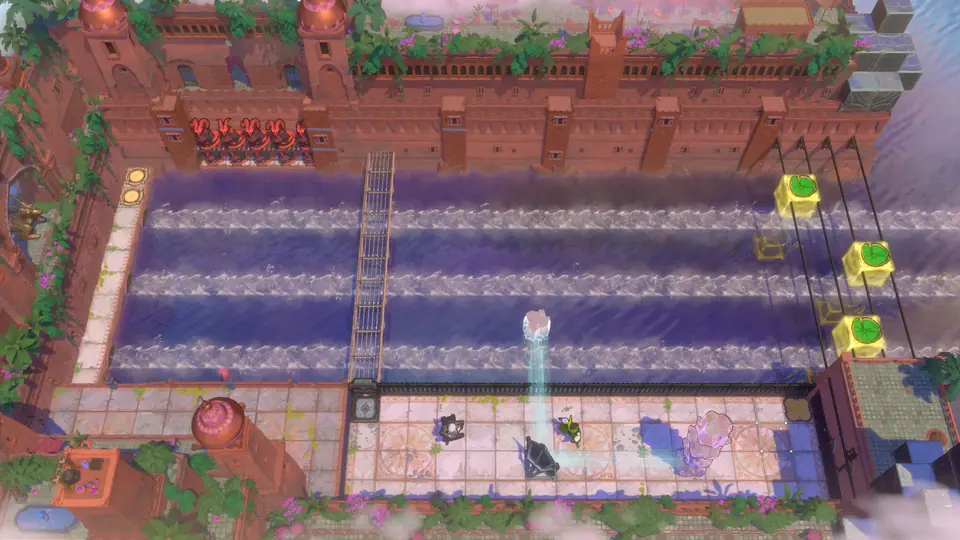
Mirrors and Rivers puzzle 11No route
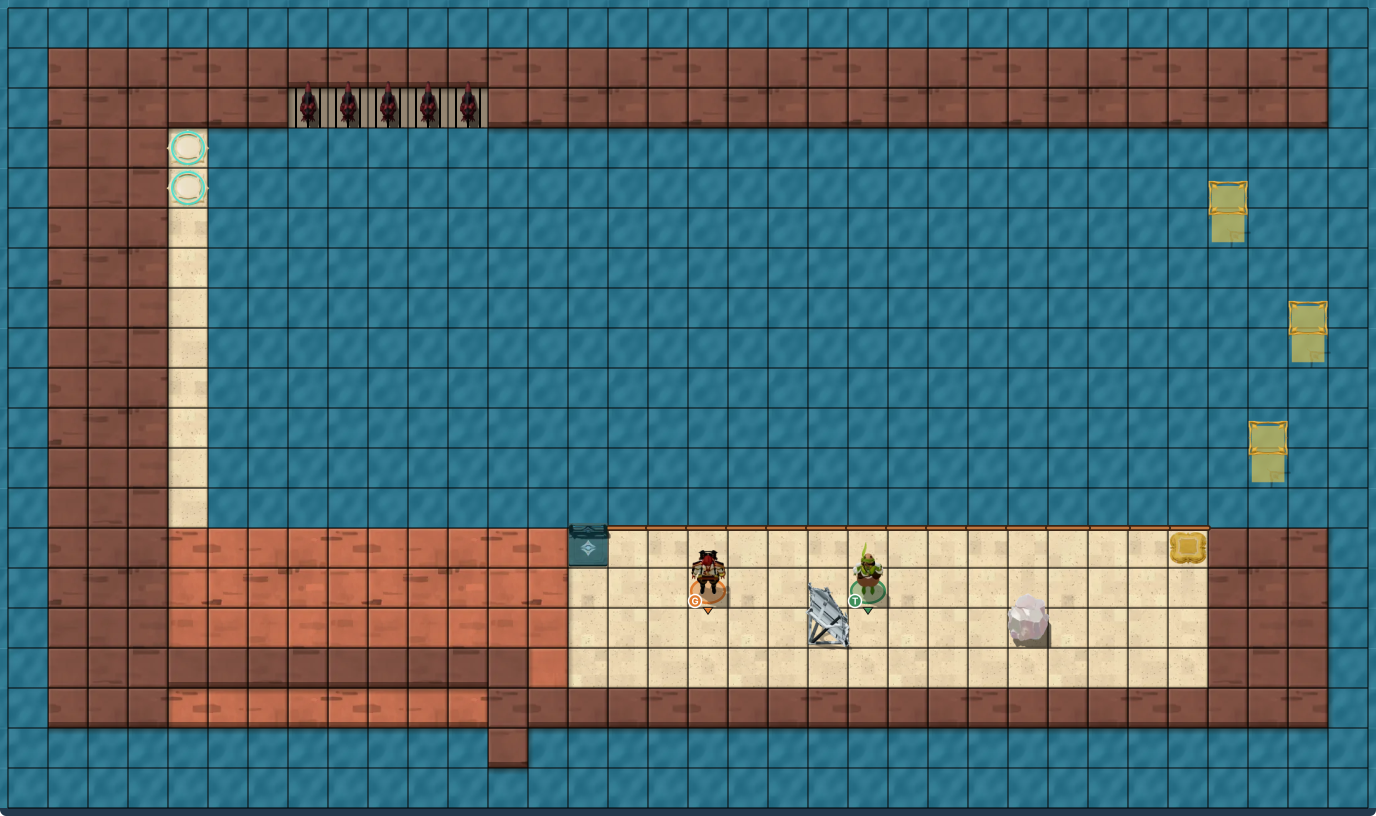
Clues
A complete move-by-move solution is not currently available for this puzzle.
No complete move sequence is listed yet. The board is available to inspect locally.
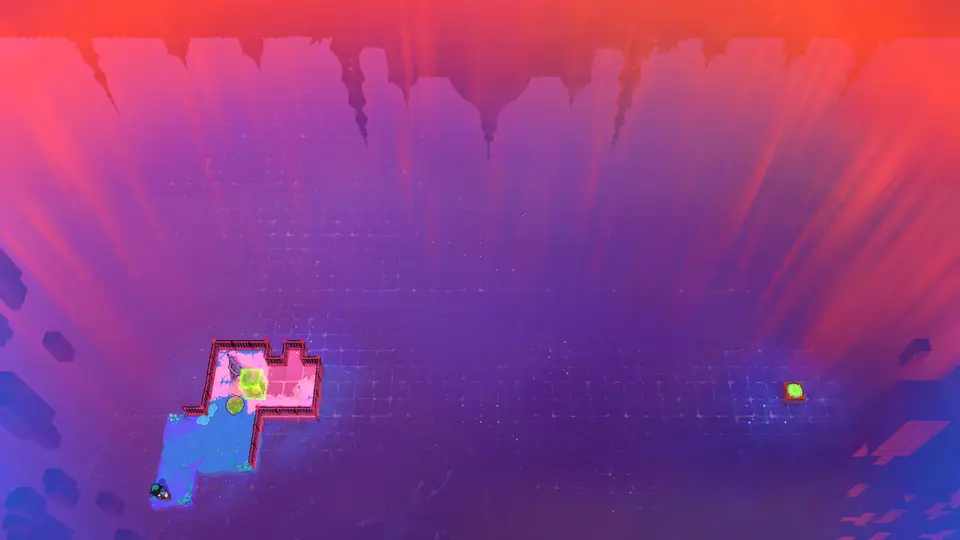
Mirrors and Rivers puzzle 13Full route

Clues
Use the move list below in order. The layout board shows the route as you step through it.
Full solution · 98 steps
Move sequence · 98 steps
Move order
- Hero
wait 0.8 s, ↑, wait 1 s · ↑, wait 1 s×3 · →, wait 1 s×2 · ↑, wait 1 s×2 · →, wait 1 s · ↓, wait 1.4 s×3 · →, wait 1 s · ↓, wait 1 s · ←, wait 1.4 s×2 · ↑, wait 1 s · ←, wait 1 s · ↓, wait 1.4 s · →, wait 1 s · ↑, wait 1 s×6 · →, wait 1 s · ↓, wait 1.4 s×5 · →, wait 1 s · ↓, wait 1 s · ←, wait 1.4 s×2 · ↑, wait 1 s · ←, wait 1 s×2 · ↓, wait 1 s×2 · →, wait 1.4 s · ←, wait 1 s · ↑, wait 1 s×2 · →, wait 1 s · ↓, wait 1.4 s · ←, wait 1 s · activate, wait 1 s · ↓, wait 1 s×2 · →, wait 1 s · ↑, wait 1.4 s×2 · activate, wait 1 s · ←, wait 1 s · ↑, wait 1 s · →, wait 1.4 s×2 · activate, wait 1 s · ↓, wait 1 s · →, wait 1 s · ↑, wait 1.4 s×4 · activate, wait 1 s · ←, wait 1 s · ↑, wait 1 s · →, wait 1.4 s×3 · activate, wait 1 s · ↓, wait 1 s · →, wait 1 s×2 · ↑, wait 1 s · activate, wait 1 s · ↓, wait 1.4 s · ←, wait 1 s · activate, wait 1 s · wait 1.6 s×15 · ↓, wait 1 s · ←, wait 0.278 s
Endless Skipping
Choose a puzzle board
Local solutions
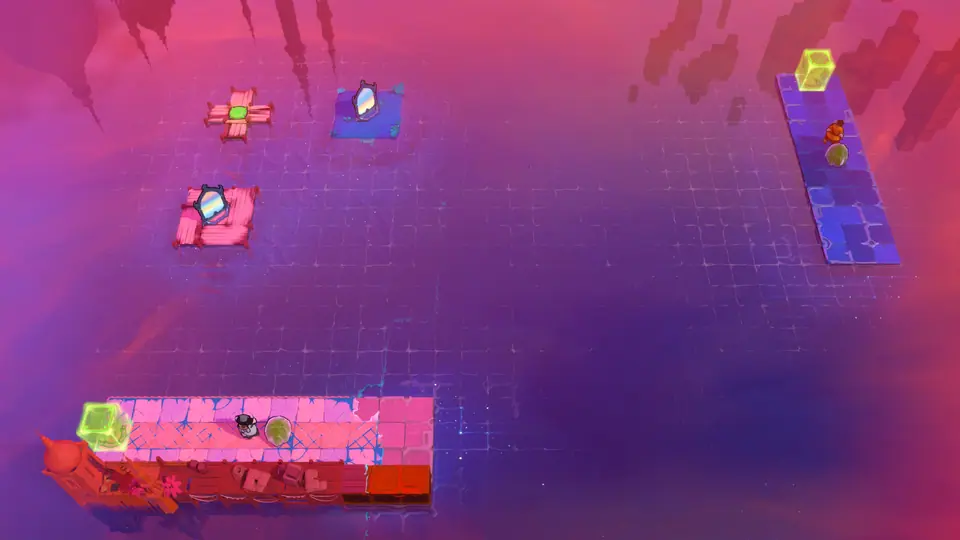 Endless Skipping puzzle 1No route
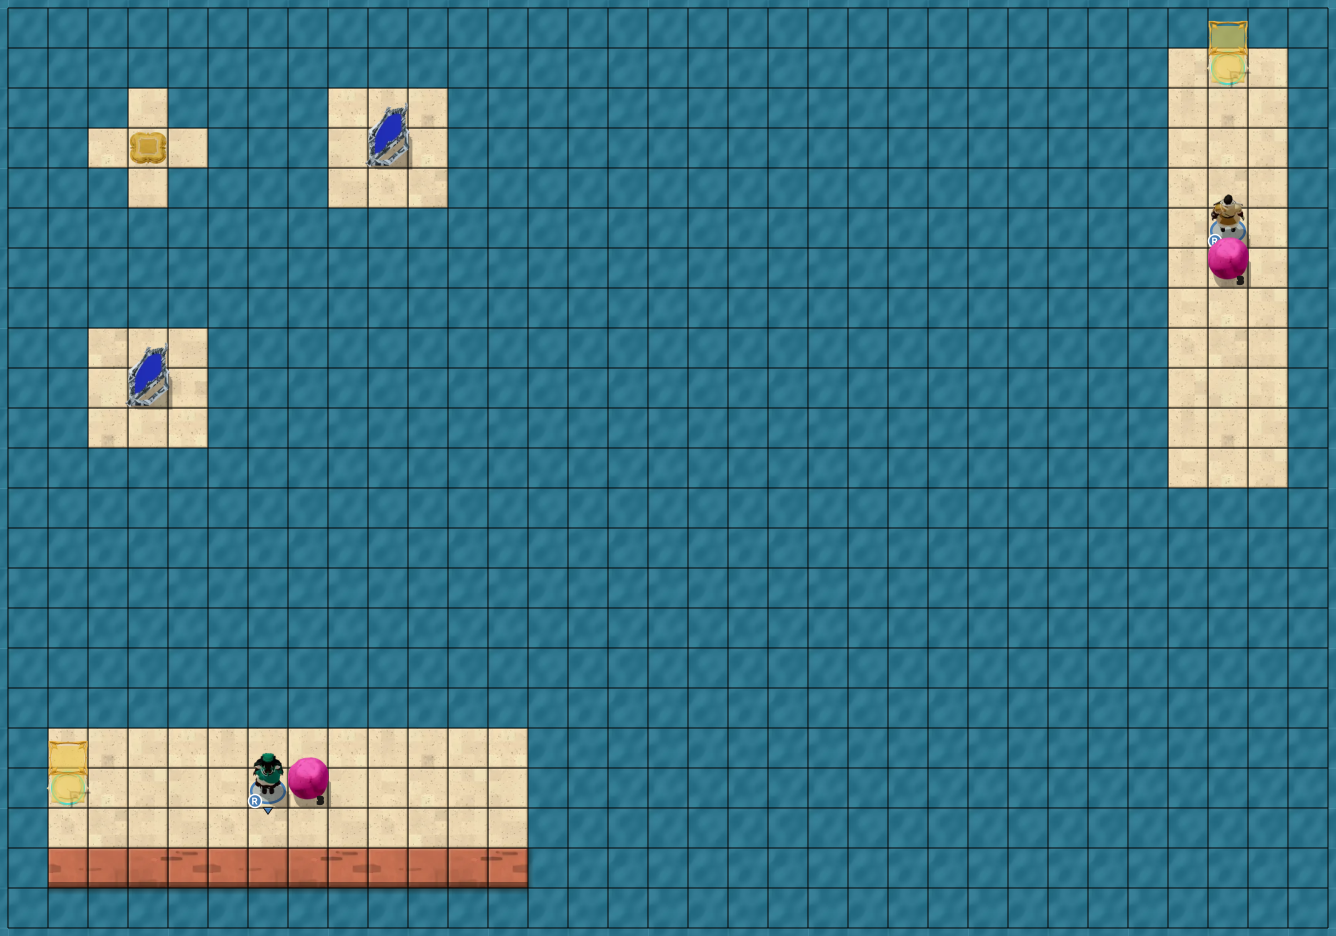
Clues
A complete move-by-move solution is not currently available for this puzzle.
No complete move sequence is listed yet. The board is available to inspect locally.
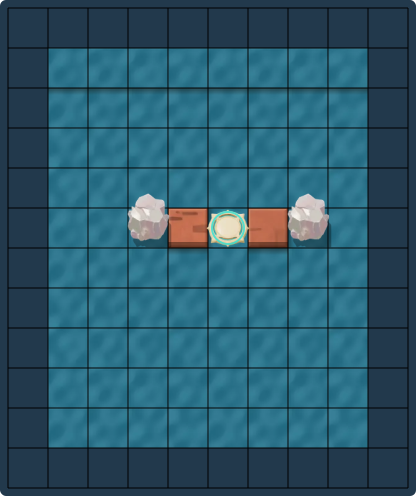
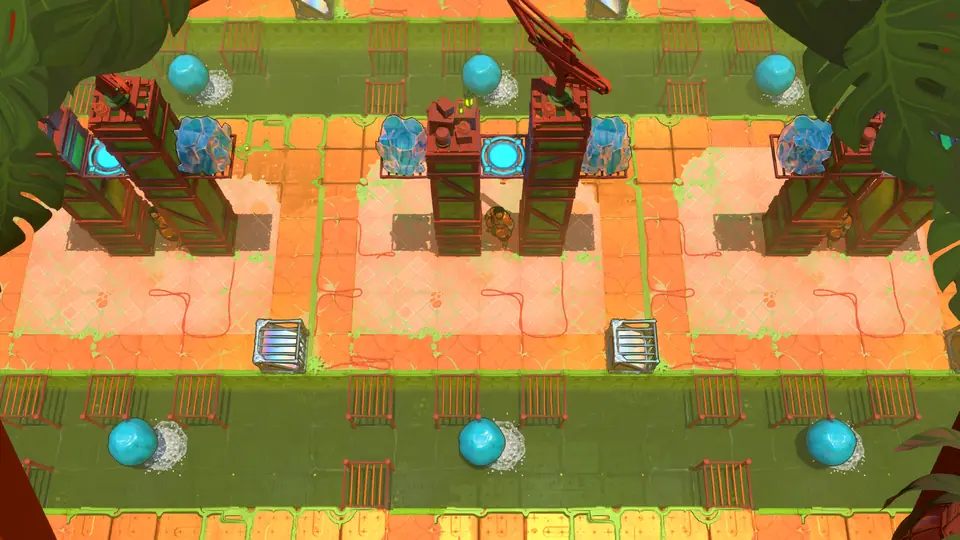 Endless Skipping puzzle 6Under review
Clues
A complete move-by-move solution is not currently available for this puzzle.
No complete move sequence is listed yet. The board is available to inspect locally.
Low MxB
Activate the MxB Antipode teleporter, then solve any 7 of these 8 puzzles.
Endpoint Falling
Choose a puzzle board
Local solutions
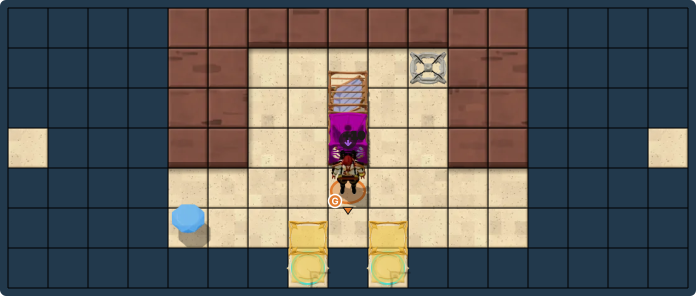
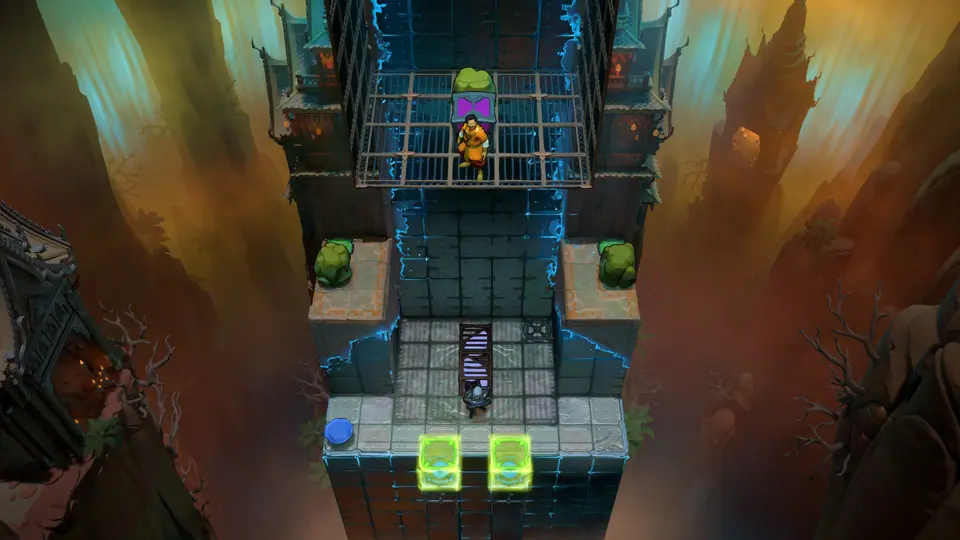 Endpoint Falling puzzle 1Under review
Clues
A complete move-by-move solution is not currently available for this puzzle.
No complete move sequence is listed yet. The board is available to inspect locally.
Mirrors and Artifacts
Choose a puzzle board
Local solutions
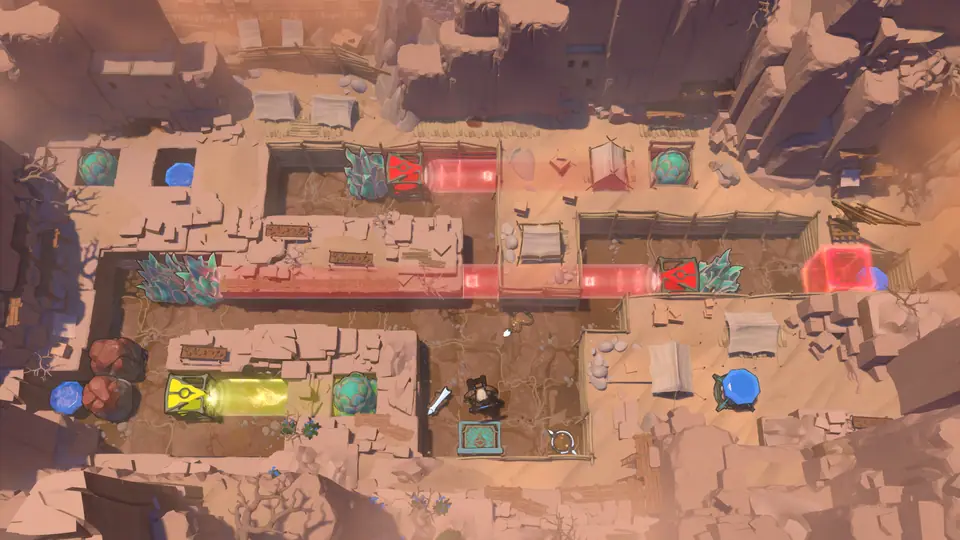 Mirrors and Artifacts puzzle 4Full route
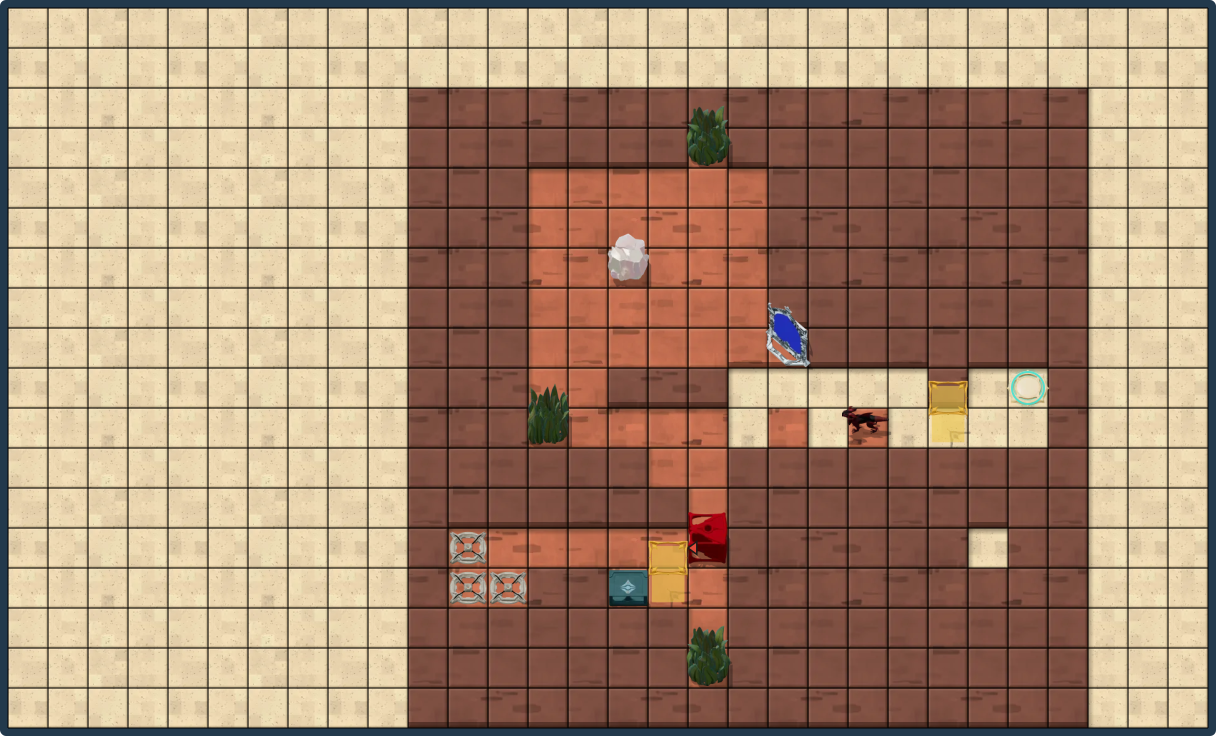
Clues
Use the move list below in order. The layout board shows the route as you step through it.
Full solution · 209 steps
Move sequence · 209 steps
Move order
- Gemsman
← · →×2 · ↓ · → · ← · ↑×2 · → · ↑ · → · ↑ · → · activate · ↑ · →×4 · ↓ · →×3 · take/drop gem · ←×2 · ↑ · ←×5 · ↓×2 · ←×3 · ↑×4 · ← · activate · ↓ · ←×4 · ↑ · ←×3 · take/drop gem · →×3 · ↓ · →×5 · ↓×3 · ←×8 · ↓×3 · →×2 · ↑ · activate · ↓ · ←×2 · ↑×3 · →×2 · ← · activate · ← · ↓×2 · ←×3 · take/drop gem · →×2 · ↑×2 · →×11 · ↑ · → · ↑ · →×4 · ↓ · →×2 · ←×2 · ↑ · ←×5 · ↓×2 · ←×3 · ↓×3 · take/drop gem · ↑ · ←×4 · take/drop gem · ↓ · take/drop gem · → · take/drop gem · ↑ · →×4 · ↓×2 · → · ↓ · ↑ · activate · ↑ · activate · ↑ · activate · ↑ · ← · ↑×2 · ←×2 · ↑×2 · ← · → · activate · → · activate · ↑ · →×2 · ↑ · ↓ · activate · ↓ · activate · ← · ↓ · activate×2 · ←×2 · ↓×3 · → · activate · →×2 · ↑ · →×4 · ↓ · →×3 · ↑ · →
Alter-Smash
Choose a puzzle board
Local solutions
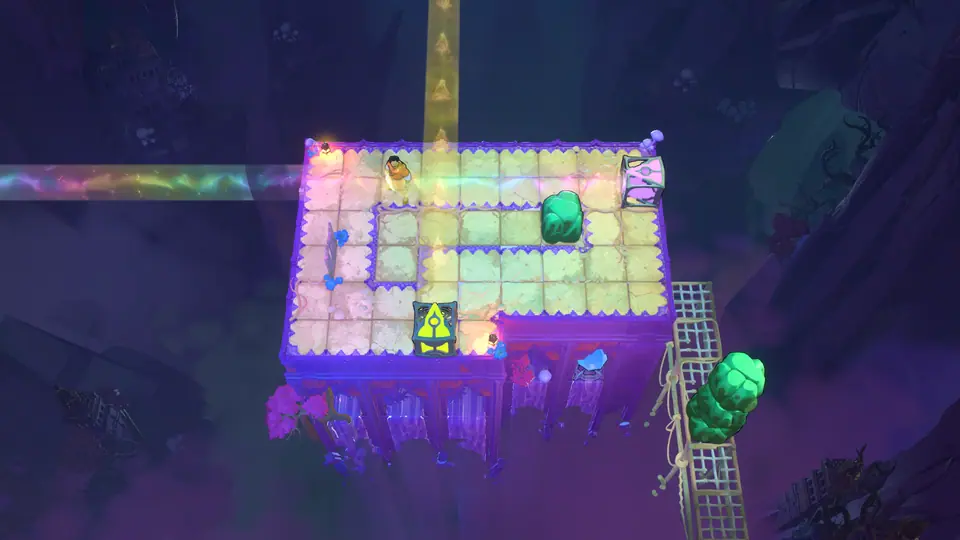 Alter-Smash puzzle 1No route
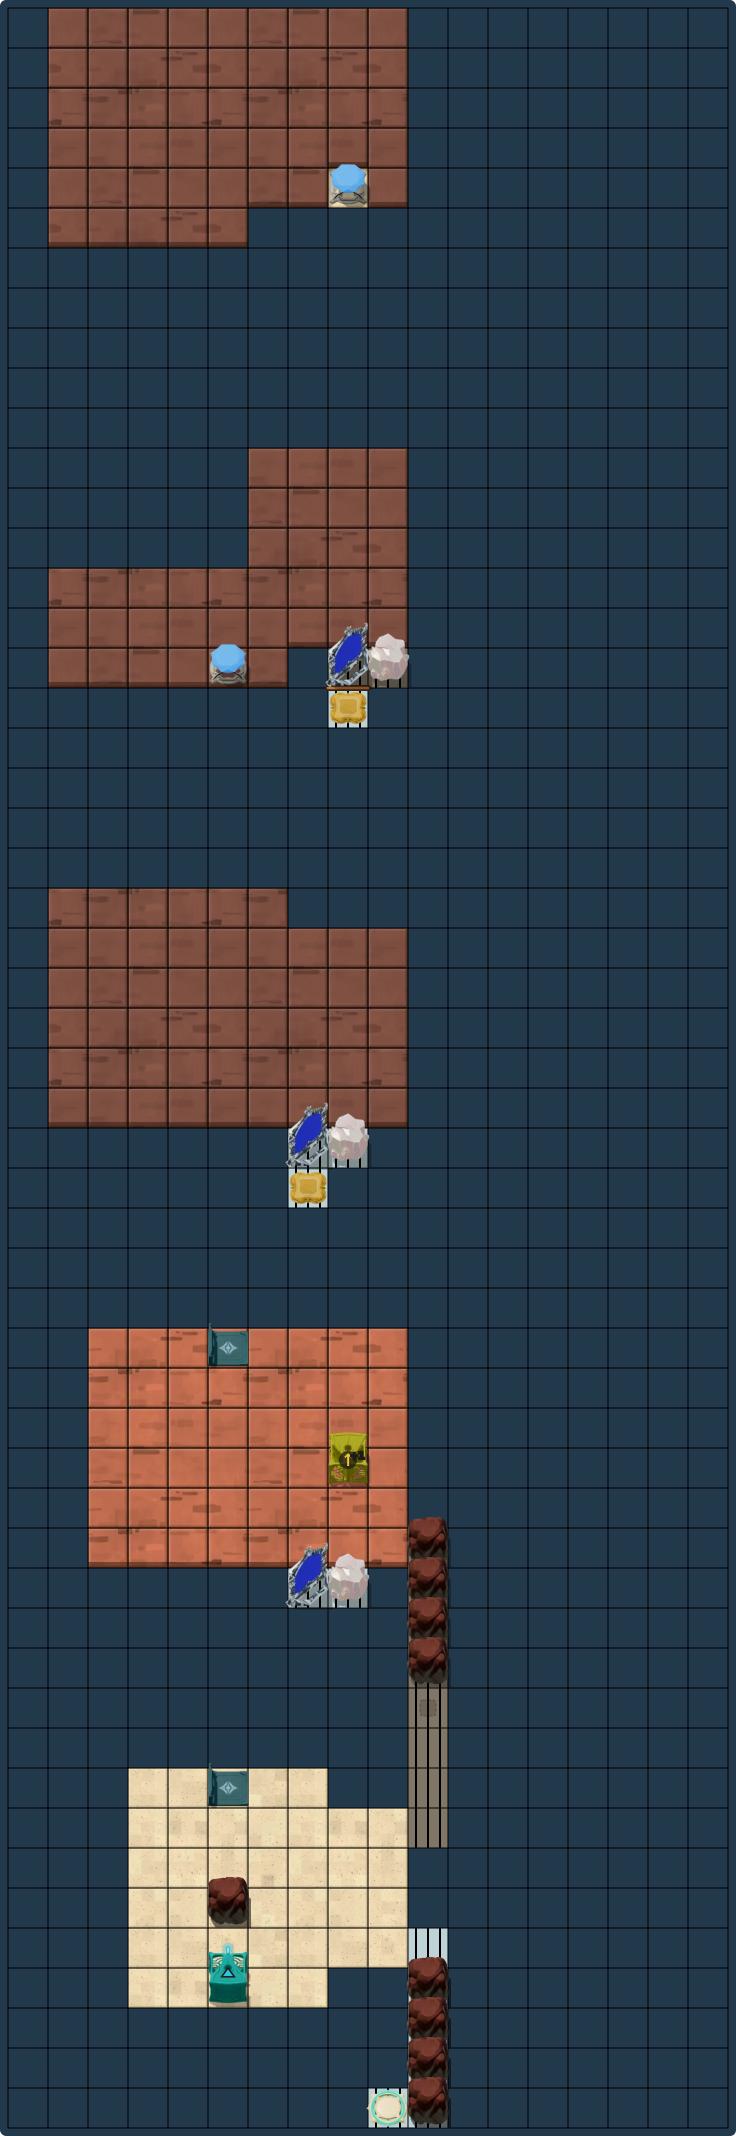
Clues
A complete move-by-move solution is not currently available for this puzzle.
No complete move sequence is listed yet. The board is available to inspect locally.
Three at Once
Choose a puzzle board
Local solutions
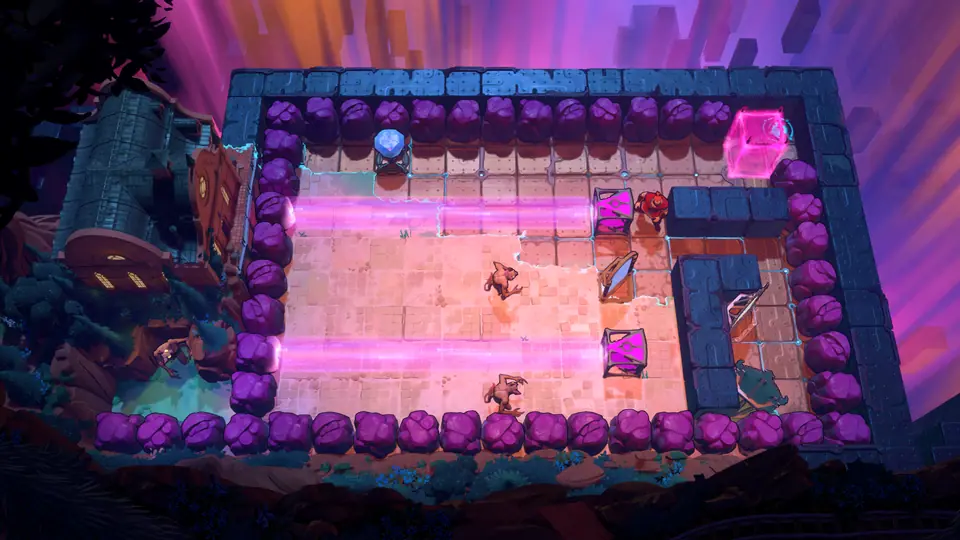 Three at Once puzzle 4No route
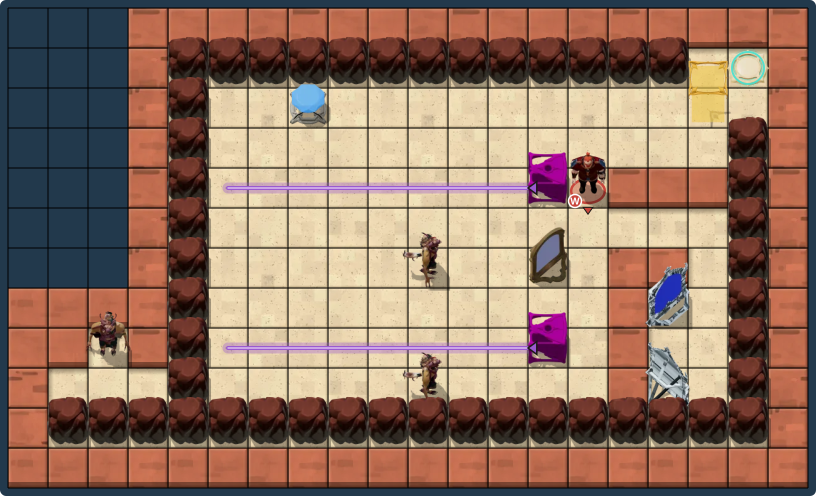
Clues
A complete move-by-move solution is not currently available for this puzzle.
No complete move sequence is listed yet. The board is available to inspect locally.
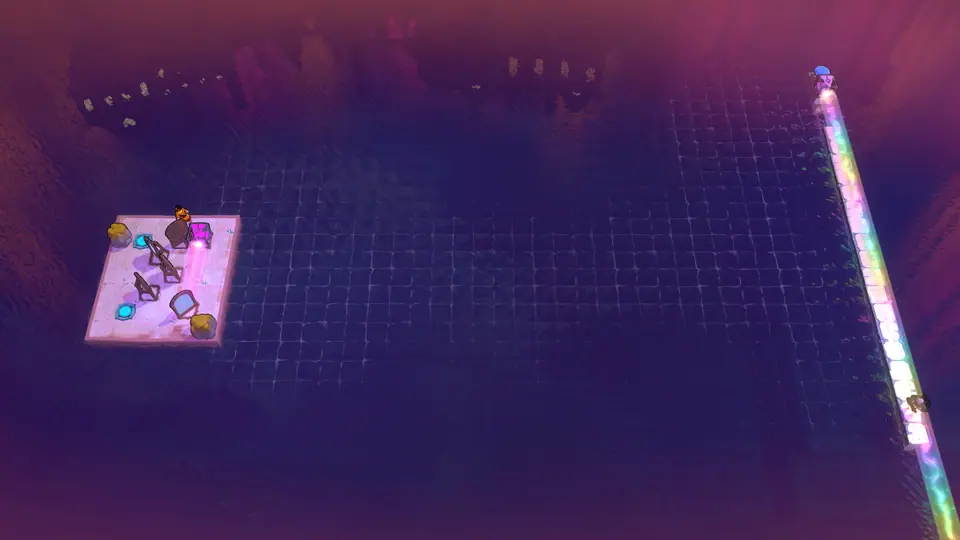 Three at Once puzzle 5Full route
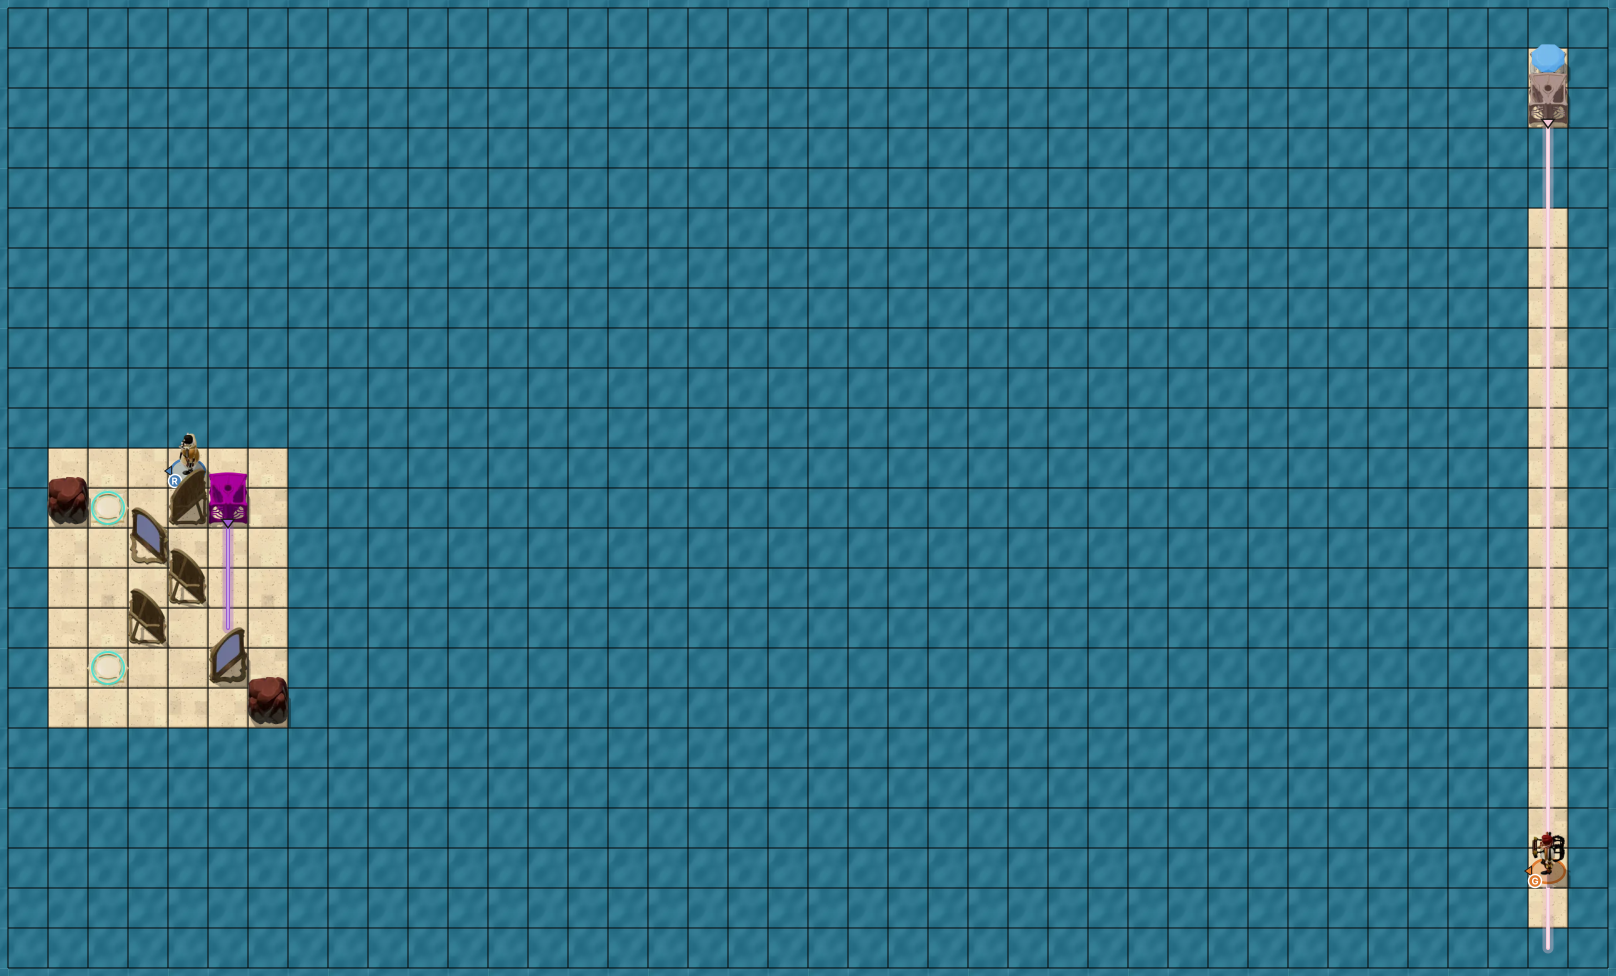
Clues
Use the move list below in order. The layout board shows the route as you step through it.
Full solution · 118 steps
Move sequence · 118 steps
Move order
- Hero
←×3 · ↓×6 · →×3 · ↑×2 · →×2 · ↓×2 · ↑×2 · ←×4 · ↑ · ← · ↓×3 · →×2 · ↑×2 · →×3 · ↑ · ←×3 · ↓ · ←×2 · ↑×4 · →×3 · ↓×5 · ← · ↓ · →×2 · ← · ↑×2 · ←×3 · ↑×2 · →×4 · ↓ · → · ↑×3 · ↓×4 · ←×2 · ↓ · ← · ↑×5 · → · ↑ · ←×2 · ↓×5 · →×4 · ↑×4 · ←×3 - Gemsman
↑×3 · ←×2 - Hero
← - Gemsman
↓×3
Doubling Beams
Choose a puzzle board
Local solutions
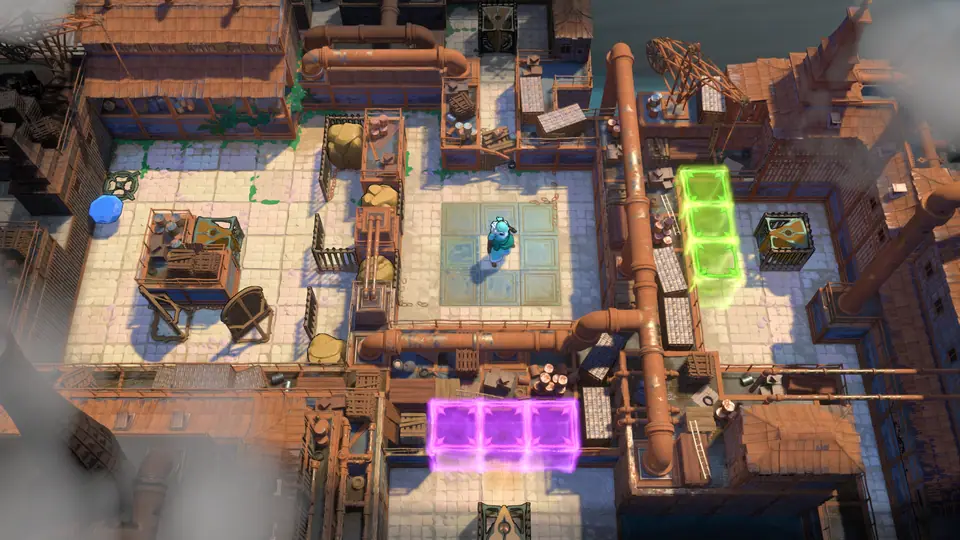 Doubling Beams puzzle 1No route

Clues
A complete move-by-move solution is not currently available for this puzzle.
No complete move sequence is listed yet. The board is available to inspect locally.
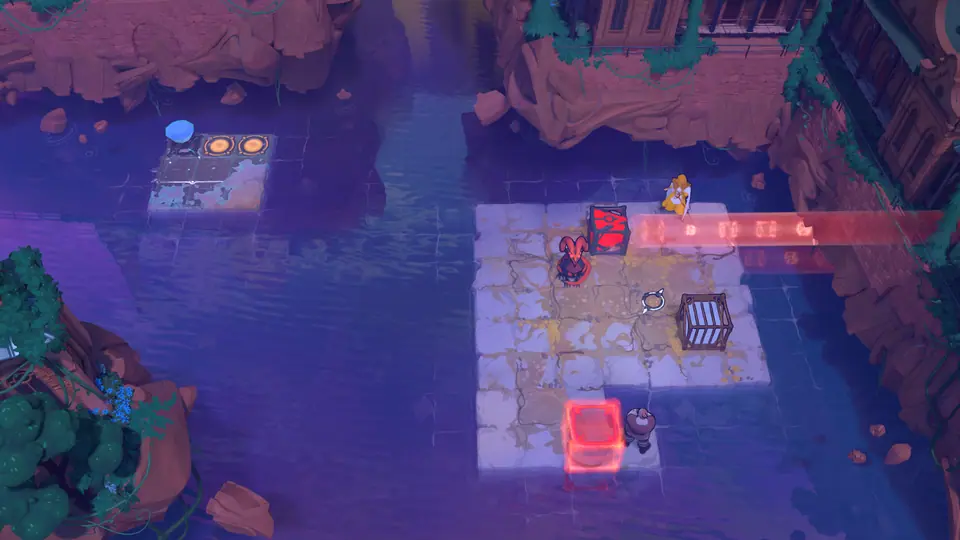 Doubling Beams puzzle 2No route
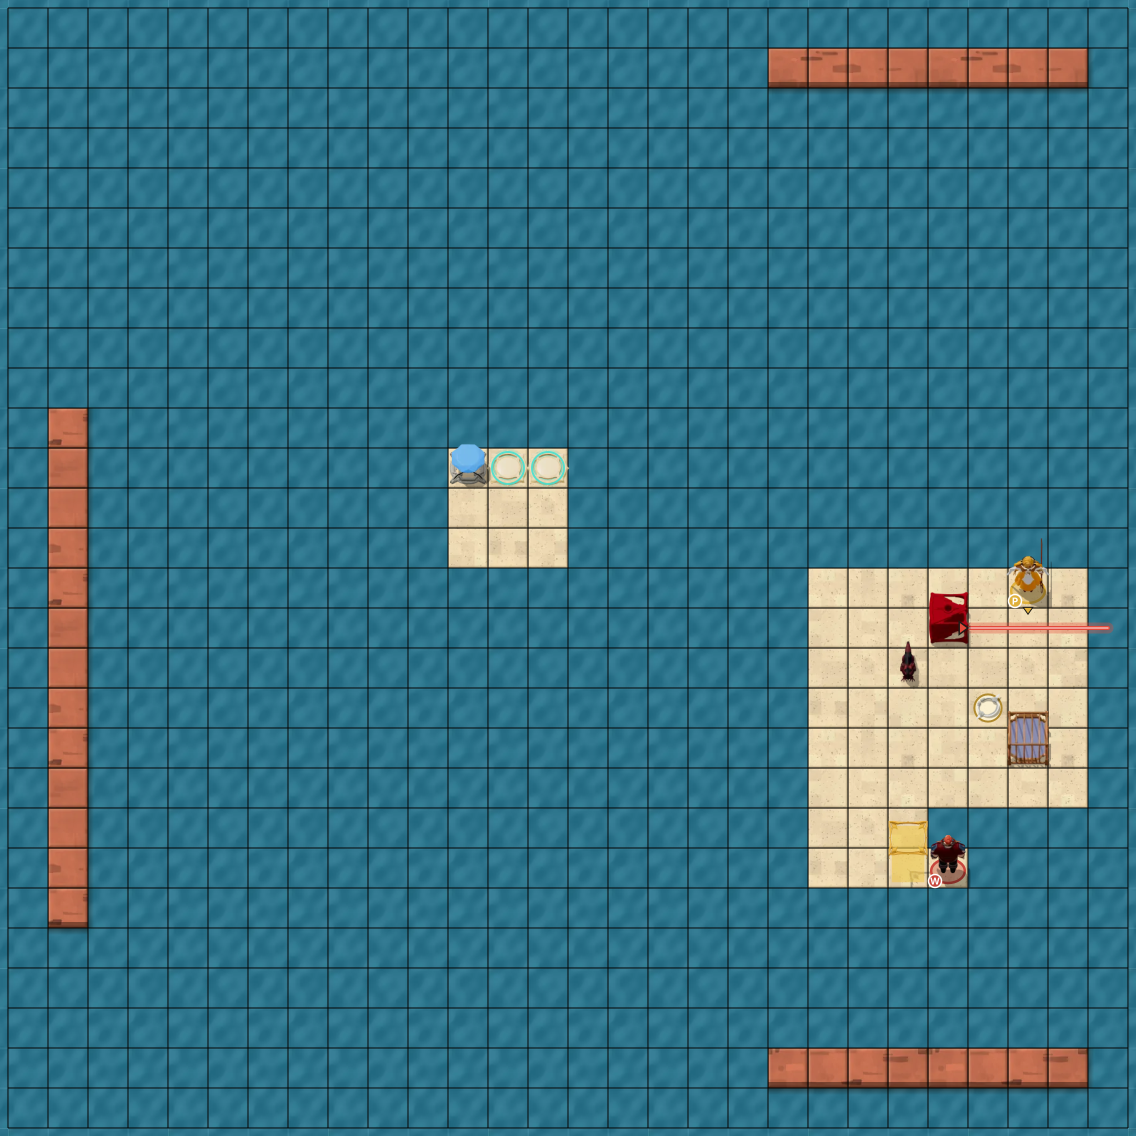
Clues
A complete move-by-move solution is not currently available for this puzzle.
No complete move sequence is listed yet. The board is available to inspect locally.
Wrapping Mirrors
Choose a puzzle board
Local solutions
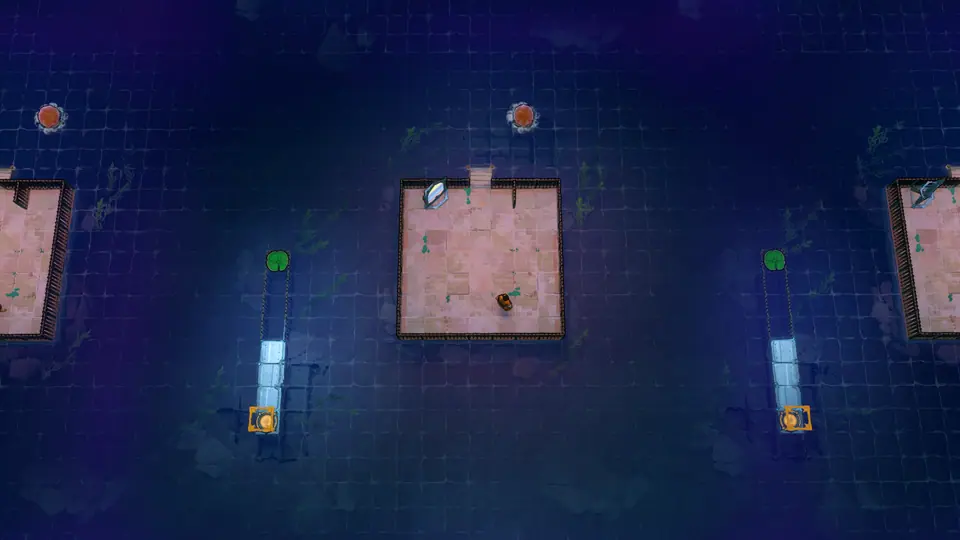 Wrapping Mirrors puzzle 4Full route
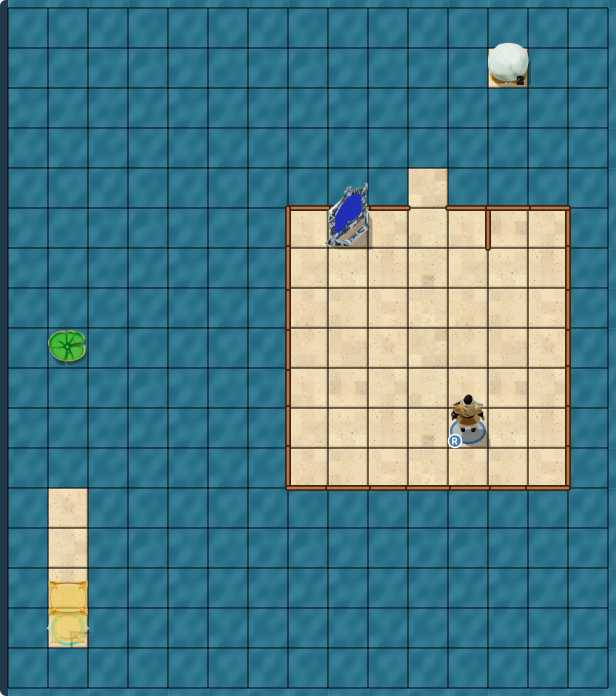
Clues
Use the move list below in order. The layout board shows the route as you step through it.
Full solution · 113 steps
Move sequence · 113 steps
Move order
- Hero
wait 0.8 s, ←, wait 1 s · ←, wait 1 s×3 · ↑, wait 1 s×5 · →, wait 1.4 s×2 · activate, wait 1 s · ↓, wait 1.4 s · ←, wait 1 s · ↓, wait 1 s · →, wait 1.4 s×2 · ↓, wait 1 s · activate, wait 1.8 s · →, wait 1 s×2 · ↑, wait 1 s · ←, wait 1.4 s×4 · ↓, wait 1 s · activate, wait 1 s · ←, wait 1 s×2 · ↑, wait 1 s · →, wait 1.4 s×2 · ↑, wait 1 s · →, wait 1 s · ↓, wait 1.4 s · ←, wait 1 s×3 · ↑, wait 1 s · →, wait 1.4 s×2 · ↓, wait 1 s · →, wait 1 s · ↑, wait 1.4 s×2 · activate, wait 1 s · ↓, wait 1 s×2 · ←, wait 1 s · ↓, wait 1 s · →, wait 1.4 s×2 · ↓, wait 1 s · wait 1.6 s×9 · activate, wait 1 s · ↓, wait 1 s×2 · →, wait 1 s×2 · ↑, wait 1 s · ←, wait 1.4 s×5 · ↓, wait 1 s · ←, wait 1 s · ↑, wait 1.4 s×3 · ↓, wait 1 s · →, wait 1 s×5 · ↑, wait 1.4 s · ←, wait 1 s · activate, wait 1.8 s · →, wait 1 s×2 · ↑, wait 1 s · ←, wait 1.4 s×5 · ↑, wait 1 s · ←, wait 1 s · ↓, wait 1.4 s×5 · ↑, wait 1 s×5 · activate, wait 1 s · ↓, wait 4 s · ↓, wait 1 s×2 · ↓, wait 0.278 s
Low SxB
Activate the SxB Antipode teleporter, then solve any 10 of these 12 puzzles.
Endpoint Skipping
Choose a puzzle board
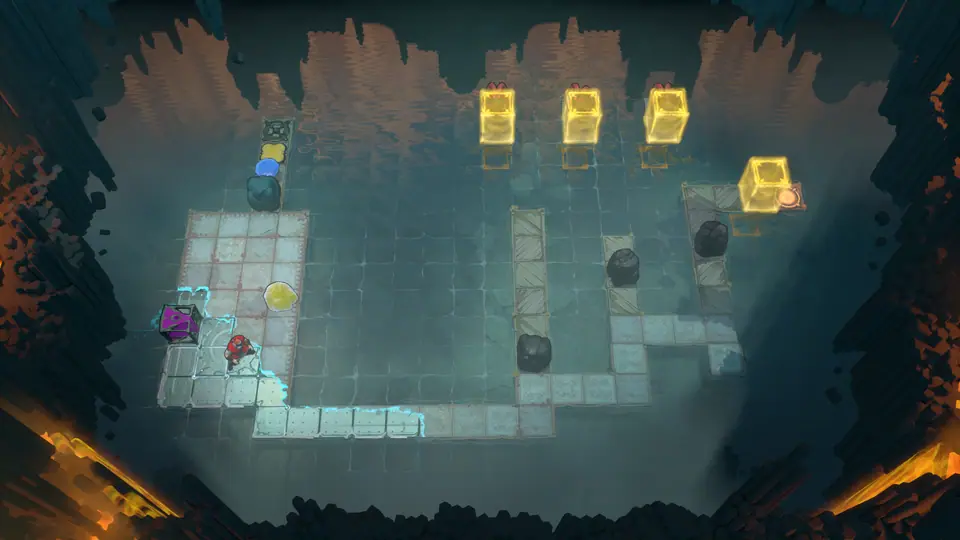 4BoardEndpoint Skipping puzzle 4
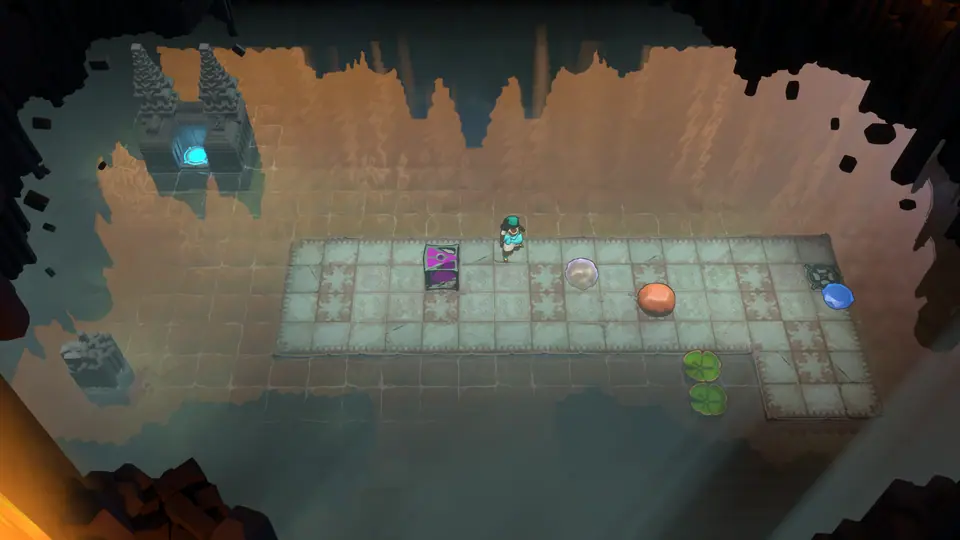 6RouteEndpoint Skipping puzzle 6
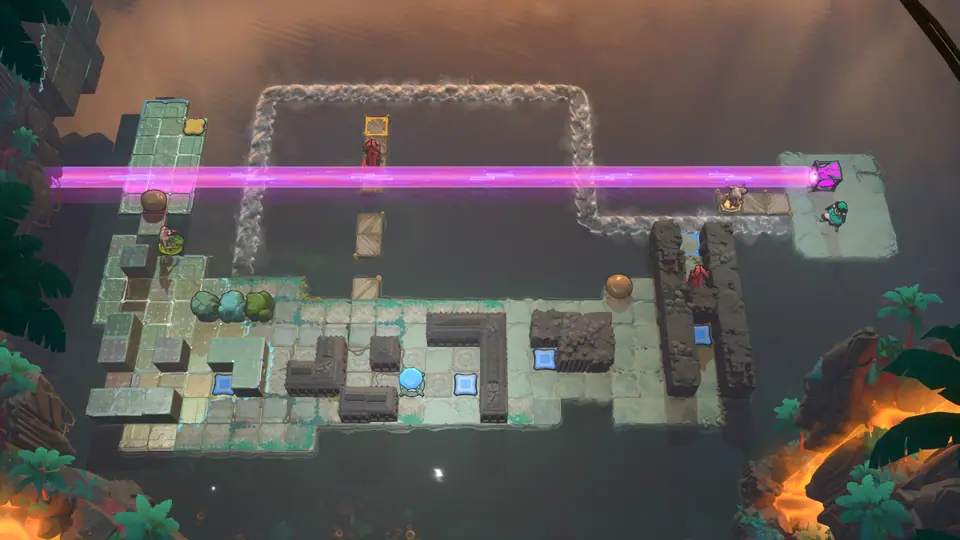 7RouteEndpoint Skipping puzzle 7
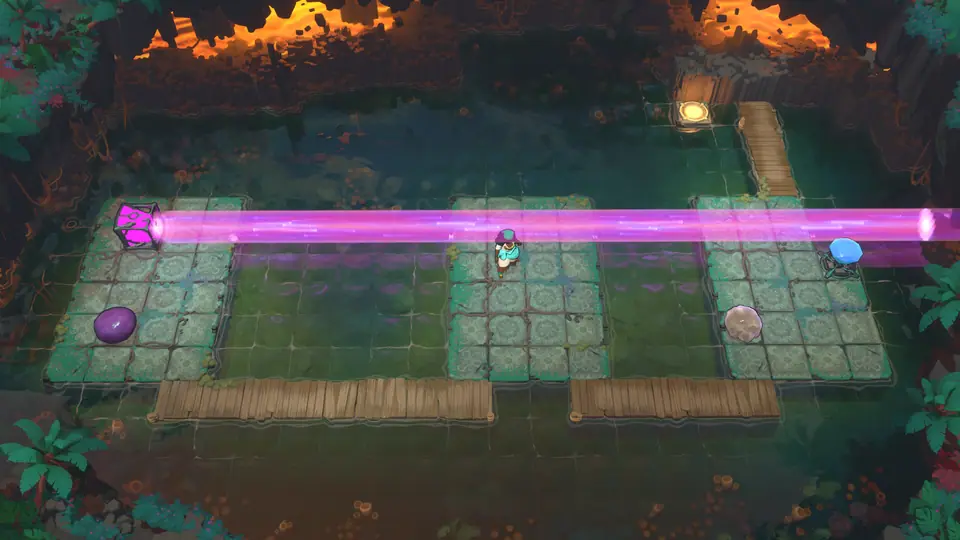 10BoardEndpoint Skipping puzzle 10
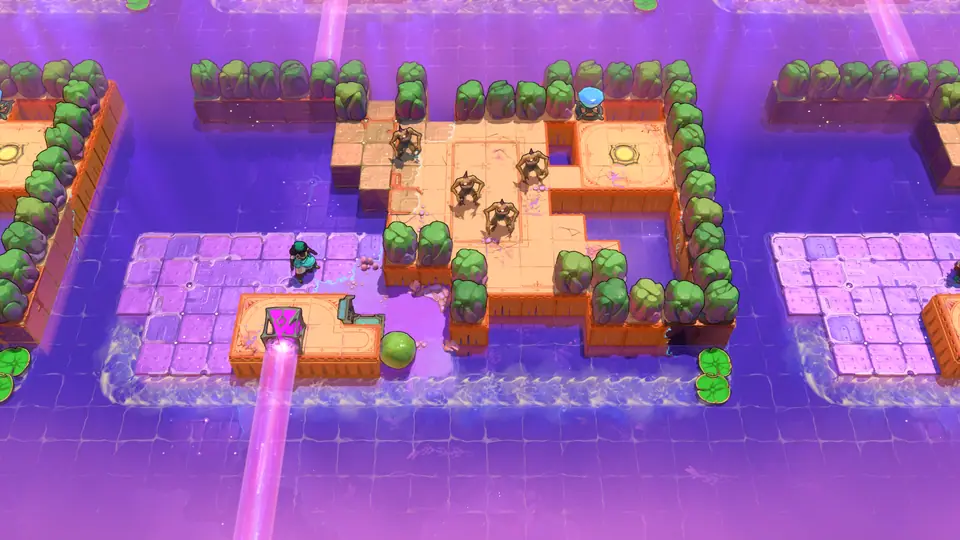 12BoardEndpoint Skipping puzzle 12
Local solutions
Endpoint Skipping puzzle 4No route
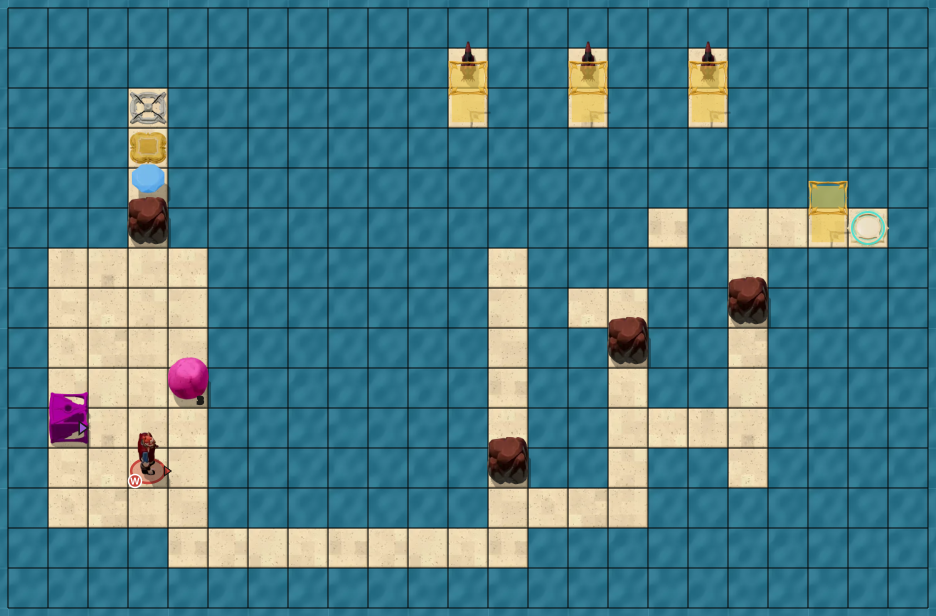
Clues
A complete move-by-move solution is not currently available for this puzzle.
No complete move sequence is listed yet. The board is available to inspect locally.
Endpoint Skipping puzzle 6Full route
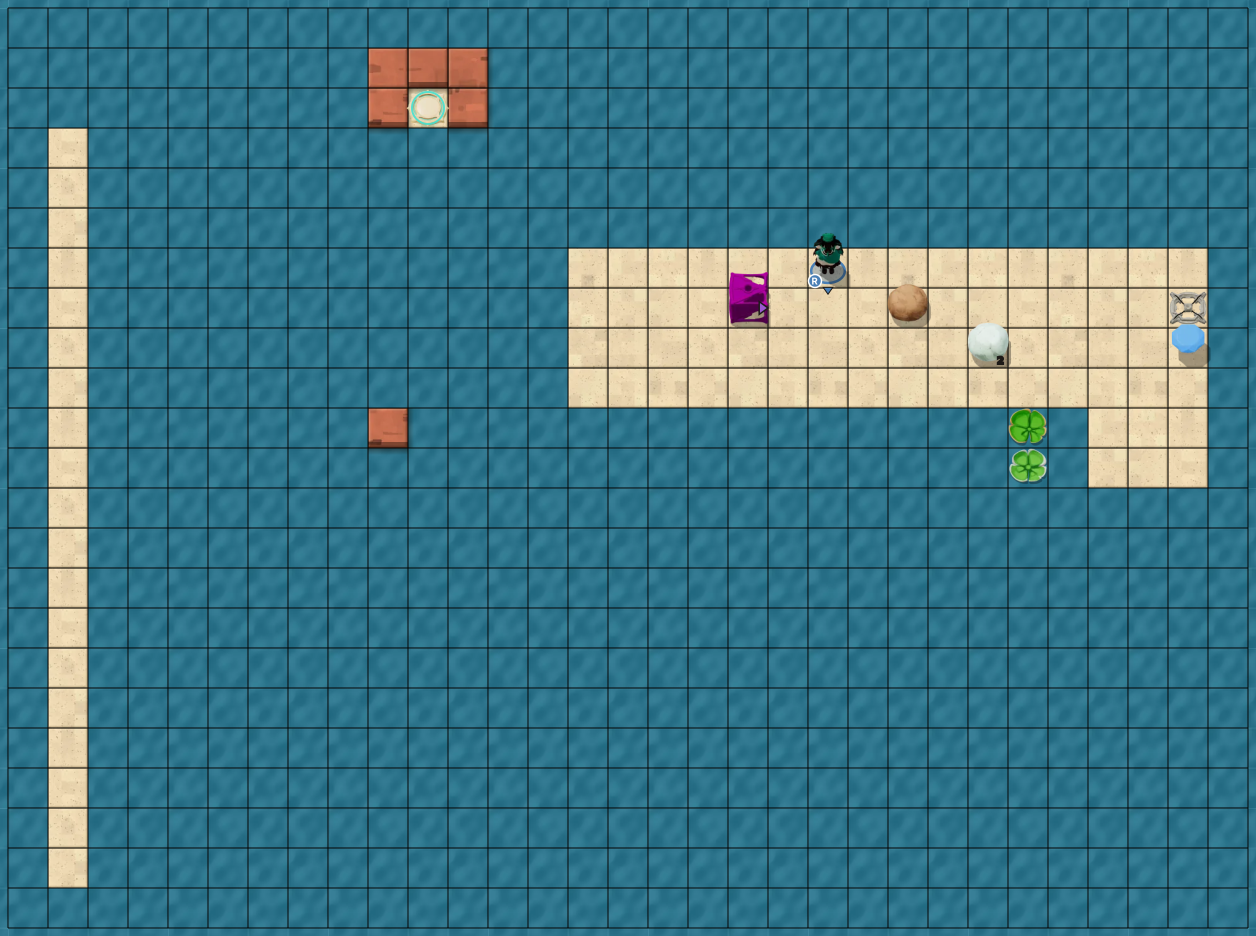
Clues
Use the move list below in order. The layout board shows the route as you step through it.
Full solution · 146 steps
Move sequence · 146 steps
Move order
- Hero
wait 0.8 s, →, wait 1 s · →, wait 1 s×2 · ↓, wait 1 s×2 · →, wait 1.4 s×2 · ↑, wait 1 s · →, wait 1 s · ↓, wait 1.4 s · ↑, wait 1 s×2 · ←, wait 1 s×5 · ↓, wait 1 s · →, wait 1.4 s×5 · ↑, wait 1 s · →, wait 1 s · ↓, wait 1.4 s×4 · →, wait 1 s×2 · ↑, wait 1 s · ←, wait 1 s · ↑, wait 1 s×3 · ←, wait 1 s×11 · ↓, wait 1 s · →, wait 1.4 s×7 · ↑, wait 1 s · →, wait 1 s · ↓, wait 1.4 s×4 · ↑, wait 4 s · ↑, wait 1 s · →, wait 1 s · ↓, wait 1.4 s · →, wait 1 s×2 · ↓, wait 1 s×2 · wait 1 s×10 · ←, wait 1.4 s · →, wait 1 s×2 · ↑, wait 1 s×2 · ↑, wait 1.4 s · ←, wait 1 s×15 · ↓, wait 1 s×2 · ←, wait 4 s · wait 1 s×42 · ↑, wait 0.278 s
Endpoint Skipping puzzle 7Full route
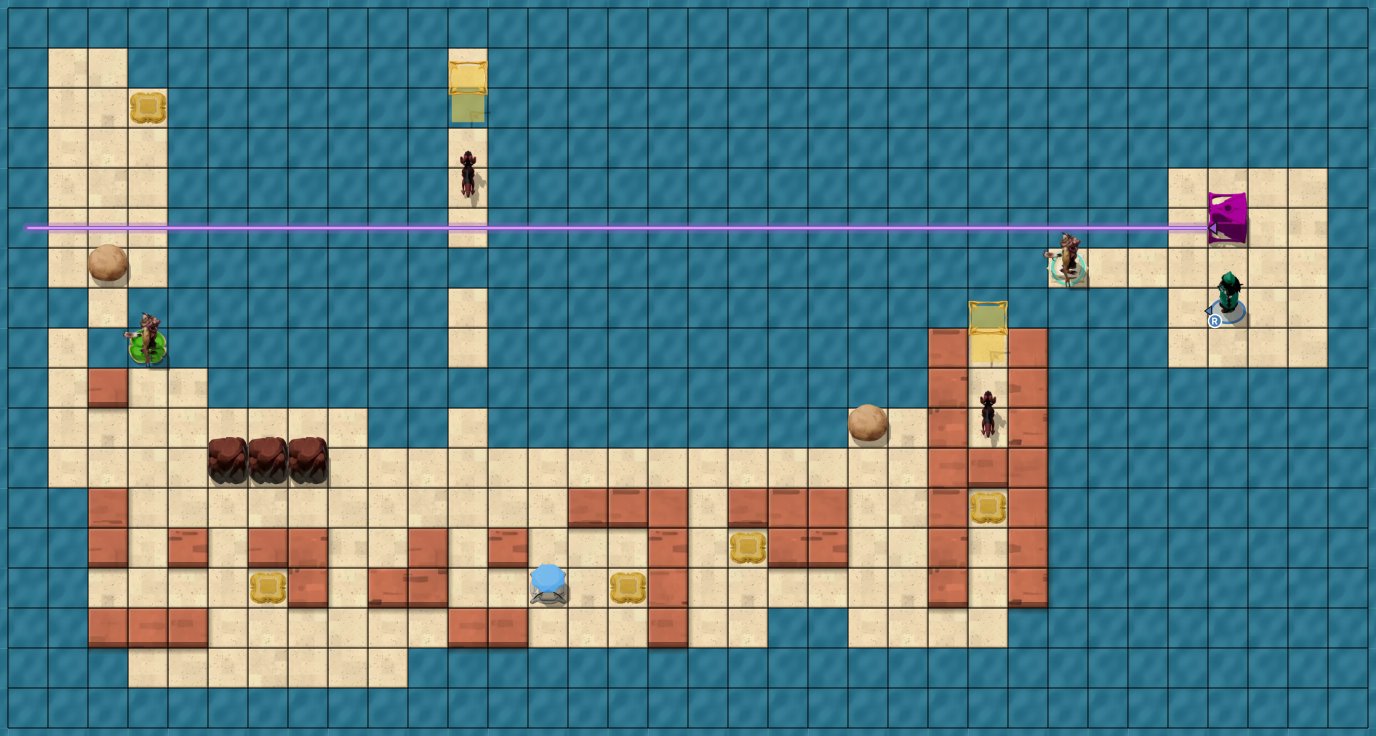
Clues
Use the move list below in order. The layout board shows the route as you step through it.
Full solution · 456 steps
Move sequence · 456 steps
Move order
- Hero
wait 0.683 s, →, wait 1 s · ↑, wait 1 s×3 · ←, wait 1 s · ↓, wait 1.4 s · ←, wait 1 s · ↓, wait 1 s · ←, wait 4 s · ↑, wait 1 s · ←, wait 1 s · ↓, wait 1.4 s×2 · ↑, wait 1 s×2 · →, wait 1 s · ↑, wait 1 s×2 · ↑, wait 1.283 s · wait 0.8 s×92 · ↓, wait 1.283 s · ↓, wait 1 s×2 · ←, wait 1 s · ↓, wait 1 s×3 · ←, wait 1 s · ↓, wait 1 s×2 · →, wait 1 s×4 · ↓, wait 1.4 s×3 · ↑, wait 1 s · ←, wait 1 s×2 · ↓, wait 1 s×2 · →, wait 1 s · →, wait 1.4 s · ↑, wait 1 s×4 · →, wait 1 s×2 · ↓, wait 1.4 s · ←, wait 1.4 s · ↓, wait 1 s · →, wait 1.4 s×6 · ←, wait 1 s · ↓, wait 1 s×2 · →, wait 1 s · →, wait 1.4 s · ↓, wait 1 s · →, wait 1 s · ↑, wait 1.4 s · ←, wait 1 s×3 · ↑, wait 1 s×2 · →, wait 1 s · ↑, wait 1 s · →, wait 1 s×9 · ↑ · ↓, wait 2.4 s · ←, wait 1 s×8 · ↓, wait 1.4 s · wait 0.8 s×50 · ↓, wait 1.4 s · ↑, wait 1 s · ←, wait 1 s×2 · ↓, wait 1 s×2 · →, wait 1 s · →, wait 1.4 s · ↓, wait 1 s · →, wait 1 s×2 · ↑, wait 1 s×2 · ←, wait 1.4 s · →, wait 1 s · ↓, wait 1 s×2 · ←, wait 1 s×2 · ↑, wait 1 s · →, wait 1.4 s · ←, wait 1 s×3 · ↑, wait 1 s×2 · →, wait 1 s×2 · ↓, wait 1.4 s · ↑, wait 1 s · ←, wait 1 s×9 · ↑, wait 1 s×2 · ←, wait 1 s×3 · ↑, wait 1 s×2 · →, wait 1 s · ↑, wait 1 s×3 · →, wait 1 s · ↑, wait 1 s×2 · ↑, wait 1.283 s · wait 0.8 s×19 · ↓, wait 1.267 s · ↓, wait 1 s×2 · ←, wait 1 s · ↓, wait 1 s×3 · ←, wait 1 s · ↓, wait 1 s×2 · →, wait 1 s×3 · ↓, wait 1 s · →, wait 1.4 s×16 · ←, wait 1 s×3 · ↓, wait 1 s×3 · →, wait 1 s×5 · ↑, wait 1 s×4 · ←, wait 1 s · ↓, wait 1.4 s×3 · →, wait 1 s · ↓, wait 1 s · ←, wait 1.4 s×3 · →, wait 1 s×2 · ↑, wait 1 s×3 · ←, wait 1 s×4 · ↓, wait 1 s×4 · →, wait 1 s · ↑, wait 1.4 s · →, wait 1 s×4 · ↓, wait 1 s · →, wait 1 s×2 · ↑, wait 1 s×2 · ↑, wait 1.283 s · wait 0.8 s×14 · wait 1.683 s · wait 0.8 s×9 · ↓, wait 1.283 s · ↓, wait 1 s×2 · ←, wait 1 s×2 · ↑, wait 1 s×4 · ←, wait 1 s×18 · ↑, wait 1 s · ←, wait 1 s×3 · ↑, wait 1 s×2 · →, wait 1 s · ↑, wait 1 s×2 · →, wait 4 s · →, wait 1 s · ↑, wait 1 s · →, wait 1 s · ↓, wait 1.4 s · ←, wait 1 s×3 · ←
Endpoint Skipping puzzle 10No route
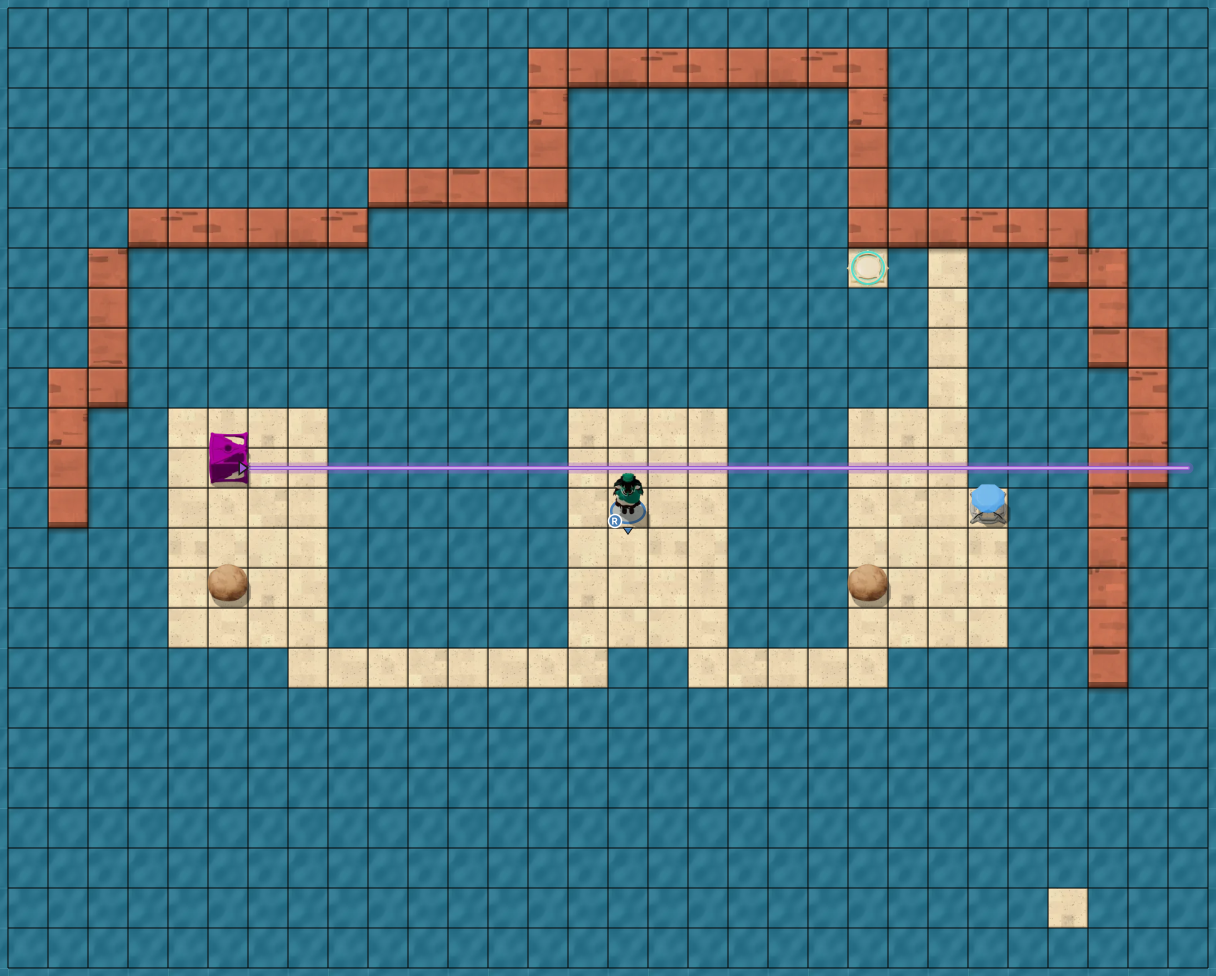
Clues
A complete move-by-move solution is not currently available for this puzzle.
No complete move sequence is listed yet. The board is available to inspect locally.
Endpoint Skipping puzzle 12No route
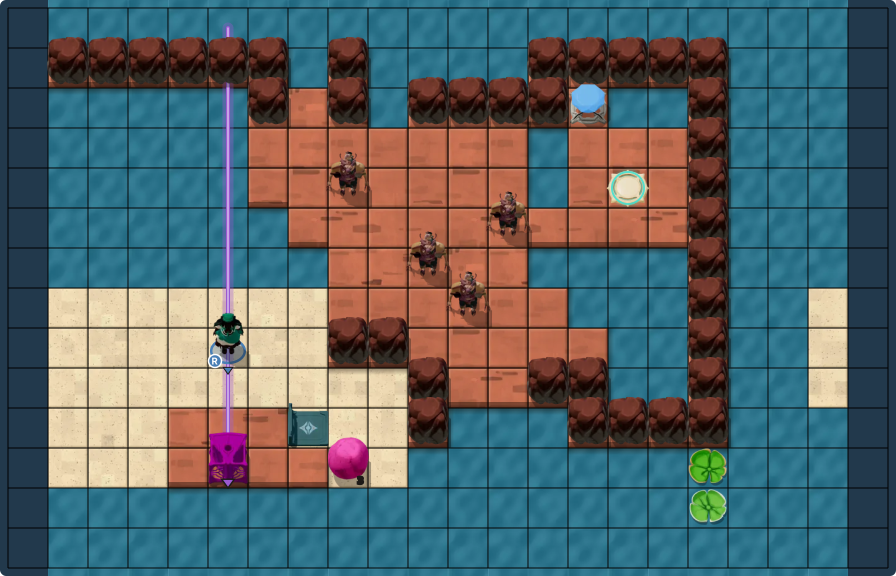
Clues
A complete move-by-move solution is not currently available for this puzzle.
No complete move sequence is listed yet. The board is available to inspect locally.
Skipping, Misc Beams
Choose a puzzle board
Local solutions
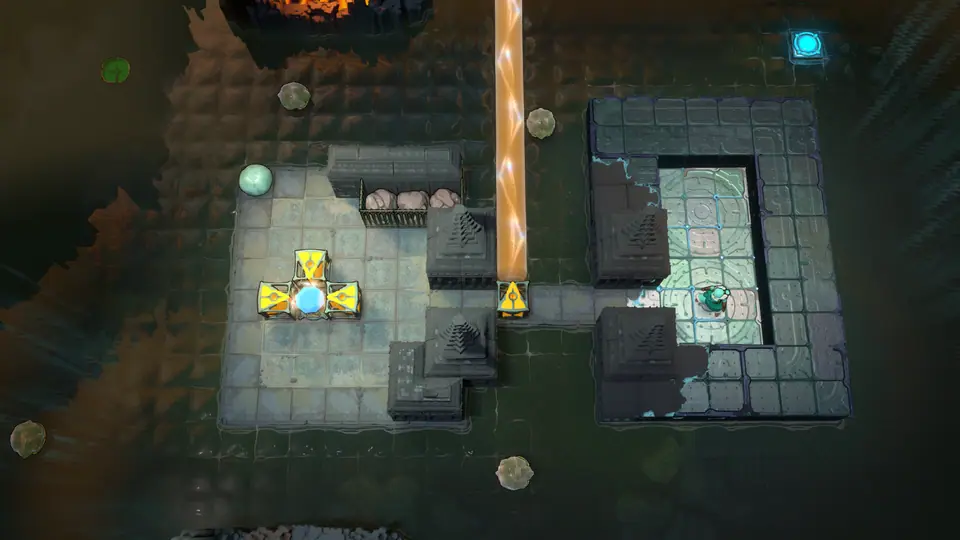 Skipping, Misc Beams puzzle 1Full route
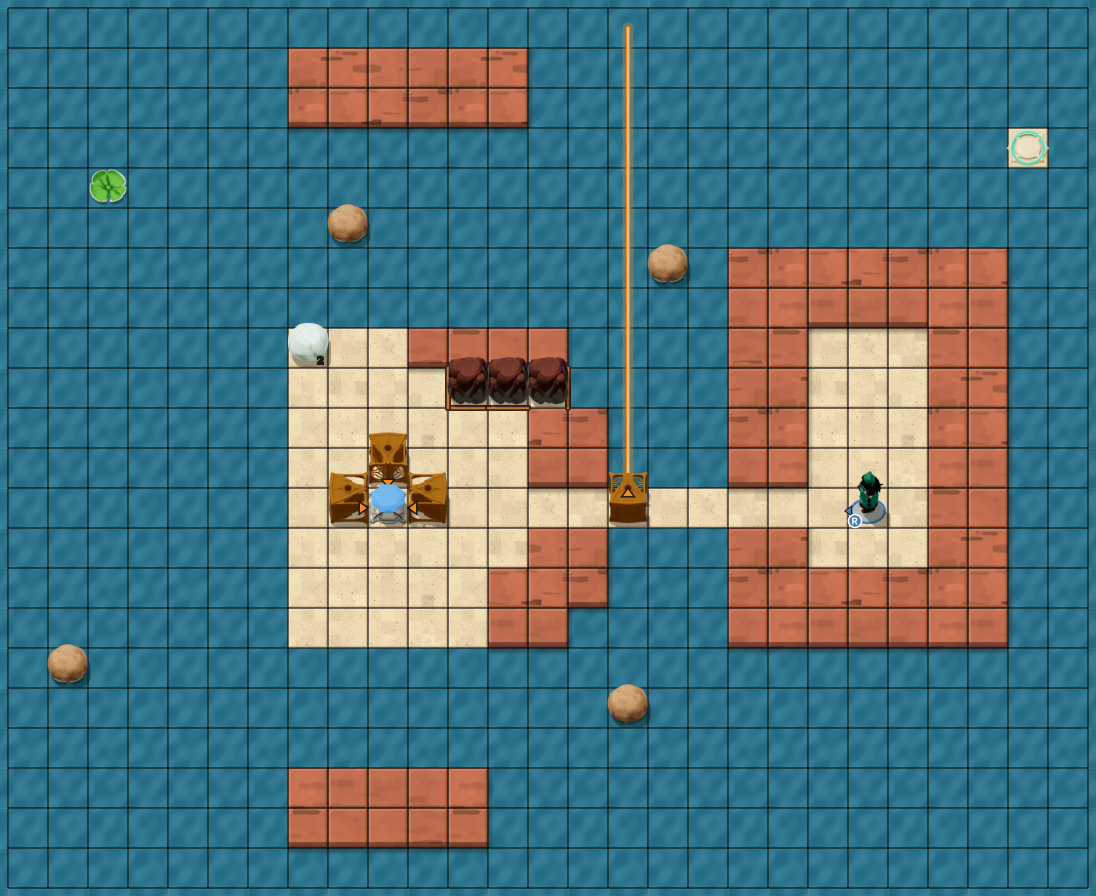
Clues
Use the move list below in order. The layout board shows the route as you step through it.
Full solution · 269 steps
Move sequence · 269 steps
Move order
- Hero
wait 0.8 s, ←, wait 1 s · ←, wait 1 s×4 · ←, wait 1.4 s×4 · ↓, wait 1 s · ←, wait 1 s×4 · ↑, wait 1.4 s×2 · ↓, wait 1 s · →, wait 1 s · ↓, wait 1 s · ↑, wait 1 s×2 · →, wait 1.4 s · ↓, wait 1.4 s · ↑, wait 1 s×3 · ←, wait 1 s · ↓, wait 1.4 s×2 · →, wait 1 s · →, wait 1.4 s · ↓, wait 1.4 s · →, wait 1.4 s×3 · ←, wait 1 s · ↑, wait 1 s · ←, wait 1.4 s×4 · ↑, wait 1 s · ←, wait 1 s · ↓, wait 1.4 s×3 · →, wait 1 s · ↑, wait 1.4 s · ←, wait 1 s · ↓, wait 1 s · →, wait 1 s · ↓, wait 1 s · →, wait 1 s×2 · ↑, wait 1.4 s · ↓, wait 1 s · →, wait 1 s · ↑, wait 1 s×2 · ←, wait 1.4 s×2 · →, wait 1 s×4 · →, wait 1.4 s×7 · ↓, wait 1 s · →, wait 1 s · ↑, wait 1.4 s · →, wait 1 s · ↑, wait 1 s · ←, wait 1.4 s · ↓, wait 1 s · ←, wait 1 s · ↑, wait 1.4 s×2 · ↓, wait 1 s×2 · ←, wait 1 s×11 · ↑, wait 1 s×2 · ←, wait 1 s×2 · ↓, wait 1 s×2 · →, wait 1.4 s×13 · ↓, wait 1 s · →, wait 1 s · ↑, wait 1.4 s×2 · →, wait 1 s · ↑, wait 1 s×3 · ←, wait 1 s×2 · ↓, wait 1.4 s×3 · →, wait 1 s · ↓, wait 1 s · ←, wait 1.4 s×9 · ↑, wait 1 s · ←, wait 1 s · ↓, wait 1.4 s · ←, wait 1 s · ↓, wait 1 s×2 · →, wait 1 s · ↑, wait 1.4 s · ←, wait 1 s · ↑, wait 1 s · →, wait 1.4 s×3 · ←, wait 1 s×5 · ↑, wait 1.4 s · ↓, wait 1 s×3 · →, wait 1 s · ↑, wait 1.4 s · ←, wait 1 s×2 · ↑, wait 1 s×4 · ↑, wait 1.4 s · wait 3.2 s×12 · ↓, wait 1 s×3 · →, wait 1 s · ↑, wait 1.4 s · ↓, wait 4 s · ↓, wait 1 s · →, wait 1 s×2 · ↑, wait 1 s · →, wait 1 s×3 · →, wait 1.4 s×7 · ↓, wait 1 s · →, wait 1 s×2 · ↑, wait 1 s · ←, wait 1.4 s×10 · ↓, wait 1 s · ←, wait 1 s · ↑, wait 1.4 s · wait 3.2 s×4 · ↑, wait 1.4 s · ←, wait 1 s×3 · ↑, wait 1 s · ↑, wait 1.4 s · ↓, wait 1 s×4 · →, wait 1 s×2 · ↑, wait 1 s · →, wait 1 s×11 · ↑, wait 1 s · ↑, wait 1.4 s×2 · ←, wait 1 s · ↑, wait 1 s · wait 3.2 s×8 · wait 0.48 s×4 · ↑, wait 4 s · wait 3.2 s×4 · ↑, wait 0.278 s
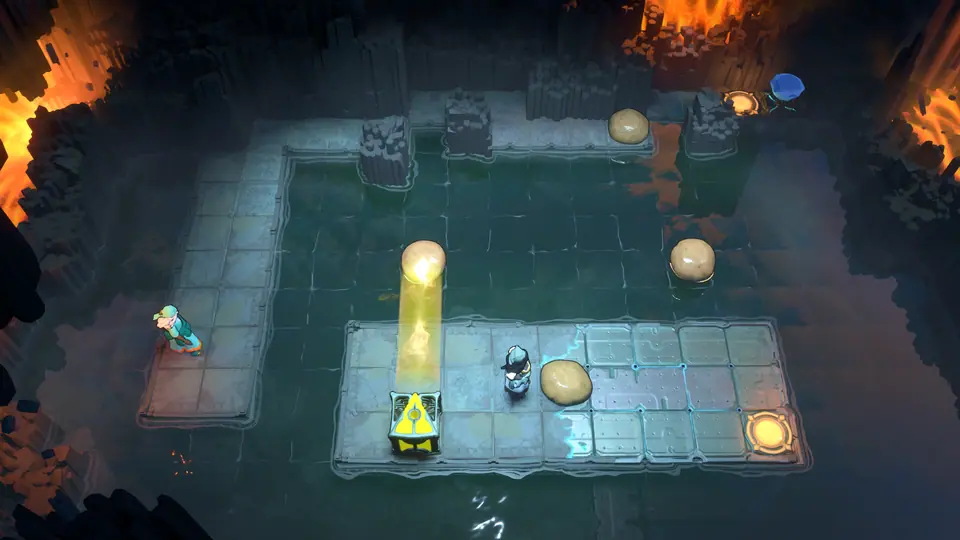 Skipping, Misc Beams puzzle 3Under review
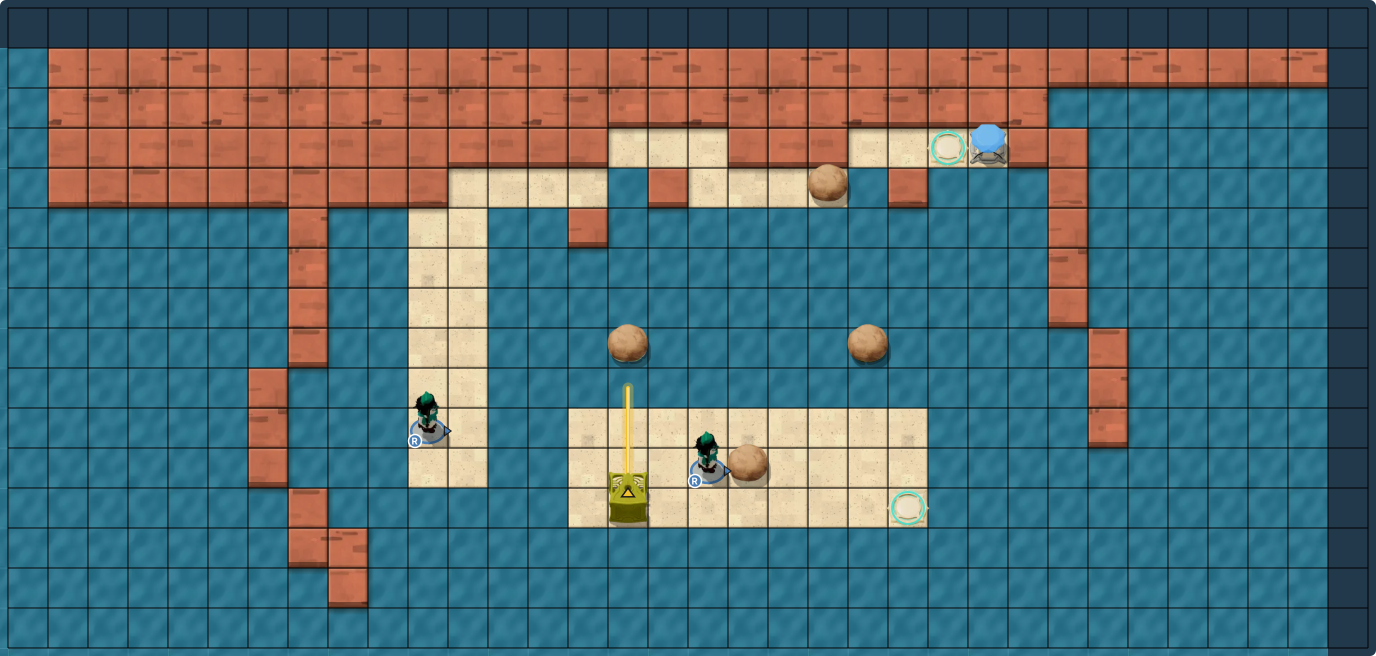
Clues
A complete move-by-move solution is not currently available for this puzzle.
No complete move sequence is listed yet. The board is available to inspect locally.
Doubling Beams
Choose a puzzle board
Local solutions
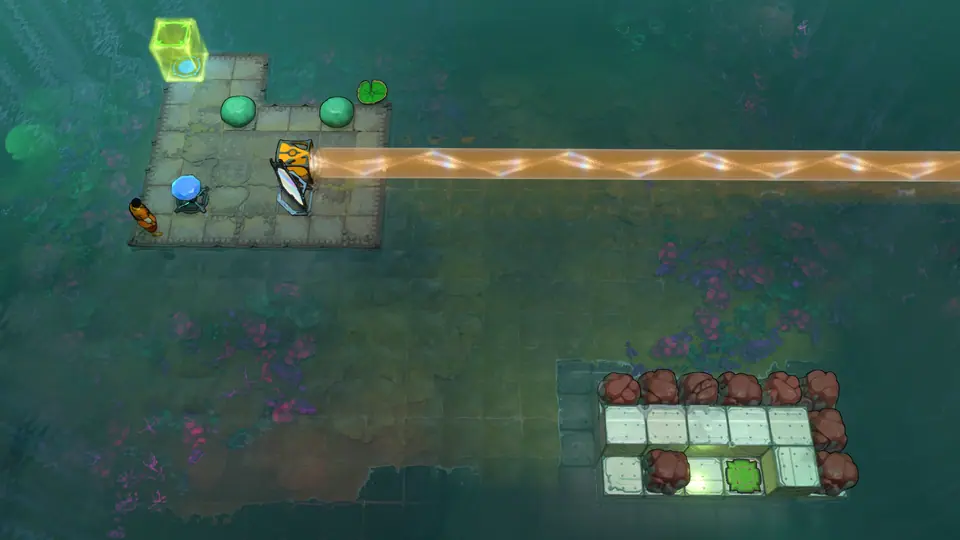 Doubling Beams puzzle 3No route
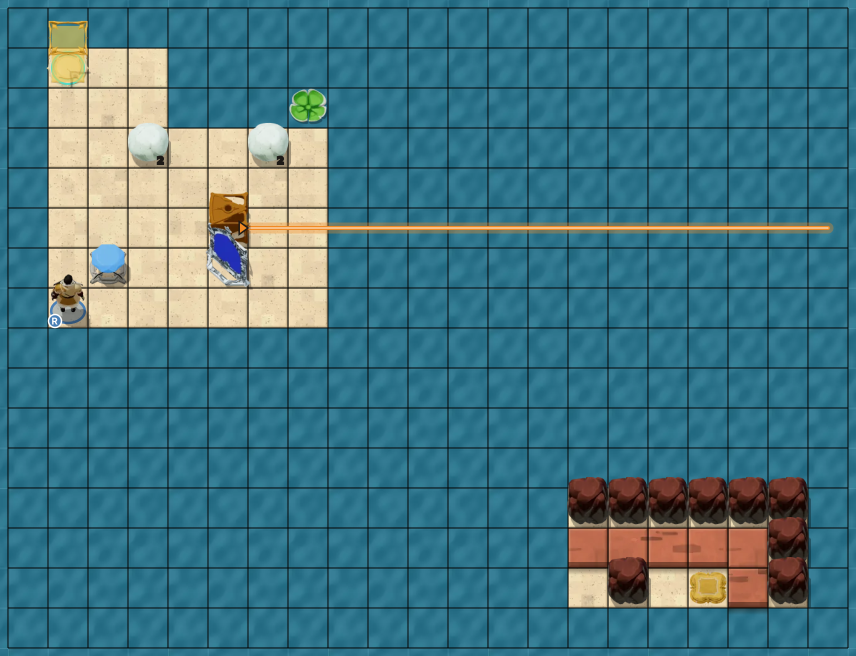
Clues
A complete move-by-move solution is not currently available for this puzzle.
No complete move sequence is listed yet. The board is available to inspect locally.
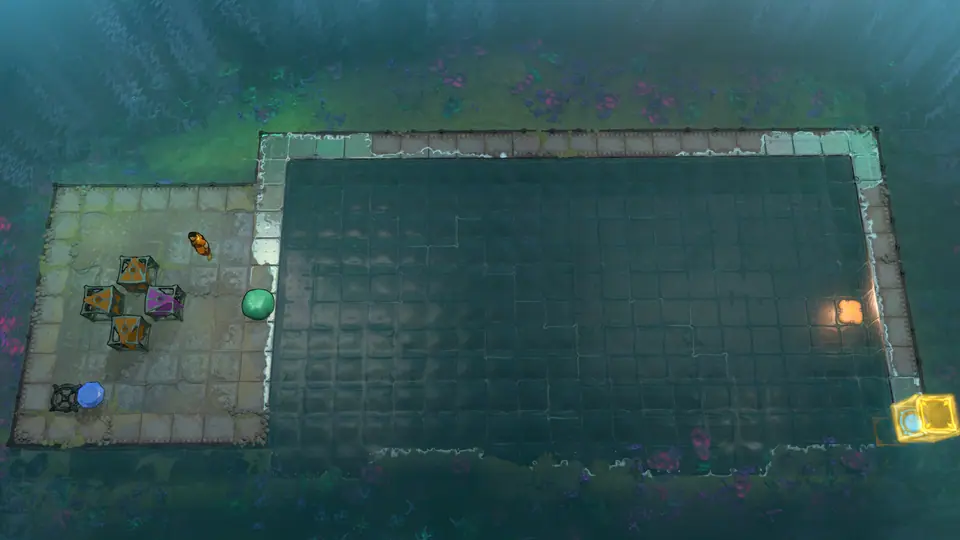 Doubling Beams puzzle 6No route
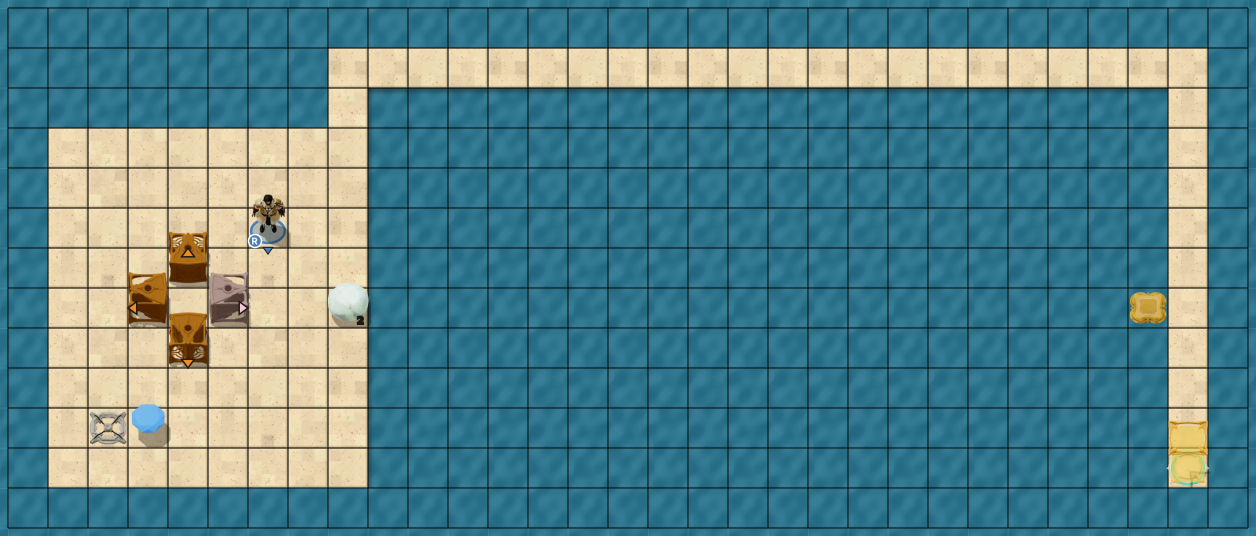
Clues
A complete move-by-move solution is not currently available for this puzzle.
No complete move sequence is listed yet. The board is available to inspect locally.
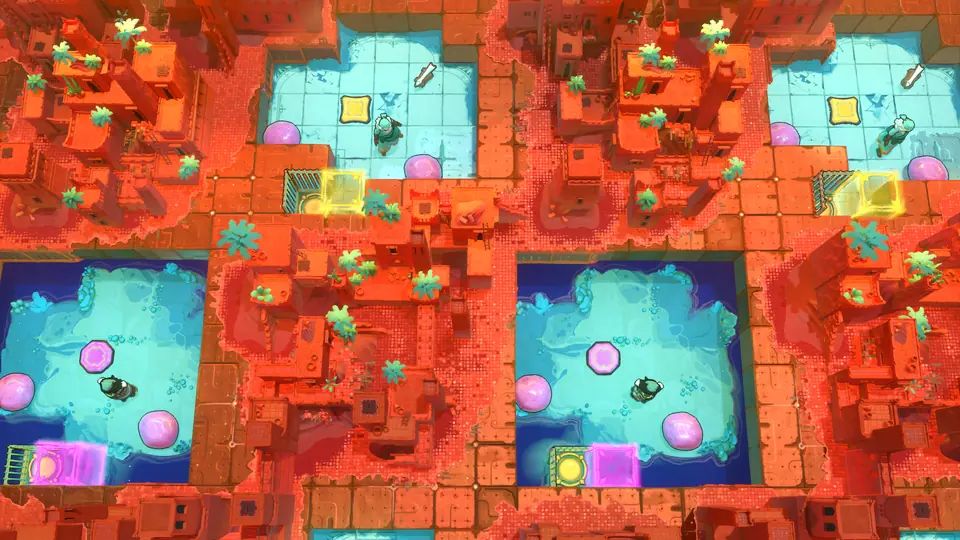 Doubling Beams puzzle 8Full route
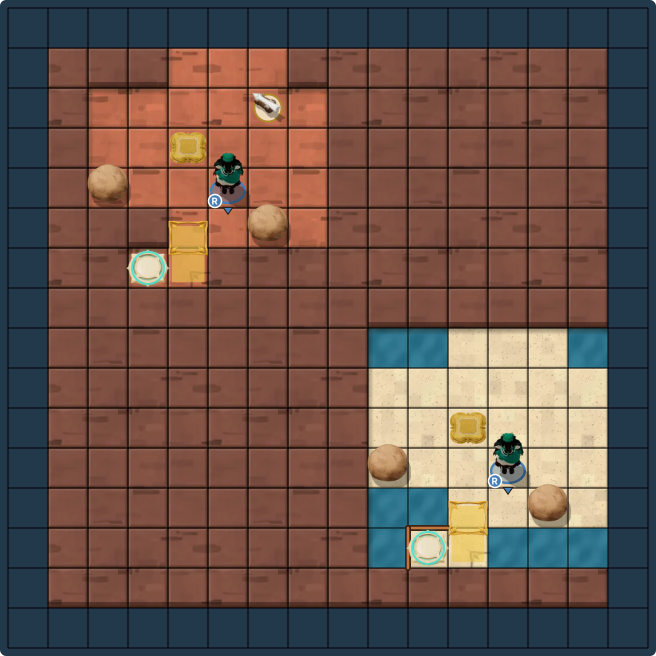
Clues
Use the move list below in order. The layout board shows the route as you step through it.
Full solution · 148 steps
Move sequence · 148 steps
Move order
- Hero 2
wait 0.683 s, →, wait 1 s · →, wait 1 s · ↓, wait 1 s · ←, wait 1.4 s×3 · ↑, wait 1 s · →, wait 1 s×3 · wait 0.733 s · wait 0.717 s×3 · ↓, wait 1.4 s · ↑, wait 1 s · ←, wait 1 s×4 · ↑, wait 1 s · ←, wait 0.267 s · ↓, wait 2.133 s · ↑, wait 1 s · →, wait 1 s · ↑, wait 1 s · wait 0.717 s · wait 0.733 s · wait 0.717 s×3 · ←, wait 1.4 s · →, wait 1 s×4 · ↓, wait 1 s · →, wait 1 s · ↑, wait 1.4 s · ↓, wait 1 s×2 · wait 0.717 s · wait 0.733 s · wait 0.717 s×4 · ↓, wait 1.4 s · ↑, wait 1 s×3 · →, wait 1 s · wait 0.733 s · wait 0.717 s×2 · ←, wait 1.4 s×3 · ↑, wait 1 s · ←, wait 1 s · ↓, wait 1.4 s · →, wait 1 s · ↓, wait 1 s×3 · ←, wait 1 s · ↓, wait 1 s · ←, wait 1 s - Hero 1
↑, wait 1 s×2 · →, wait 1 s · ←, wait 1 s×2 · ↓, wait 1.283 s · ↓, wait 1.267 s · ←, wait 1 s · activate, wait 1.133 s · →, wait 1 s×3 · ↓ · activate, wait 1.117 s · ↓, wait 1 s · →, wait 1 s · ↑, wait 1.4 s · ↓, wait 1 s · ←, wait 1 s · ↑, wait 1 s×3 · ←, wait 1 s · ↑, wait 1 s · → · activate, wait 1.117 s · ↓, wait 1 s · ←, wait 1 s · ↑ · activate, wait 1.117 s · ↓, wait 1.283 s×2 · →, wait 1 s · ↓, wait 1 s · ← · activate, wait 1.117 s · ↑, wait 1 s · →, wait 1 s×2 · ↓ · activate, wait 1.117 s · ←, wait 1 s · ↑, wait 1 s×2 · → · activate, wait 1.117 s · ←, wait 1 s×3 · ↓, wait 1 s · ←, wait 1 s · ↑ · activate, wait 1.117 s · →, wait 1 s · →, wait 1.283 s×2 · →, wait 1 s · ↑, wait 1 s · →, wait 1 s · ↓, wait 1.4 s · ←, wait 1 s×2 · ←, wait 1.283 s · ↓, wait 1.267 s · ←, wait 1 s · activate, wait 1.117 s · ↑, wait 1 s · →, wait 1.283 s×2 · →, wait 1 s×2 · ↓, wait 1.4 s · ←, wait 1.4 s×2 · ↓, wait 1 s · ←, wait 1 s · ↑, wait 1.4 s · ↓, wait 1 s×2 · ←
Partial Resets
Choose a puzzle board
Local solutions
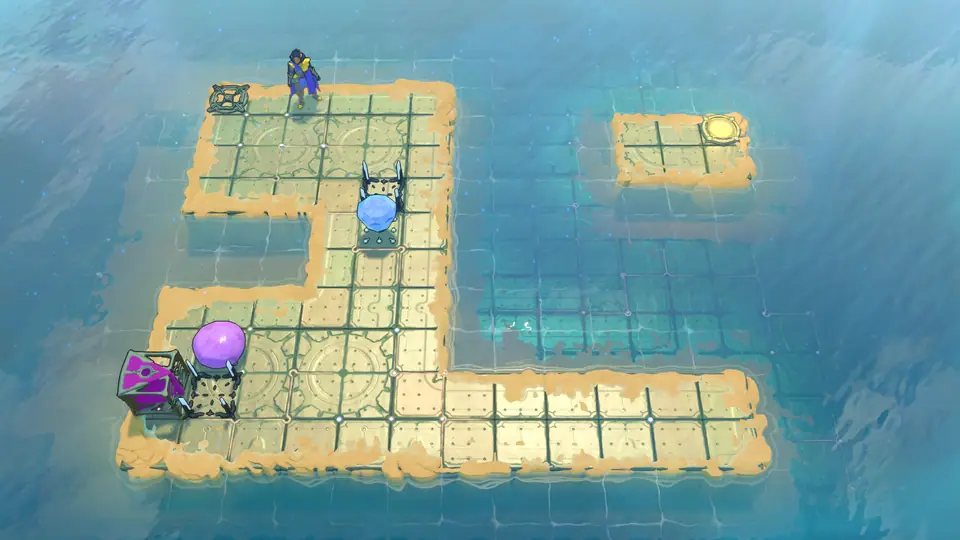 Partial Resets puzzle 1Full route
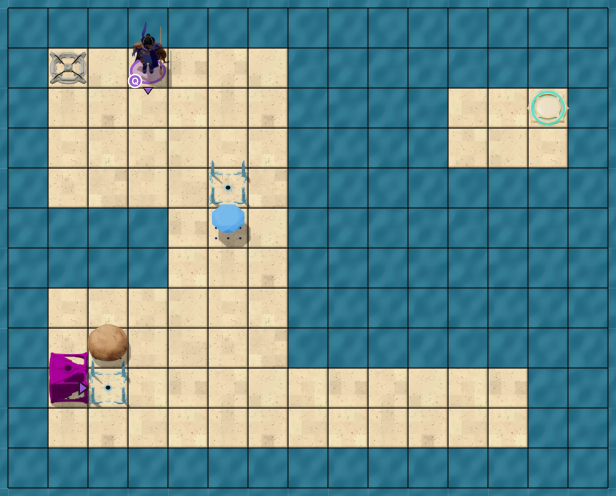
Clues
Use the move list below in order. The layout board shows the route as you step through it.
Full solution · 199 steps
Move sequence · 199 steps
Move order
- Queen
→, wait 1 s×2 · ↓, wait 1 s×3 · ←, wait 1 s · ↓, wait 1 s×3 · ←, wait 1 s×2 · ↓, wait 1 s · →, wait 1 s×2 · ↑, wait 1 s×4 · →, wait 1 s · ↓, wait 1 s×3 · →, wait 1 s · ↓, wait 1 s · ←, wait 1 s×5 · →, wait 1 s×2 · ↓, wait 1 s×2 · ←, wait 1 s · ↑, wait 1 s · →, wait 1 s · ↑, wait 1 s · ←, wait 1 s×2 · →, wait 1 s×3 · ↑, wait 1 s×4 · →, wait 1 s · activate, wait 1 s · ←, wait 1 s · ↓, wait 1 s×6 · ←, wait 1 s×3 · ↑, wait 1 s · →, wait 1 s×3 · ↑, wait 1 s×5 · →, wait 1 s · ↓, wait 1 s×4 · →, wait 1 s · ↓, wait 1 s · ←, wait 1 s×6 · ↑, wait 1 s · →, wait 1 s×3 · ↓, wait 1 s · →, wait 1 s · ↑, wait 1 s×6 · →, wait 1 s · ↓, wait 1 s · activate, wait 1 s · ←, wait 1 s · ↓, wait 1 s×2 · →, wait 1 s · ↑, wait 1 s×4 · →, wait 1 s · ↑, wait 1 s · ←, wait 1 s×4 · →, wait 1 s×3 · ↓, wait 1 s×3 · activate, wait 1 s · ↓, wait 1 s×4 · →, wait 1 s · ↓, wait 1 s · ←, wait 1 s×4 · activate, wait 1 s · ↓, wait 1 s · ←, wait 1 s · ↑, wait 1 s · →, wait 1 s×2 · ↑, wait 1 s×2 · ←, wait 1 s · ↓, wait 1 s · →, wait 1 s · ↓, wait 1 s×2 · ←, wait 1 s×2 · ↑, wait 1 s · →, wait 1 s×10 · ↓, wait 1 s · →, wait 1 s · ↑, wait 1 s · ←, wait 1 s×7 · ↑, wait 1 s×5 · activate, wait 1 s · ↑, wait 1 s×3 · ←, wait 1 s · ↓, wait 1 s · →, wait 1 s · ↓, wait 1 s×2 · ←, wait 1 s · ↓, wait 1 s×2 · →, wait 1 s · ↑, wait 1 s×4 · →, wait 1 s · ↑, wait 1 s · ←, wait 1 s×4 · →, wait 1 s×3 · ↓, wait 1 s×2 · →, wait 1 s · ↑, wait 1 s · →, wait 1 s · →, wait 0.16 s
Lily Beam Rotation
Choose a puzzle board
Local solutions
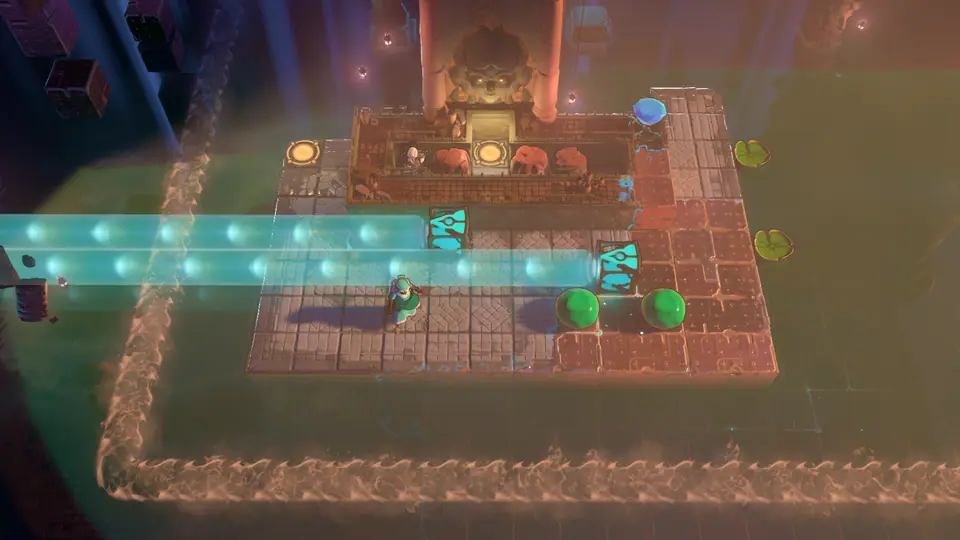 Lily Beam Rotation puzzle 3Full route
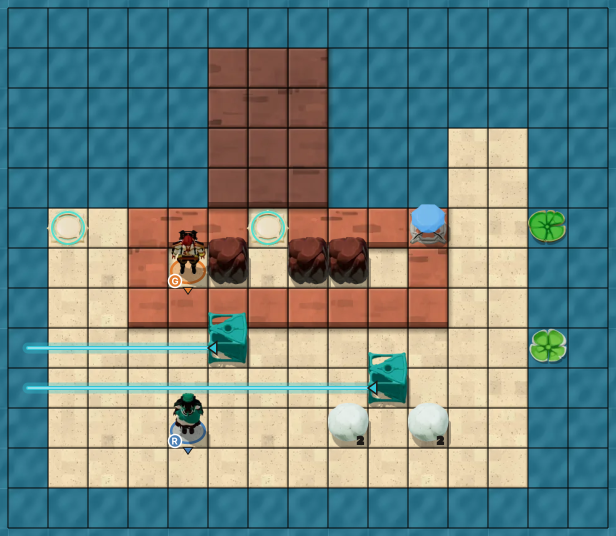
Clues
Use the move list below in order. The layout board shows the route as you step through it.
Full solution · 109 steps
Move sequence · 109 steps
Move order
- Hero
↑, wait 0.983 s · ↑, wait 1 s · →, wait 1 s×8 · ←, wait 1 s×4 · ↓, wait 1 s · →, wait 1 s×3 · ↓, wait 1 s · →, wait 1 s · ↑, wait 1 s×4 · ←, wait 1 s · ↑, wait 1 s · →, wait 1 s · ↓, wait 1 s×4 · ←, wait 1 s×3 · ↓, wait 1 s · →, wait 1 s×2 · ↓, wait 1 s · →, wait 1 s · ↑, wait 1 s×6 · ↓, wait 1 s×4 · ←, wait 1 s×5 · ↓, wait 1 s · →, wait 1 s×4 · ↓, wait 1 s · →, wait 1 s · ↑, wait 1 s×3 · ←, wait 1 s · ↑, wait 1 s · →, wait 1 s · ←, wait 1 s · ↑, wait 1 s×3 · wait 1.2 s×7 · →, wait 1 s · ↓, wait 1 s×7 · ←, wait 1 s×11 · ↑, wait 1 s×2 · wait 0.133 s · wait 0.117 s · wait 0.583 s - Gemsman
→, wait 0.533 s · →, wait 1 s · ↑, wait 1 s - Hero
↑, wait 1 s×3 · ↑
Endgame targets
These two puzzles are separate from the ten High and Low candidate sets.
The Heroic Way
Choose a puzzle board
Local solution status
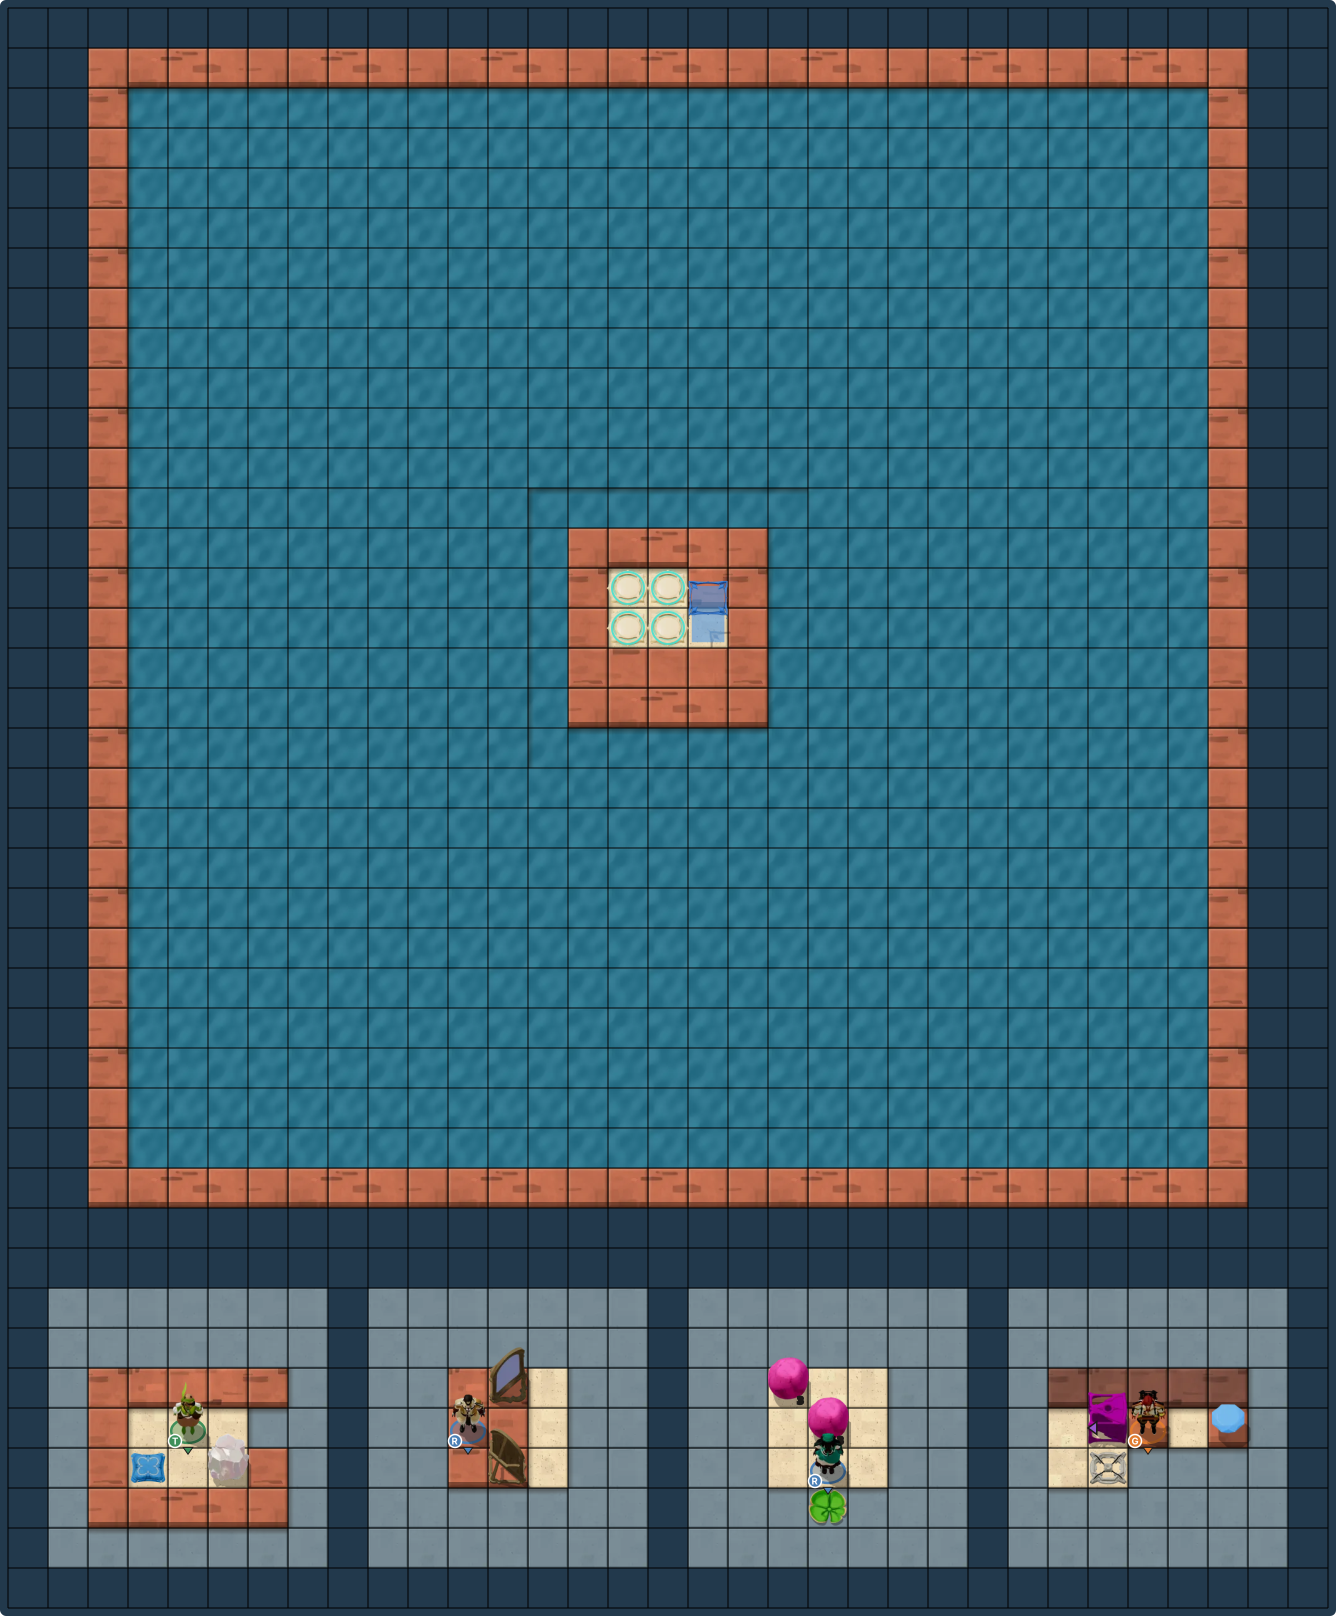
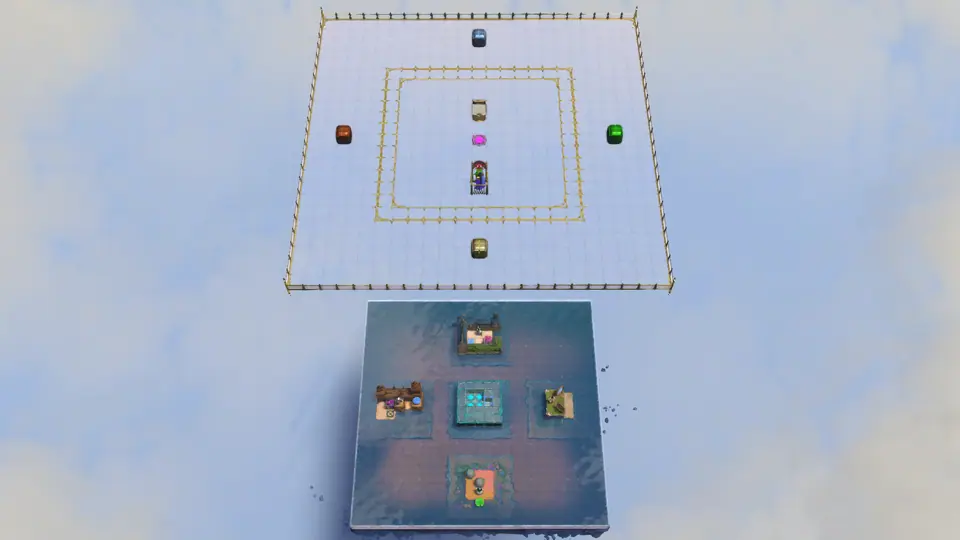 The Heroic Way puzzle 1No route
Clues
A complete move-by-move solution is not currently available for this puzzle.
No complete move sequence is listed yet. The board is available to inspect locally.
Exit Low
Choose a puzzle board
Local solution status
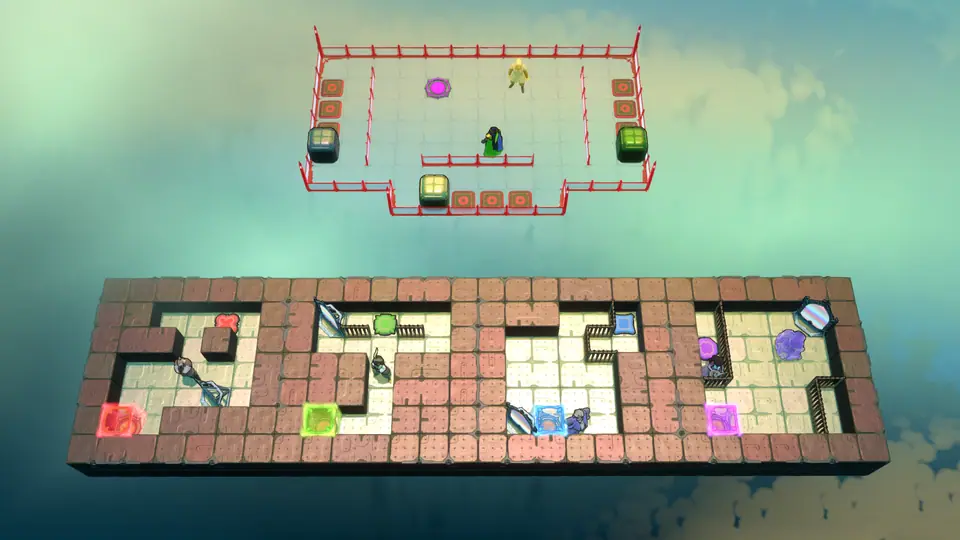 Exit Low puzzle 15Full route
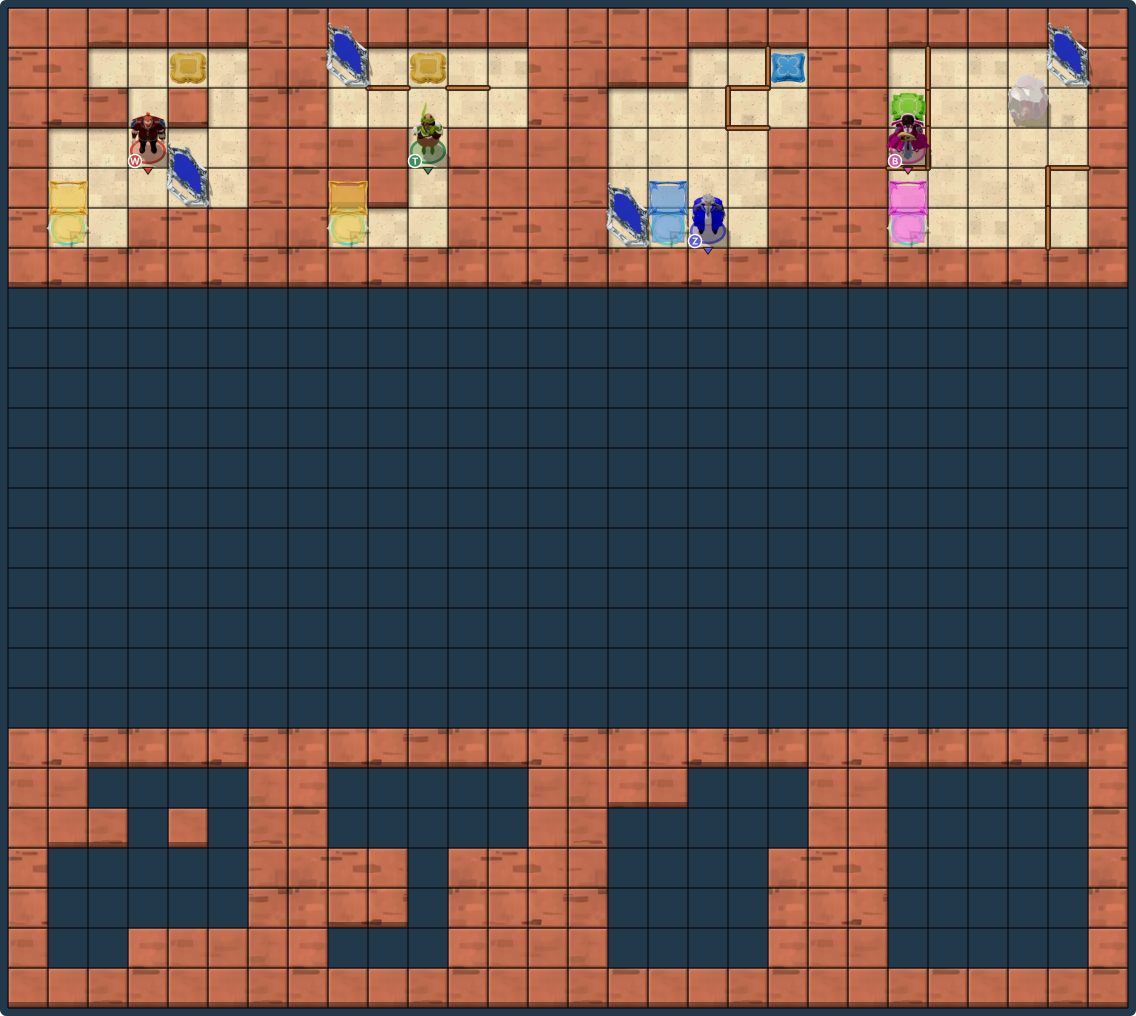
Clues
Use the move list below in order. The layout board shows the route as you step through it.
Full solution · 149 steps
Move sequence · 149 steps
Move order
- Queen
→×2 · ↓×2 · ←×3 · →×3 · ↑ · →×2 · ↑×2 · → · ↑ · ← · ↑×2 · ←×10 · ↓×3 · ↑×2 · → · ↑ · →×3 · ↓ - Warrior
→×2 · ↓ · ←×2 · ↑ · ←×2 · ↓ · activate · ↑ · ← · ↑ · → · ↓ · → · ↑×2 · activate · → · ↓×2 · ←×2 · ↓×2 - Thief
↑×2 · ← · →×3 · ↓ · ←×2 · ↑ · ← · activate · ←×2 · ↑ · activate · ↓×2 · ←×2 - Wizard
↑ · ←×2 · ↑ · ↓ · ↑ · →×2 · ↑ · ← · ↓ · →×3 · ↑ · ← · ↑×2 · → · ↓ · ← · ↑×2 · activate · → · ↑ · ←×2 · ↓×4 · ← - Bard
↑×2 · activate · ↑ · activate · → · ↓×3 · → · ↑×2 · activate · ←×2 · activate · ↓ · → · ↓ · activate · ↑×2 · ↓ · → · ↓×2 · ←×3
Ascend and Descend
For Ascend, the Crossroads High route reference describes four marked route puzzles and the upward purple beam after the first ending. The exact achievement-trigger tile is not confirmed in the available evidence, so treat this as a reported method rather than a verified trigger.
Descend remains unresolved in the available sources. No supported route or trigger is available to add here.
For progressive hints and broader puzzle mechanics, see the walkthrough and puzzle hints, Heroes, Mirrors, and Light guide, Dragon and Gem guide, and Skipping Stones guide.
Sources
- [1]Order of the Sinking Star achievements and puzzle requirements — WikiTactics
Current community index for the hidden achievement puzzle sets and solve thresholds, checked 2026-10-17.
- [2]Order of the Sinking Star walkthrough and puzzle map — WikiTactics
Links each named room and puzzle number to its current hint, solution and in-game verification record.
- [3]About this puzzle reference — WikiTactics
Describes the reference site’s stated level-data and solution-validation method; this is its own methodology description.
- [4]Order of the Sinking Star achievements — Steam
Official achievement names and visible descriptions; Steam hides conditions for some entries.
- [5]How to Ascend — Sinking Star Walkthrough
Community route reference for reaching Crossroads High after the first ending; exact achievement trigger tile is not confirmed.
Was this helpful?
Thanks for the feedback!